52. Render Texture
Learn how to change the drawing destination for shapes, textures, and fonts from the scene to a texture, and its applications.
52.1 Render Texture
52.1.1 Overview
- By default, shapes, textures, and fonts are drawn to the scene
- However, you can also set a texture prepared by the program that can be set as a drawing destination (render texture) as the drawing destination
- By reusing the render texture that has been drawn to in other drawings, you can achieve advanced and complex graphics expressions
- Drawing with
.draw()for shapes, textures, and fonts is executed at high speed on the GPU, unlike writing toImage(.paint()or.overwrite()) learned in Tutorial 63 - Since render states are also applied, drawing to render textures achieves the same effects as normal scene drawing
52.1.2 How to Use Render Textures
- Create a
RenderTextureand pass the render texture to the constructor of aScopedRenderTarget2Dobject. While theScopedRenderTarget2Dobject is valid, all 2D drawing destinations (render targets) become the specified render texture - This is called changing the render target
- After the render texture is released from the render target when the
ScopedRenderTarget2Dobject's scope ends, it can draw itself to the scene or another render target like a normal texture RenderTexturehas the same drawing functions and operation functions asTexture.draw(),.drawAt(),.scaled(), etc.
52.1.3 Creating and Clearing Render Textures
- Creating
RenderTextureis costly, so reuse pre-created ones instead of creating new ones every frame RenderTexturecan clear its contents to a specified color with.clear(color)- If not cleared, the previously drawn contents will remain
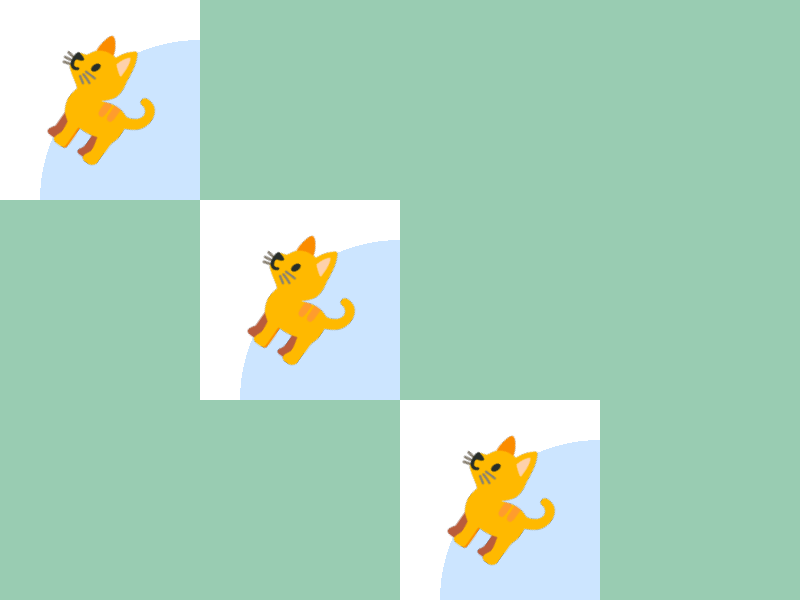
# include <Siv3D.hpp>

void Main()
{
	Scene::SetBackground(ColorF{ 0.6, 0.8, 0.7 });

	const Texture emoji{ U"🐈"_emoji };

	// Create a 200 x 200 render texture. Initial state is white
	const RenderTexture renderTexture{ Size{ 200, 200 }, Palette::White };

	while (System::Update())
	{
		// Clear the render texture to white
		renderTexture.clear(Palette::White);

		{
			// Change render target to renderTexture
			const ScopedRenderTarget2D target{ renderTexture };

			Circle{ 200, 200, 160 }.draw(ColorF{ 0.8, 0.9, 1.0 });

			emoji.rotated(Scene::Time() * 30_deg).drawAt(100, 100);
		} // target scope ends here and render target returns to scene

		// Draw the render texture
		renderTexture.draw(0, 0);
		renderTexture.draw(200, 200);
		renderTexture.draw(400, 400);
	}
}
- Since
RenderTexture's.clear()returns a reference to itself, you can combine clearing and setting toScopedRenderTarget2Din one line as follows:
# include <Siv3D.hpp>

void Main()
{
	Scene::SetBackground(ColorF{ 0.6, 0.8, 0.7 });

	const Texture emoji{ U"🐈"_emoji };

	// Create a 200 x 200 render texture. Initial state is white
	const RenderTexture renderTexture{ 200, 200, Palette::White };

	while (System::Update())
	{
		{
			// Clear renderTexture and change render target to renderTexture
			const ScopedRenderTarget2D target{ renderTexture.clear(Palette::White) };

			Circle{ 200, 200, 160 }.draw(ColorF{ 0.8, 0.9, 1.0 });

			emoji.rotated(Scene::Time() * 30_deg).drawAt(100, 100);
		}

		renderTexture.draw(0, 0);
		renderTexture.draw(200, 200);
		renderTexture.draw(400, 400);
	}
}
52.2 Usage Without Clearing
- When the content drawn to the render texture doesn't change, you can reduce drawing costs by not clearing
- The following sample code draws to the render texture in the first frame and then draws it every frame without clearing, reducing drawing and clearing costs
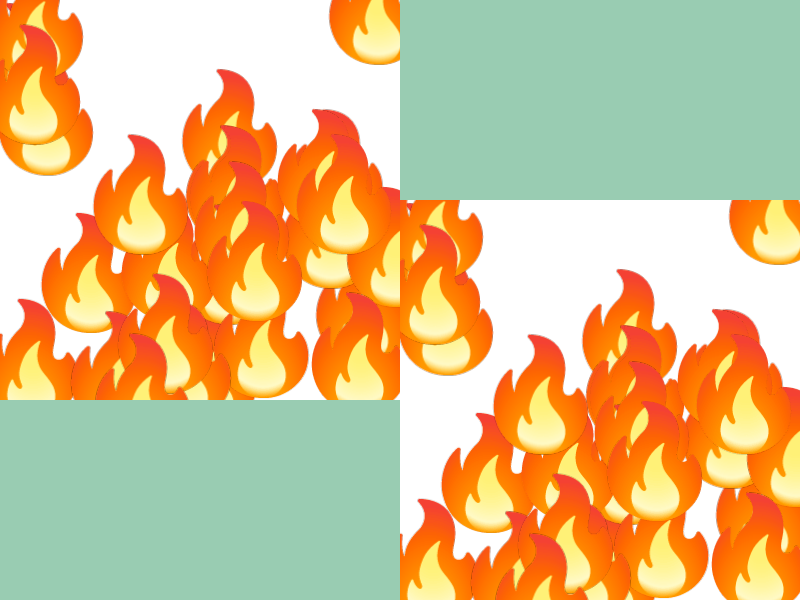
# include <Siv3D.hpp>

void Main()
{
	Scene::SetBackground(ColorF{ 0.6, 0.8, 0.7 });

	const Texture emoji{ U"🔥"_emoji };

	// Create a 200 x 200 render texture. Initial state is white
	const RenderTexture renderTexture{ Size{ 400, 400 }, Palette::White };
	{
		// Change render target to renderTexture
		const ScopedRenderTarget2D target{ renderTexture };

		for (int32 i = 0; i < 30; ++i)
		{
			emoji.drawAt(RandomVec2(Rect{ 0, 0, 400, 400 }));
		}
	}

	while (System::Update())
	{
		// Draw the render texture
		renderTexture.draw(0, 0);
		renderTexture.draw(400, 200);
	}
}
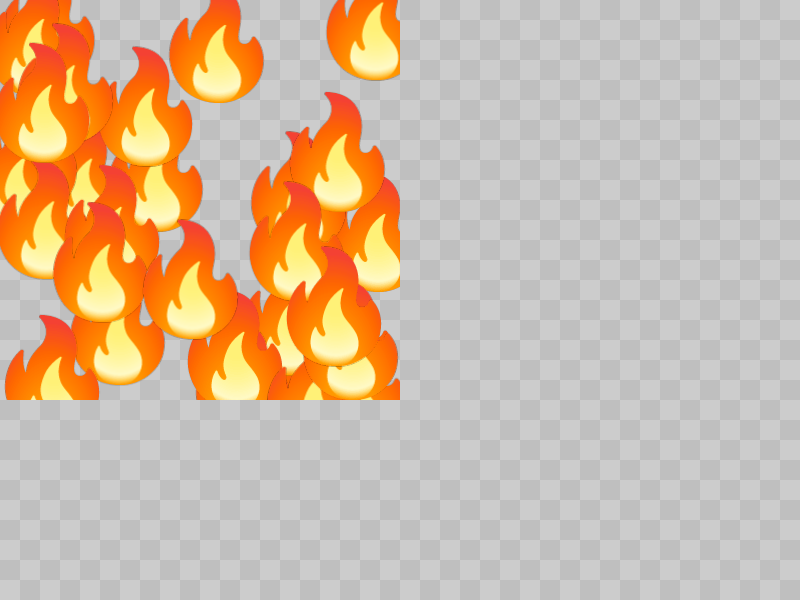
52.3 Writing to Transparent Render Textures
- When drawing to a render texture with an initial state of transparent color (alpha component is 0.0) using the default blend state, the RGB components of the render texture are updated while the alpha component is not updated
- This means the entire texture remains transparent, and nothing will be displayed when drawing such a render texture

# include <Siv3D.hpp>

void Main()
{
	Scene::SetBackground(ColorF{ 0.8 });

	const int32 cellSize = 20;

	const Texture emoji{ U"🔥"_emoji };

	// Create a 400 x 400 render texture. Initial state is ColorF{ 0.5, 0.0 }
	const RenderTexture renderTexture{ Size{ 400, 400 }, ColorF{ 0.5, 0.0 } };
	{
		// Change render target to renderTexture
		const ScopedRenderTarget2D target{ renderTexture };

		for (int32 i = 0; i < 30; ++i)
		{
			// This drawing does not update the render texture's alpha component
			emoji.drawAt(RandomVec2(Rect{ 0, 0, 400, 400 }));
		}
	}

	while (System::Update())
	{
		for (int32 y = 0; y < (600 / cellSize); ++y)
		{
			for (int32 x = 0; x < (800 / cellSize); ++x)
			{
				if (IsEven(y + x))
				{
					Rect{ (x * cellSize), (y * cellSize), cellSize }.draw(ColorF{ 0.75 });
				}
			}
		}

		// Draw the render texture
		renderTexture.draw(0, 0);
	}
}
- To solve this problem, change the blend state to "preserve the maximum alpha component drawn"
- The alpha component will now be updated when drawing to the render texture
# include <Siv3D.hpp>

// Create a blend state that preserves the maximum alpha component drawn
BlendState MakeBlendState()
{
	BlendState blendState = BlendState::Default2D;
	blendState.srcAlpha = Blend::SrcAlpha;
	blendState.dstAlpha = Blend::DestAlpha;
	blendState.opAlpha = BlendOp::Max;
	return blendState;
}

void Main()
{
	Scene::SetBackground(ColorF{ 0.8 });

	const int32 cellSize = 20;

	const Texture emoji{ U"🔥"_emoji };

	// Create a 400 x 400 render texture. Initial state is ColorF{ 0.5, 0.0 }
	const RenderTexture renderTexture{ Size{ 400, 400 }, ColorF{ 0.5, 0.0 } };
	{
		// Change render target to renderTexture
		const ScopedRenderTarget2D target{ renderTexture };

		// Blend state that preserves the maximum alpha component drawn
		const ScopedRenderStates2D blend{ MakeBlendState() };

		for (int32 i = 0; i < 30; ++i)
		{
			// This drawing updates the render texture's alpha component
			emoji.drawAt(RandomVec2(Rect{ 0, 0, 400, 400 }));
		}
	}

	while (System::Update())
	{
		for (int32 y = 0; y < (600 / cellSize); ++y)
		{
			for (int32 x = 0; x < (800 / cellSize); ++x)
			{
				if (IsEven(y + x))
				{
					Rect{ (x * cellSize), (y * cellSize), cellSize }.draw(ColorF{ 0.75 });
				}
			}
		}

		// Draw the render texture
		renderTexture.draw(0, 0);
	}
}
52.4 Multisample Render Textures
- Multisample anti-aliasing is not applied when drawing to
RenderTexture- Jaggies will occur when drawing shapes that include diagonal lines
- Use
MSRenderTextureif you want to apply multisample anti-aliasing
| Drawing Target | Multisample Anti-aliasing |
|---|---|
| Normal scene | Enabled |
RenderTexture |
Disabled |
MSRenderTexture |
Enabled |
- The method for setting
MSRenderTextureas a render target is the same asRenderTexture -
When using the drawing results of
MSRenderTexture, the following two steps are required:- ① Call
Graphics2D::Flush()to execute (flush) all 2D drawing processes up to that point and complete drawing to theMSRenderTexture's multisample texture - ② Use
MSRenderTexture's.resolve()to convert (resolve) the multisample texture insideMSRenderTextureto a normal texture that can be used for drawing
- ① Call
-
The reason these steps are necessary:
- In Siv3D,
.draw()is a "reservation" and.resolve()is "immediate execution" - Without
Graphics2D::Flush(), resolve would be executed with nothing drawn to the multisample texture
- In Siv3D,
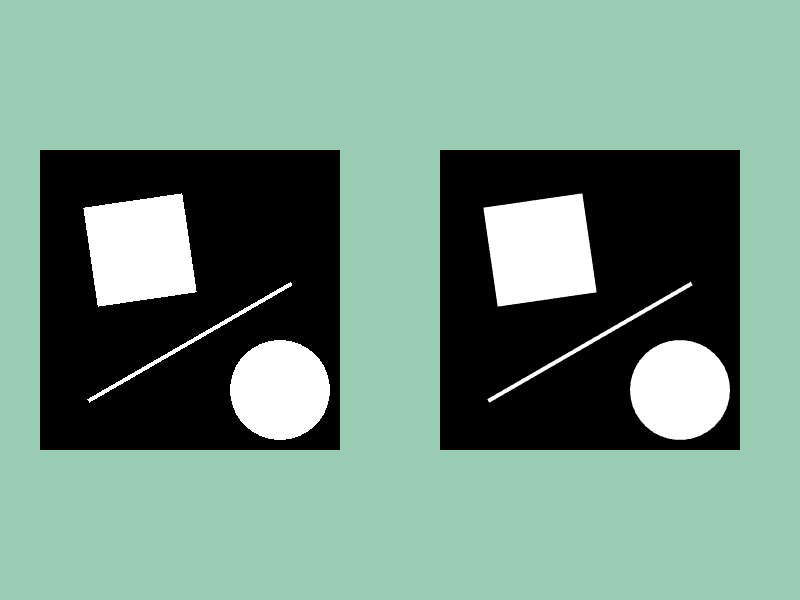
Comparison of render texture and multisample render texture
# include <Siv3D.hpp>

void Draw()
{
	Rect{ Arg::center(100, 100), 100 }.rotated(Scene::Time() * 30_deg).draw();
	Circle{ 240, 240, 50 }.draw();
	Line{ 50, 250, 250, (130 + Periodic::Sine0_1(3s) * 20) }.draw(4);
}

void Main()
{
	Scene::SetBackground(ColorF{ 0.6, 0.8, 0.7 });

	// Render texture
	const RenderTexture renderTexture{ 300, 300, Palette::White };

	// Multisample render texture
	const MSRenderTexture msRenderTexture{ 300, 300, Palette::White };

	while (System::Update())
	{
		// Render texture
		{
			const ScopedRenderTarget2D target{ renderTexture.clear(Palette::Black) };
			Draw();
		}

		renderTexture.draw(40, 150);

		// Multisample render texture
		{
			const ScopedRenderTarget2D target{ msRenderTexture.clear(Palette::Black) };
			Draw();
		}

		// Flush 2D drawing
		Graphics2D::Flush();

		// Resolve the multisample texture
		msRenderTexture.resolve();

		msRenderTexture.draw(440, 150);
	}
}
52.5 Special Operations on Render Textures
- The following image processing features using
RenderTextureare provided - All are processed at high speed using GPU
52.5.1 Downsample
- Scale and copy texture contents to another render texture
- Arguments:
from: Input textureto: Output texture
- Scale the contents of
fromtexture and draw toto - Both
fromandtomust be valid textures and different from each other - Detailed usage is explained in 52.6
52.5.2 Gaussian Blur
- Apply Gaussian blur to texture
void Shader::GaussianBlur(const TextureRegion& from, const RenderTexture& internalBuffer, const RenderTexture& to);
- Arguments:
from: Input textureinternalBuffer: Intermediate textureto: Output texture
- Apply vertical and horizontal Gaussian blur to
fromtexture and draw toto from,internalBuffer, andtomust all be valid textures with the same region sizefromandtocan be the same texture- Detailed usage is explained in 52.7
52.5.3 Copy
- Copy texture contents to another render texture
- Arguments:
from: Input textureto: Output texture
- Draw the contents of
fromtexture toto - Both
fromandtomust be valid textures, different from each other, and have the same region size - This function has limited uses. For example, you can use
Shader::Copy()to extract only a part of a large texture and discard the large render texture to save memory consumption
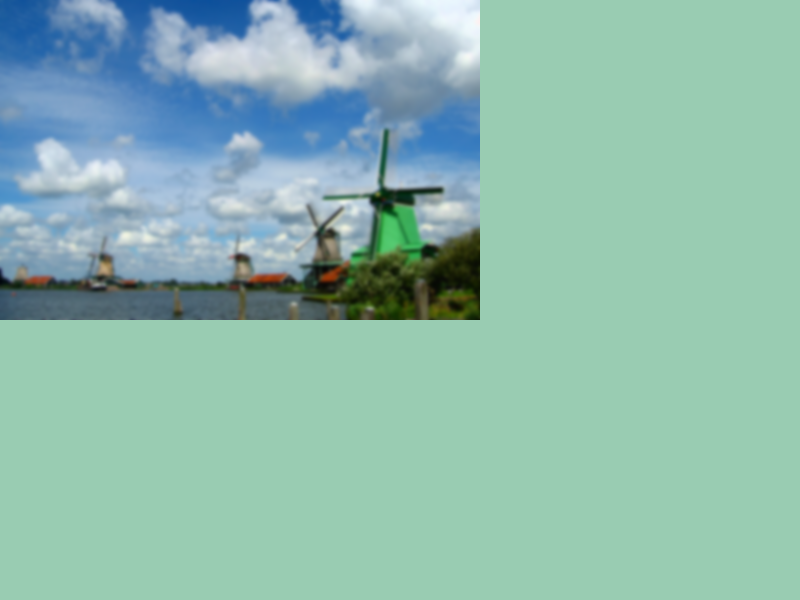
52.6 Downsample
- Scale and copy texture contents to another render texture
- Usually used to dynamically create low-resolution versions of textures
- An example of dynamic downsampling appears in 52.9

# include <Siv3D.hpp>

void Main()
{
	Scene::SetBackground(ColorF{ 0.6, 0.8, 0.7 });

	const Texture texture{ U"example/windmill.png" };

	// Render texture with 1/4 vertical and horizontal size
	const RenderTexture renderTexture{ texture.size() / 4 };

	// Execute downsample
	Shader::Downsample(texture, renderTexture);

	while (System::Update())
	{
		renderTexture.draw();
	}
}
(Alternative method) CPU processing
- Downsampling using
Imageis also possible - It produces high-quality results but takes longer than downsampling with
RenderTexturebecause it's processed on CPU, making it unsuitable for real-time processing like every-frame execution
52.7 Gaussian Blur
- Get the result of applying vertical and horizontal Gaussian blur to a texture
- The effect obtained from a single Gaussian blur process is not very large
- To get a large blur effect, combine with downsampling (52.8)
# include <Siv3D.hpp>

void Main()
{
	Scene::SetBackground(ColorF{ 0.6, 0.8, 0.7 });

	const Texture texture{ U"example/windmill.png" };
	const RenderTexture internalTexture{ texture.size() };
	const RenderTexture renderTexture{ texture.size() };

	Shader::GaussianBlur(texture, internalTexture, renderTexture);

	while (System::Update())
	{
		renderTexture.draw();
	}
}
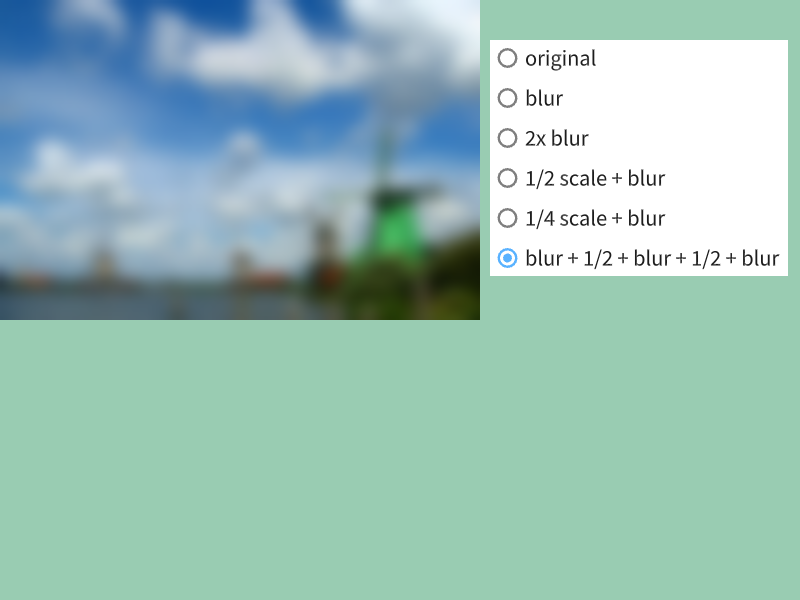
52.8 Strong Gaussian Blur
- Rather than applying Gaussian blur repeatedly, applying Gaussian blur to a downsampled texture and then drawing it scaled to the original size achieves a large blur effect at lower cost
- Also, applying Gaussian blur before downsampling increases cost but improves blur quality
# include <Siv3D.hpp>

void Main()
{
	Scene::SetBackground(ColorF{ 0.6, 0.8, 0.7 });

	// (0) Original
	const Texture original{ U"example/windmill.png" };

	// (1) Gaussian blur 1x
	const RenderTexture blur1{ original.size() };
	const RenderTexture internalTexture{ original.size() };
	Shader::GaussianBlur(original, internalTexture, blur1);

	// (2) Gaussian blur 2x
	const RenderTexture blur2{ original.size() };
	Shader::GaussianBlur(blur1, internalTexture, blur2);

	// (3) 1/2 downsample + Gaussian blur 1x
	const RenderTexture downsample2{ original.size() / 2 };
	const RenderTexture internalTexture2{ original.size() / 2 };
	Shader::Downsample(original, downsample2);
	Shader::GaussianBlur(downsample2, internalTexture2, downsample2);

	// (4) 1/4 downsample + Gaussian blur 1x
	const RenderTexture downsample4{ original.size() / 4 };
	const RenderTexture internalTexture4{ original.size() / 4 };
	Shader::Downsample(original, downsample4);
	Shader::GaussianBlur(downsample4, internalTexture4, downsample4);

	// (5) Gaussian blur + 1/2 downsample + Gaussian blur + 1/2 downsample + Gaussian blur
	const RenderTexture downsampleB2{ original.size() / 2 };
	const RenderTexture downsampleB4{ original.size() / 4 };
	Shader::Downsample(blur1, downsampleB2);
	Shader::GaussianBlur(downsampleB2, internalTexture2, downsampleB2);
	Shader::Downsample(downsampleB2, downsampleB4);
	Shader::GaussianBlur(downsampleB4, internalTexture4, downsampleB4);

	size_t index = 0;

	while (System::Update())
	{
		if (index == 0)
		{
			original.draw();
		}
		else if (index == 1)
		{
			blur1.draw();
		}
		else if (index == 2)
		{
			blur2.draw();
		}
		else if (index == 3)
		{
			downsample2.scaled(2.0).draw();
		}
		else if (index == 4)
		{
			downsample4.scaled(4.0).draw();
		}
		else if (index == 5)
		{
			downsampleB4.scaled(4.0).draw();
		}

		SimpleGUI::RadioButtons(index, { U"original", U"blur", U"2x blur", U"1/2 scale + blur", U"1/4 scale + blur", U"blur + 1/2 + blur + 1/2 + blur" }, Vec2{ 490, 40 });
	}
}
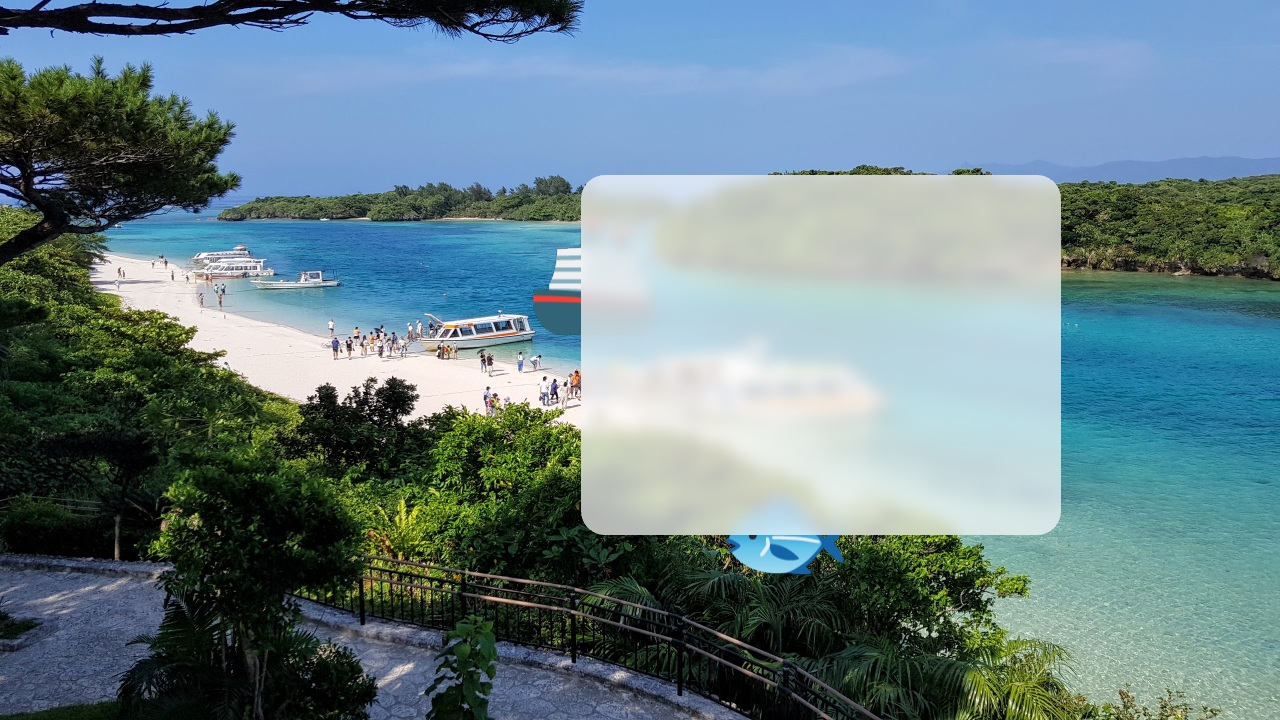
52.9 Specified Region Gaussian Blur
- By preparing a render texture with the entire scene blurred and cutting out and drawing part of it, you can achieve the effect of a blurred background showing through
- The following sample code blurs the entire scene, but when the blur region and size are fixed, you can process at lower cost by applying blur only to the minimal region
# include <Siv3D.hpp>

// Function to calculate UV of a partial region of the entire scene texture
RectF CalculateUVRect(const Size& scenceSize, const RectF& region)
{
	return{ (region.pos / scenceSize), (region.size / scenceSize) };
}

void Main()
{
	// Scene size
	const Size sceneSize{ 1280, 720 };

	// Resize window
	Window::Resize(sceneSize);

	// bay.jpg is 2560 x 1440 so load at smaller size
	const Texture texture{ Image{ U"example/bay.jpg" }.scale(1280, 720) };
	const Texture emoji1{ U"🚢"_emoji };
	const Texture emoji2{ U"🐟"_emoji };

	// Main drawing render texture
	const MSRenderTexture msRenderTexture{ sceneSize };

	// Gaussian blur textures
	const RenderTexture internalTexture{ sceneSize };
	const RenderTexture blur1{ sceneSize };
	const RenderTexture blur4{ sceneSize / 4 };
	const RenderTexture internalTexture4{ sceneSize / 4 };

	while (System::Update())
	{
		// Draw texture and emoji to render texture
		{
			const ScopedRenderTarget2D target{ msRenderTexture.clear(ColorF{ 0.6, 0.8, 0.7 })};
			texture.draw();
			emoji1.drawAt(Vec2{ (640 + Periodic::Sine1_1(4s) * 300.0), (200.0 + Periodic::Sine1_1(3s) * 100.0) });
			emoji2.drawAt(Vec2{ (640 + Periodic::Sine1_1(5s) * 300.0), (500.0 + Periodic::Sine1_1(2s) * 100.0) });
		}

		// Resolve render texture
		{
			// Flush 2D drawing
			Graphics2D::Flush();

			// Resolve multisample texture
			msRenderTexture.resolve();
		}

		// Prepare blur texture
		{
			Shader::GaussianBlur(msRenderTexture, internalTexture, blur1);
			Shader::Downsample(blur1, blur4);
			Shader::GaussianBlur(blur4, internalTexture4, blur4);
		}

		// Draw render texture to scene
		msRenderTexture.draw();

		// Mini window drawing area
		const RoundRect miniWindow{ Arg::center = Cursor::Pos(), 480, 360 , 24 };

		// Paste and draw specified region of blur texture to mini window
		miniWindow(blur4.uv(CalculateUVRect(sceneSize, miniWindow.rect))).draw();

		// Draw mini window
		miniWindow.draw(ColorF{ 1.0, 0.7 });
	}
}
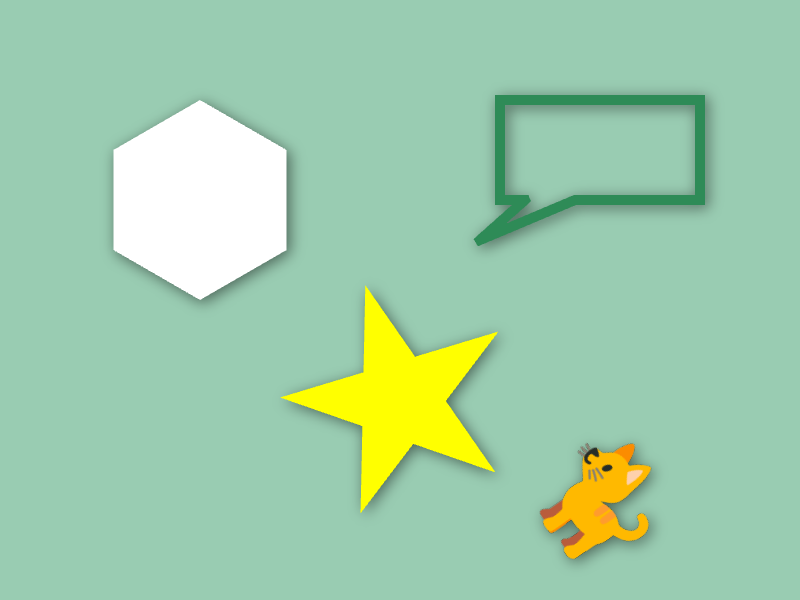
52.10 Arbitrary Shape Shadows
- By preparing a shadow texture and drawing a blurred version of it as a shadow, you can achieve arbitrary shape shadows
- By clearing the render texture with
ColorF{ 1.0, 0.0 }and then applying blend stateBlendState::MaxAlphafor drawing, RGB values are ignored and only the maximum alpha value drawn is recorded - This is convenient when you want to draw only shapes for shadows since you can ignore the RGB components of textures
- The following sample code visualizes only the blurred shadow texture
blur4while the left mouse button is being clicked
# include <Siv3D.hpp>

void Draw(double angle, const Texture& emoji)
{
	Shape2D::Hexagon(100, Vec2{ 200, 200 }).draw();
	Shape2D::Star(120, Vec2{ 400, 400 }, angle).draw(Palette::Yellow);
	Shape2D::RectBalloon(Rect{ 500, 100, 200, 100 }, Vec2{ 480, 240 })
		.drawFrame(10, Palette::Seagreen);
	emoji.rotated(angle).drawAt(600, 500);
}

void Main()
{
	Scene::SetBackground(ColorF{ 0.6, 0.8, 0.7 });
	const Texture emoji{ U"🐈"_emoji };

	// Shadow render texture
	const RenderTexture shadowTexture{ Scene::Size(), ColorF{ 1.0, 0.0 } };
	const RenderTexture blur4{ shadowTexture.size() / 4 };
	const RenderTexture internal4{ shadowTexture.size() / 4 };

	while (System::Update())
	{
		const double angle = (Scene::Time() * 10_deg);

		// Draw shadow shapes
		{
			const ScopedRenderTarget2D target{ shadowTexture.clear(ColorF{ 1.0, 0.0 }) };

			// Apply blend state that ignores RGB values and preserves maximum alpha value drawn
			const ScopedRenderStates2D blend{ BlendState::MaxAlpha };

			// Shift drawing position to cast shadow in bottom-right direction
			const Transformer2D transform{ Mat3x2::Translate(3, 3) };

			Draw(angle, emoji);
		}

		// Downsample shadowTexture + Gaussian blur
		{
			Shader::Downsample(shadowTexture, blur4);
			Shader::GaussianBlur(blur4, internal4, blur4);
		}

		// Draw blurred shadow
		blur4.resized(Scene::Size()).draw(ColorF{ 0.0, 0.5 });

		// Draw normal shapes
		if (not MouseL.pressed())
		{
			Draw(angle, emoji);
		}
	}
}
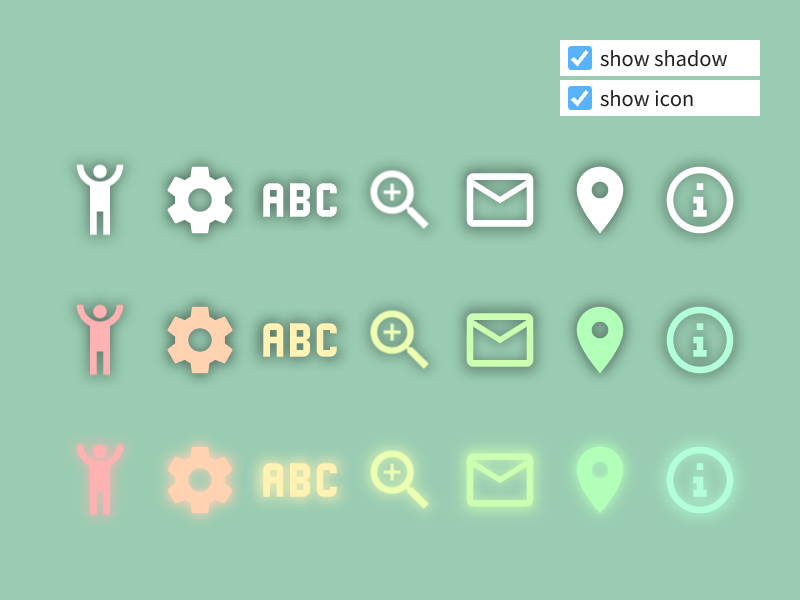
52.11 Icon Shadows
- Apply 52.10 to create an icon texture class with shadows
# include <Siv3D.hpp>

class IconWithShadow
{
public:

	IconWithShadow() = default;

	explicit IconWithShadow(const Texture& texture)
		: m_texture{ texture }
		, m_shadowTexture{ m_texture.size()/2, ColorF{ 1.0, 0.0 } }
	{
		RenderTexture m_internalTexture{ m_texture.size() / 2 };

		// Prepare shadow texture
		{
			const ScopedRenderTarget2D target{ m_shadowTexture };

			// Apply blend state that ignores RGB values and preserves maximum alpha value drawn
			const ScopedRenderStates2D blend{ BlendState::MaxAlpha };

			// Draw scaled down to prevent blur overflow
			m_texture.scaled(0.3).drawAt(m_shadowTexture.size() * 0.5);
		}

		// Apply Gaussian blur
		Shader::GaussianBlur(m_shadowTexture, m_internalTexture, m_shadowTexture);
	}

	// Draw icon
	void drawIconAt(const Vec2& center, const ColorF& color = ColorF{ 1.0 }) const
	{
		m_texture.drawAt(center, color);
	}

	// Draw shadow
	void drawShadowAt(const Vec2& center, const ColorF& shadowColor = ColorF{ 0.0, 0.5 }) const
	{
		// Draw slightly larger than scaled down size
		m_shadowTexture.scaled(3.6).drawAt(center, shadowColor);
	}

	// Draw shadow and icon
	void drawWithShadowAt(const Vec2& center, const ColorF& color = ColorF{ 1.0 }, const ColorF& shadowColor = ColorF{ 0.0, 0.5 }) const
	{
		drawShadowAt(center, shadowColor);
		drawIconAt(center, color);
	}

private:

	Texture m_texture;

	RenderTexture m_shadowTexture;
};


void Main()
{
	Scene::SetBackground(ColorF{ 0.6, 0.8, 0.7 });

	const Array<IconWithShadow> icons =
	{
		IconWithShadow{ Texture{ 0xF064C_icon, 80 } },
		IconWithShadow{ Texture{ 0xF0493_icon, 80 } },
		IconWithShadow{ Texture{ 0xF100D_icon, 80 } },
		IconWithShadow{ Texture{ 0xF06ED_icon, 80 } },
		IconWithShadow{ Texture{ 0xF01F0_icon, 80 } },
		IconWithShadow{ Texture{ 0xF034E_icon, 80 } },
		IconWithShadow{ Texture{ 0xF1C6A_icon, 80 } },
	};

	bool showShadow = true;
	bool showIcon = true;

	while (System::Update())
	{
		if (showShadow)
		{
			for (size_t i = 0; i < icons.size(); ++i)
			{
				icons[i].drawShadowAt(Vec2{ (100 + i * 100), 200 });
			}

			for (size_t i = 0; i < icons.size(); ++i)
			{
				icons[i].drawShadowAt(Vec2{ (100 + i * 100), 340 });
			}

			for (size_t i = 0; i < icons.size(); ++i)
			{
				icons[i].drawShadowAt(Vec2{ (100 + i * 100), 480 }, HSV{ (i * 25.0), 0.3, 1.0 });
			}
		}

		if (showIcon)
		{
			for (size_t i = 0; i < icons.size(); ++i)
			{
				icons[i].drawIconAt(Vec2{ (100 + i * 100), 200 });
			}

			for (size_t i = 0; i < icons.size(); ++i)
			{
				icons[i].drawIconAt(Vec2{ (100 + i * 100), 340 }, HSV{ (i * 25.0), 0.3, 1.0 });
			}

			for (size_t i = 0; i < icons.size(); ++i)
			{
				icons[i].drawIconAt(Vec2{ (100 + i * 100), 480 }, HSV{ (i * 25.0), 0.3, 1.0 });
			}
		}

		SimpleGUI::CheckBox(showShadow, U"show shadow", Vec2{ 560, 40 }, 200);
		SimpleGUI::CheckBox(showIcon, U"show icon", Vec2{ 560, 80 }, 200);
	}
}
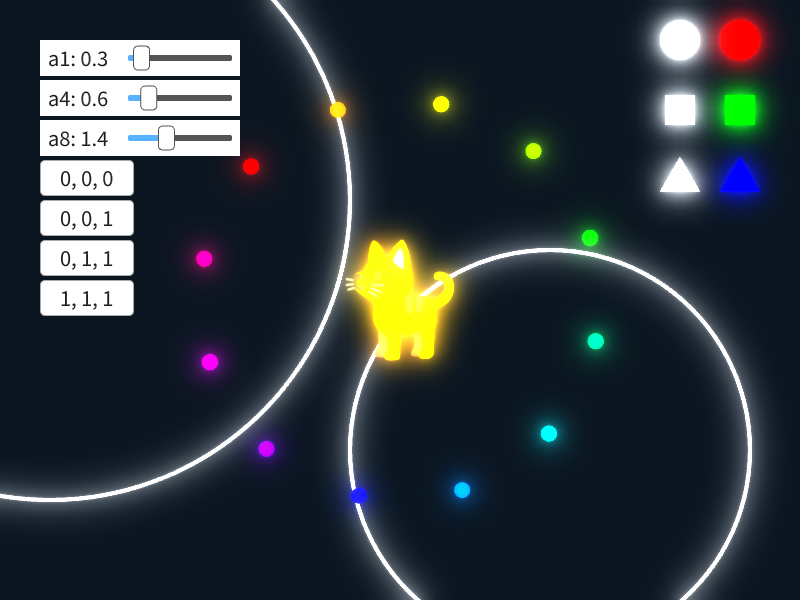
52.12 Light Bloom
- By drawing Gaussian blur results with additive blending, you can achieve light bloom expression
# include <Siv3D.hpp>

void DrawScene(const Texture& emoji)
{
	Circle{ 680, 40, 20 }.draw();
	Rect{ Arg::center(680, 110), 30 }.draw();
	Triangle{ 680, 180, 40 }.draw();

	Circle{ 740, 40, 20 }.draw(HSV{ 0 });
	Rect{ Arg::center(740, 110), 30 }.draw(HSV{ 120 });
	Triangle{ 740, 180, 40 }.draw(HSV{ 240 });

	Circle{ 50, 200, 300 }.drawFrame(4);
	Circle{ 550, 450, 200 }.drawFrame(4);

	for (int32 i = 0; i < 12; ++i)
	{
		const double angle = (i * 30_deg + Scene::Time() * 5_deg);
		const Vec2 pos = OffsetCircular{ Vec2{ 400, 300 }, 200, angle };
		Circle{ pos, 8 }.draw(HSV{ i * 30 });
	}

	emoji.drawAt(400, 300);
}

void Main()
{
	const Size sceneSize{ 800, 600 };
	const Texture emoji{ U"🐈"_emoji };

	// Bloom textures
	const RenderTexture blur1{ sceneSize };
	const RenderTexture internal1{ sceneSize };
	const RenderTexture blur4{ sceneSize / 4 };
	const RenderTexture internal4{ sceneSize / 4 };
	const RenderTexture blur8{ sceneSize / 8 };
	const RenderTexture internal8{ sceneSize / 8 };

	// Contribution levels of 3 types of blur textures
	double a1 = 0.0, a4 = 0.0, a8 = 0.0;

	while (System::Update())
	{
		// Normal scene drawing
		{
			DrawScene(emoji);
		}

		// Prepare bloom textures
		{
			// Draw scene
			{
				// Set bloom texture as render target
				const ScopedRenderTarget2D target{ blur1.clear(ColorF{ 0.0 }) };

				// Draw scene
				DrawScene(emoji);
			} // blur1 render target is released

			// (1) blur1: 1x blur
			Shader::GaussianBlur(blur1, internal1, blur1);

			// (2) blur4: 1x blur + 1/4 scale + 1x blur
			Shader::Downsample(blur1, blur4);
			Shader::GaussianBlur(blur4, internal4, blur4);

			// (3) blur8: 1x blur + 1/4 scale + 1x blur + 1/2 scale + 1x blur
			Shader::Downsample(blur4, blur8);
			Shader::GaussianBlur(blur8, internal8, blur8);
		}

		{
			const ScopedRenderStates2D blend{ BlendState::Additive };

			if (a1)
			{
				blur1.resized(sceneSize).draw(ColorF{ a1 });
			}

			if (a4)
			{
				blur4.resized(sceneSize).draw(ColorF{ a4 });
			}

			if (a8)
			{
				blur8.resized(sceneSize).draw(ColorF{ a8 });
			}
		}

		SimpleGUI::Slider(U"a1: {:.1f}"_fmt(a1), a1, 0.0, 4.0, Vec2{ 40, 40 });
		SimpleGUI::Slider(U"a4: {:.1f}"_fmt(a4), a4, 0.0, 4.0, Vec2{ 40, 80 });
		SimpleGUI::Slider(U"a8: {:.1f}"_fmt(a8), a8, 0.0, 4.0, Vec2{ 40, 120 });

		if (SimpleGUI::Button(U"0, 0, 0", Vec2{ 40, 160 }))
		{
			a1 = a4 = a8 = 0.0;
		}

		if (SimpleGUI::Button(U"0, 0, 1", Vec2{ 40, 200 }))
		{
			a1 = a4 = 0.0;
			a8 = 1.0;
		}

		if (SimpleGUI::Button(U"0, 1, 1", Vec2{ 40, 240 }))
		{
			a1 = 0.0;
			a8 = a4 = 1.0;
		}

		if (SimpleGUI::Button(U"1, 1, 1", Vec2{ 40, 280 }))
		{
			a1 = a4 = a8 = 1.0;
		}
	}
}
52.13 Getting Contents
- You can get the image data of a render texture as
Image(Tutorial 63) using.readAsImage()Imagecan be processed in C++ code, access individual pixels, or save to files
- The operation of getting
Imagefrom a render texture is very costly, so you should avoid executing it every frame - Getting render texture contents as
Imageis a last resort. Consider whether you can achieve your goal while keeping it as a render texture - The following sample code saves the contents drawn to a render texture to an image file:
# include <Siv3D.hpp>

void Main()
{
	const Texture emoji{ U"🔥"_emoji };

	const RenderTexture renderTexture{ Size{ 400, 400 }, Palette::White };
	{
		const ScopedRenderTarget2D target{ renderTexture };

		for (int32 i = 0; i < 30; ++i)
		{
			emoji.drawAt(RandomVec2(Rect{ 0, 0, 400, 400 }));
		}
	}

	{
		// Execute (flush) all 2D drawing processes and complete drawing to render texture
		Graphics2D::Flush();

		// Get render texture contents as image
		Image image;
		renderTexture.readAsImage(image);

		// Save image
		image.save(U"fire.png");
	}

	while (System::Update())
	{

	}
}