31. テクスチャを描く
絵文字やアイコン、画像ファイルからテクスチャを作成し描画する方法を学びます。
31.1 テクスチャの作成と描画
テクスチャの作成
- 画面に描画する画像はテクスチャクラス
Textureで管理します - テクスチャの作成にはいくつかの方法があります
- 31.2 絵文字から作成
- 31.3 アイコンから作成
- 31.4 画像ファイルから作成
- 31.5 画像データから作成
- テクスチャの作成にはコストがかかるため、通常はメインループの前で行います
- メインループ内で作成する場合には、毎フレーム作成されないよう制御が必要です
テクスチャの描画
- テクスチャを描画するには
Textureのメンバ関数を使います- 31.9 左上座標を指定した描画
.draw() - 31.10 中心座標を指定した描画
.drawAt() - 31.11 それ以外の座標を指定した描画
.draw(Arg::...)
- 31.9 左上座標を指定した描画
- 拡大縮小・回転・反転・部分切り出しなどの操作を適用したテクスチャを表現する、次のようなクラスが用意されています
TextureRegionTexturedQuadTexturedCircleTexturedRoundRect
- これらのクラスは
Textureのメンバ関数によって作成されますが、ほとんど意識することなくTextureと同様に使えます
// .scaled() は TextureRegion を返す
// .rotated() は TexturedQuad を返す
texture.scaled(2.0).rotated(30_deg).drawAt(400, 300);
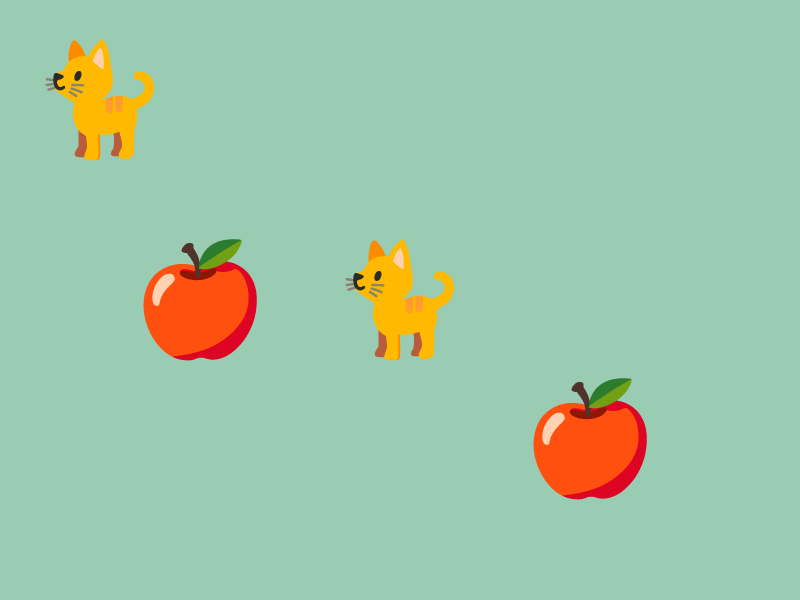
31.2 絵文字から作成
- Siv3D には Unicode 15.1 に準拠した 3,700 種類以上の絵文字が標準で同梱されています
Texture{ U"絵文字"_emoji }で、絵文字からテクスチャを作成します
- 絵文字一覧は Emojipedia: Google Noto Color Emoji で確認できます
- どのプラットフォーム(Windows, macOS, Linux, Web)でも同じデザインの絵文字を描画できます
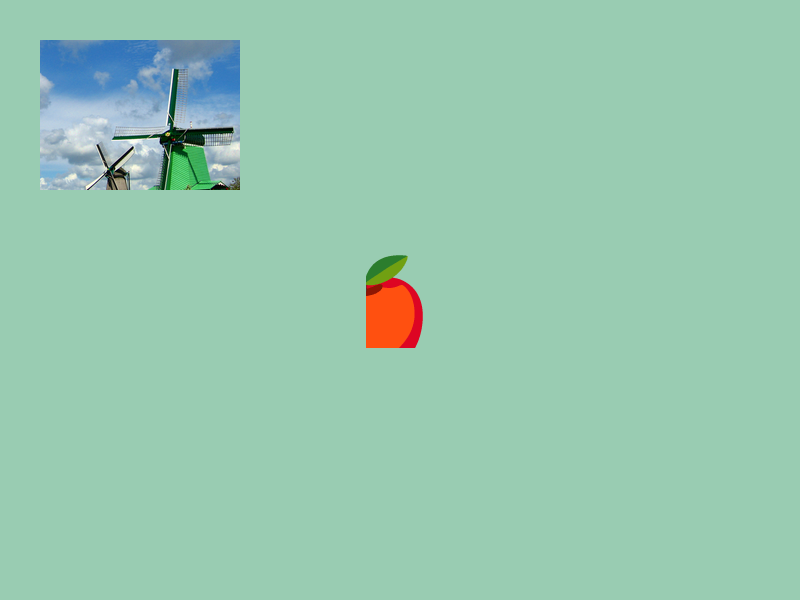
# include <Siv3D.hpp>

void Main()
{
	Scene::SetBackground(ColorF{ 0.6, 0.8, 0.7 });

	const Texture emoji1{ U"🐈"_emoji };
	const Texture emoji2{ U"🍎"_emoji };

	while (System::Update())
	{
		emoji1.drawAt(100, 100);
		emoji1.drawAt(400, 300);

		emoji2.drawAt(200, 300);
		emoji2.drawAt(Cursor::Pos());
	}
}
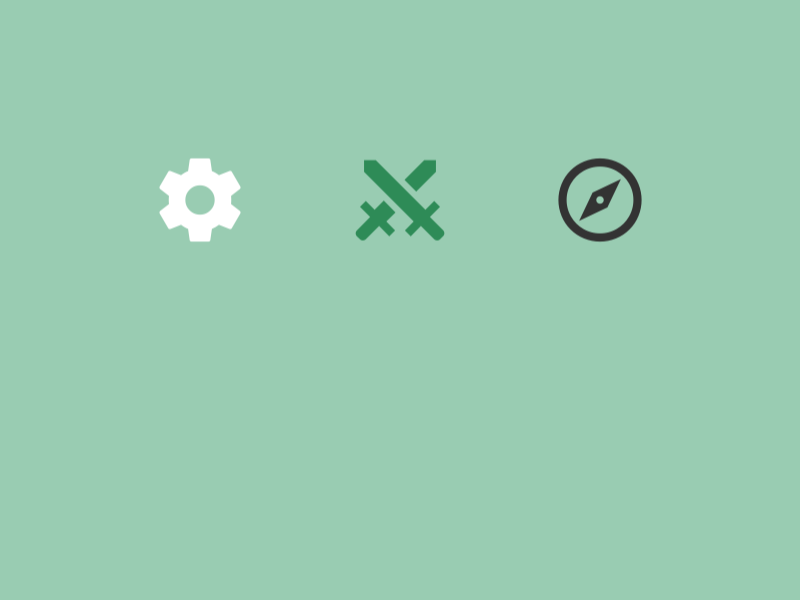
31.3 アイコンから作成
- Siv3D には 7,000 種類以上のアイコンが標準で同梱されています
Texture{ 0xアイコン番号_icon, サイズ }で、アイコンからテクスチャを作成します
- アイコン番号は Material Design Icons または Font Awesome の 16 進数コードです
- どのプラットフォーム(Windows, macOS, Linux, Web)でも同じデザインのアイコンを描画できます
- アイコンの色は白であるため、31.12 色の乗算により、描画時に色を変更できます
# include <Siv3D.hpp>

void Main()
{
	Scene::SetBackground(ColorF{ 0.6, 0.8, 0.7 });

	const Texture icon1{ 0xF0493_icon, 100 };
	const Texture icon2{ 0xF0787_icon, 100 };
	const Texture icon3{ 0xF018C_icon, 100 };

	while (System::Update())
	{
		icon1.drawAt(200, 200);
		icon2.drawAt(400, 200, Palette::Seagreen);
		icon3.drawAt(600, 200, ColorF{ 0.2 });
	}
}
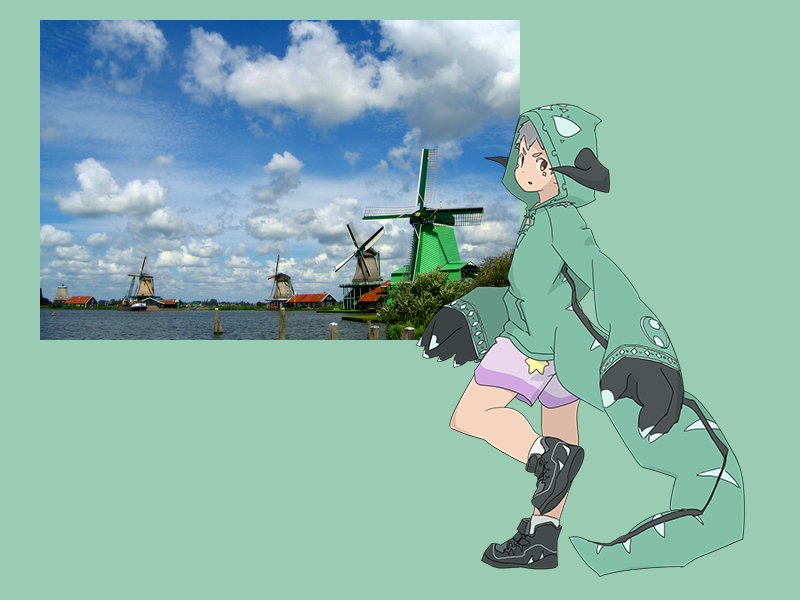
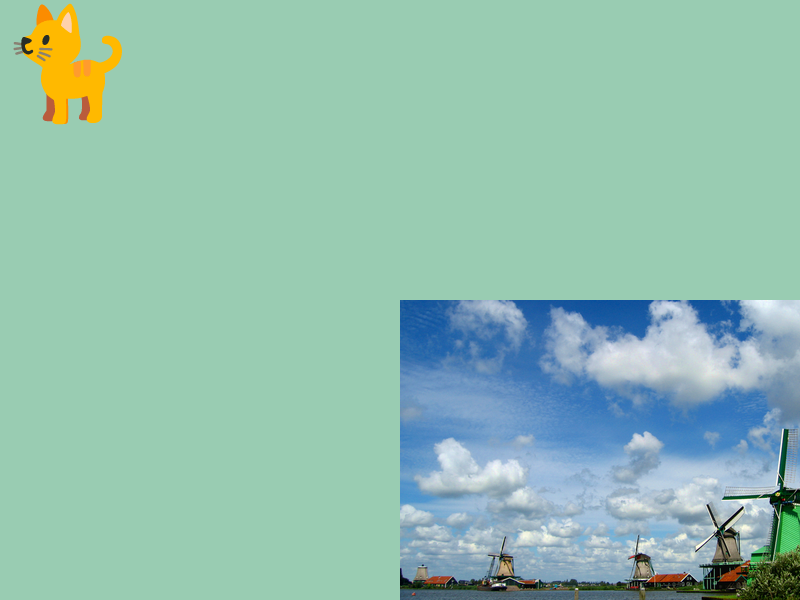
31.4 画像ファイルから作成
- 画像ファイルからテクスチャを作成するには、
Texture{ ファイルパス }を使います - ファイルパスは、実行ファイルがあるフォルダ(開発中は
Appフォルダ)を基準とする相対パスか、絶対パスを使用します- 例えば
U"example/windmill.png"は、実行ファイルがあるフォルダ(Appフォルダ)のexample/フォルダにあるwindmill.pngというファイルを指します
- 例えば
- Siv3D は次の 9 種類の画像フォーマットの読み込みをサポートします
| フォーマット | 拡張子 | 対応状況 |
|---|---|---|
| PNG | png | ✅ |
| JPEG | jpg / jpeg / jfif | ✅ |
| BMP | bmp | ✅ |
| SVG | svg | ✅ |
| GIF | gif | ✅ |
| TGA | tga | ✅ |
| PPM | ppm / pgm / pbm / pnm | ✅ |
| WebP | webp | ✅ |
| TIFF | tif / tiff | ✅ |
| DDS | dds | (将来のバージョン) |
| WBMP | wbmp | (将来のバージョン) |
| JPEG XL | jxl | (将来のバージョン) |
# include <Siv3D.hpp>

void Main()
{
	Scene::SetBackground(ColorF{ 0.6, 0.8, 0.7 });

	// 風車の画像
	const Texture texture1{ U"example/windmill.png" };

	// Siv3D くん(Siv3D の公式マスコットキャラクター)の画像
	const Texture texture2{ U"example/siv3d-kun.png" };

	while (System::Update())
	{
		texture1.draw(40, 20);

		texture2.draw(400, 100);
	}
}
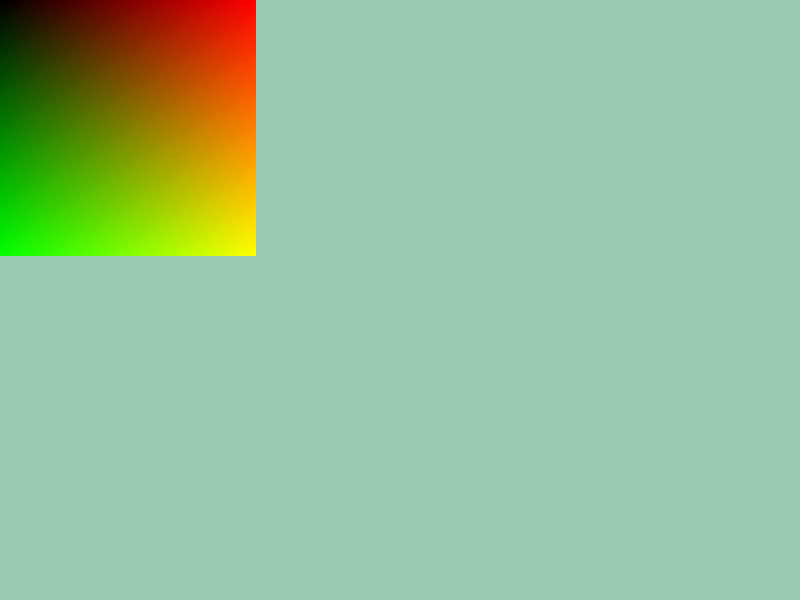
31.5 画像データから作成
- プログラムで生成・加工した画像データ(
Imageクラス)からテクスチャを作成できますImageクラスについては チュートリアル 63 を参照してください
Texture{ 画像データ }で、画像データからテクスチャを作成します
# include <Siv3D.hpp>

Image MakeImage()
{
	Image image{ 256, 256 };

	for (int32 y = 0; y < image.height(); ++y)
	{
		for (int32 x = 0; x < image.width(); ++x)
		{
			image[y][x] = ColorF{ (x / 255.0), (y / 255.0), 0.0 };
		}
	}

	return image;
}

void Main()
{
	Scene::SetBackground(ColorF{ 0.6, 0.8, 0.7 });

	const Texture texture{ MakeImage() };

	while (System::Update())
	{
		texture.draw();
	}
}
31.6 テクスチャのサイズ
- テクスチャの幅(ピクセル)は
.width()で取得できます。戻り値はint32型です - テクスチャの高さ(ピクセル)は
.height()で取得できます。戻り値はint32型です - 幅と高さを同時に取得するには
.size()を使います。戻り値はSize(Point) 型です
# include <Siv3D.hpp>

void Main()
{
	const Texture texture{ U"example/windmill.png" };
	const Texture emoji{ U"🐈"_emoji };

	Print << texture.width();
	Print << texture.height();
	Print << emoji.size();

	while (System::Update())
	{

	}
}
31.7 空のテクスチャ
Texture型のオブジェクトは、デフォルトでは空のテクスチャを持っています- 空のテクスチャは、16 × 16 ピクセルの黄色の画像で、有効なテクスチャと同じように扱うことができます
- 絵文字やアイコン、画像ファイルのロードに失敗した場合にも空のテクスチャになります
- 空のテクスチャであるかを調べるには、
if (texture.isEmpty()),if (texture),if (not texture)を使います

# include <Siv3D.hpp>

void Main()
{
	Scene::SetBackground(ColorF{ 0.6, 0.8, 0.7 });

	Texture texture1;

	Print << texture1.isEmpty();

	// テクスチャを代入する
	texture1 = Texture{ U"🐈"_emoji };

	// 存在しない画像ファイルを指定する
	const Texture texture2{ U"example/aaa.png" };

	if (not texture2)
	{
		Print << U"Failed to load a texture";
	}

	while (System::Update())
	{
		// 空のテクスチャを描画する(16x16 の黄色い画像)
		texture2.drawAt(400, 300);
	}
}
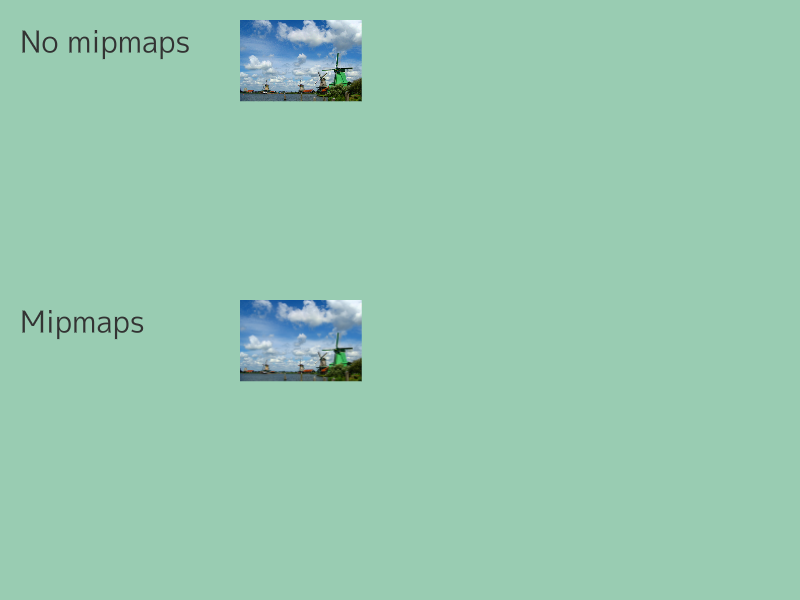
31.8 ミップマップの生成
- 1/2, 1/4, ... サイズの縮小版画像を事前に内部で生成しておくミップマップという技術があります
- ミップマップを使うと、そのテクスチャのビデオメモリ使用量が約 30 % 増加しますが、次のようなメリットがあります
- 縮小描画時のノイズやちらつきが少なくなる(画質の向上)
- 縮小描画時の処理負荷が低減する
- 一切縮小描画を行わない場合には、ミップマップを生成しないという選択肢もあります
- Siv3D ではミップマップは
Textureの内部で管理されています - 絵文字やアイコンからテクスチャを作成する際にはデフォルトでミップマップが生成されます
- 画像ファイルや
Imageからテクスチャを作成する場合には、コンストラクタで明示的にTextureDesc::Mippedの指定が必要です
| テクスチャの作成方法 | ミップマップの自動生成 |
|---|---|
| 絵文字から作成 | ✅ |
| アイコンから作成 | ✅ |
| 画像ファイルから作成 | TextureDesc::Mipped の指定が必要 |
Image から作成 |
TextureDesc::Mipped の指定が必要 |
- 次のサンプルでは、1 つ目のテクスチャはミップマップを生成せず、2 つ目のテクスチャはミップマップを生成して描画しています
- ミップマップを使用したほうが、縮小時のノイズが少ないことがわかります
# include <Siv3D.hpp>

void Main()
{
	Scene::SetBackground(ColorF{ 0.6, 0.8, 0.7 });
	const Font font{ FontMethod::MSDF, 48 };

	const Texture texture1{ U"example/windmill.png" };
	const Texture texture2{ U"example/windmill.png", TextureDesc::Mipped };

	while (System::Update())
	{
		const double scale = Periodic::Sine0_1(12s);

		font(U"No mipmaps").draw(30, Vec2{ 20, 20 }, ColorF{ 0.2 });
		font(U"Mipmaps").draw(30, Vec2{ 20, 300 }, ColorF{ 0.2 });

		texture1.scaled(scale).draw(240, 20);
		texture2.scaled(scale).draw(240, 300);
	}
}
31.9 左上座標を指定した描画
- 左上の座標を指定してテクスチャを描画するには、
.draw()を使います
| コード | 説明 |
|---|---|
.draw(色 = Palette::White) |
テクスチャを座標 (0, 0) から描画する |
.draw(x, y, 色 = Palette::White) |
テクスチャを座標 (x, y) から描画する |
.draw(pos, 色 = Palette::White) |
テクスチャを座標 pos から描画する |
.draw(x, y, Arg::top = 上側の色, Arg::bottom = 下側の色) |
上下の色を指定して描画する |
.draw(x, y, Arg::left = 左側の色, Arg::right = 右側の色) |
左右の色を指定して描画する |
.draw(pos, Arg::top = 上側の色, Arg::bottom = 下側の色) |
上下の色を指定して描画する |
.draw(pos, Arg::left = 左側の色, Arg::right = 右側の色) |
左右の色を指定して描画する |
# include <Siv3D.hpp>

void Main()
{
	Scene::SetBackground(ColorF{ 0.6, 0.8, 0.7 });

	const Texture texture1{ U"🐈"_emoji };
	const Texture texture2{ U"example/windmill.png" };

	while (System::Update())
	{
		texture1.draw();

		texture2.draw(400, 300);
	}
}
31.10 中心座標を指定した描画
- 中心の座標を指定してテクスチャを描画するには、
.drawAt()を使います
| コード | 説明 |
|---|---|
.drawAt(x, y, 色 = Palette::White) |
テクスチャを座標 (x, y) を中心に描画する |
.drawAt(pos, 色 = Palette::White) |
テクスチャを座標 pos を中心に描画する |
.drawAt(x, y, Arg::top = 上側の色, Arg::bottom = 下側の色) |
上下の色を指定して描画する |
.drawAt(x, y, Arg::left = 左側の色, Arg::right = 右側の色) |
左右の色を指定して描画する |
.drawAt(pos, Arg::top = 上側の色, Arg::bottom = 下側の色) |
上下の色を指定して描画する |
.drawAt(pos, Arg::left = 左側の色, Arg::right = 右側の色) |
左右の色を指定して描画する |

# include <Siv3D.hpp>

void Main()
{
	Scene::SetBackground(ColorF{ 0.6, 0.8, 0.7 });

	const Texture texture1{ U"🐈"_emoji };
	const Texture texture2{ U"example/windmill.png" };

	while (System::Update())
	{
		texture1.drawAt(0, 0);

		texture2.drawAt(400, 300);
	}
}
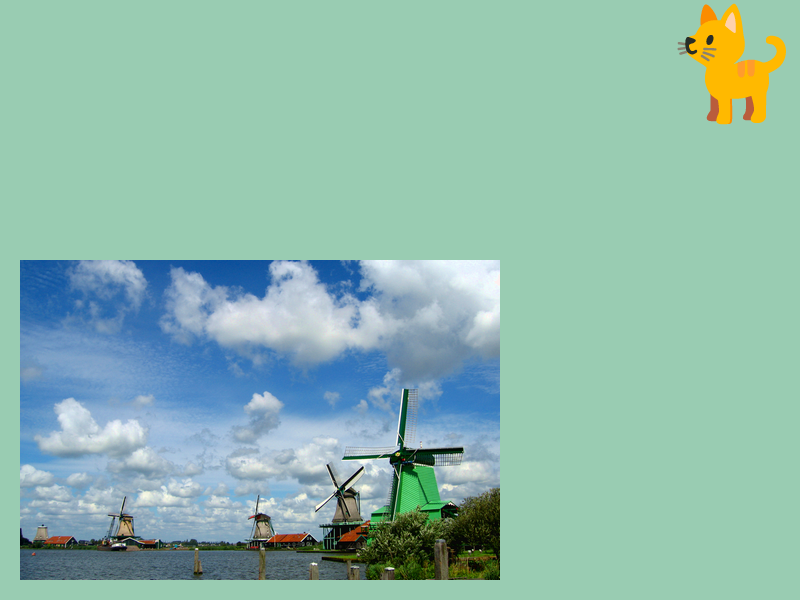
31.11 それ以外の座標を指定した描画
- 右端の中心位置を指定してテクスチャを描画するには、次の方法を使います
.draw(Arg::topRight = pos, ...)- `.draw(Arg::topRight(x, y), ...)
- このように指定できる基準位置は、全部で 9 種類あります
| 基準位置 | 説明 |
|---|---|
Arg::topLeft |
テクスチャの左上。.draw() と同じ |
Arg::topCenter |
上辺の中央 |
Arg::topRight |
右上 |
Arg::leftCenter |
左辺の中央 |
Arg::center |
中心。.drawAt() と同じ |
Arg::rightCenter |
右辺の中央 |
Arg::bottomLeft |
左下 |
Arg::bottomCenter |
下辺の中央 |
Arg::bottomRight |
右下 |
# include <Siv3D.hpp>

void Main()
{
	Scene::SetBackground(ColorF{ 0.6, 0.8, 0.7 });

	const Texture texture1{ U"🐈"_emoji };
	const Texture texture2{ U"example/windmill.png" };

	while (System::Update())
	{
		texture1.draw(Arg::topRight = Vec2{ 800, 0 });

		texture2.draw(Arg::bottomLeft(20, 580));
	}
}
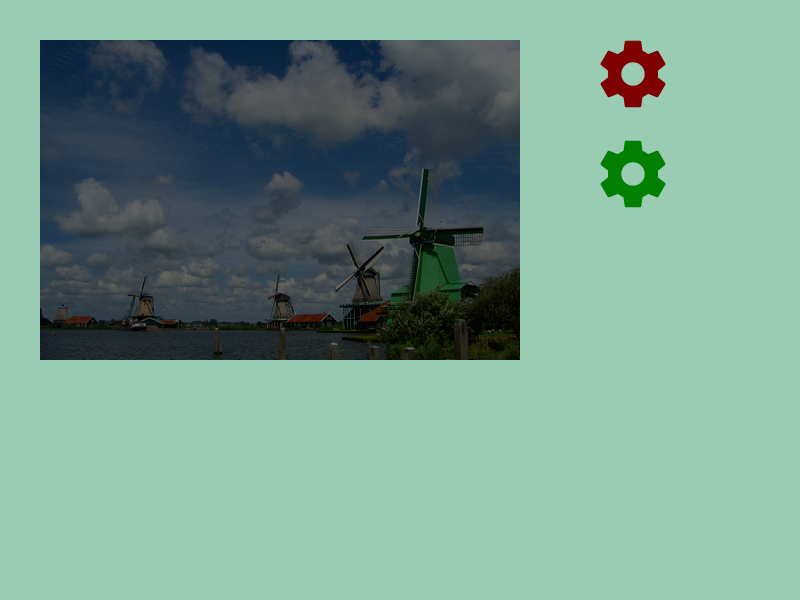
31.12 色を乗算した描画
31.12.1 RGB 各成分を乗算
.draw()と.drawAt()ではテクスチャに乗算する色を指定できます- テクスチャのピクセル
ColorF{ sr, sg, sb }を描くとき、色ColorF{ r, g, b }を乗算すると、描画される色はColorF{ (sr * r), (sg * g), (sb * b) }になります(通常のブレンドモード時) - デフォルトでは
Palette::White(ColorF{ 1.0 })が乗算色として使われます
# include <Siv3D.hpp>

void Main()
{
	Scene::SetBackground(ColorF{ 0.6, 0.8, 0.7 });

	const Texture texture{ U"example/windmill.png" };
	const Texture icon{ 0xF0493_icon, 80 };

	while (System::Update())
	{
		texture.draw(40, 40, ColorF{ 0.4 });

		icon.draw(600, 40, ColorF{ 0.5, 0.0, 0.0 });

		icon.draw(600, 140, ColorF{ 0.0, 0.5, 0.0 });
	}
}
31.12.2 アルファ値の使用
- 不透明度(アルファ値)を使うこともできます
- テクスチャのピクセル
ColorF{ sr, sg, sb }を、書き込み先のピクセルColorF{ dr, dg, db }に描くとき、描画される色はColorF{ (sr * a + dr * (1 - a)), (sg * a + dg * (1 - a)), (sb * a + db * (1 - a)) }になります(通常のブレンドモード時)

# include <Siv3D.hpp>

void Main()
{
	Scene::SetBackground(ColorF{ 0.6, 0.8, 0.7 });

	const Texture texture{ U"example/windmill.png" };
	const Texture icon{ 0xF0493_icon, 80 };

	while (System::Update())
	{
		texture.draw(40, 40, ColorF{ 1.0, 0.5 });

		icon.draw(500, 40, ColorF{ 0.5, 0.0, 0.0, 0.3 });

		icon.draw(500, 140, ColorF{ 0.0, 0.5, 0.0, 0.3 });
	}
}
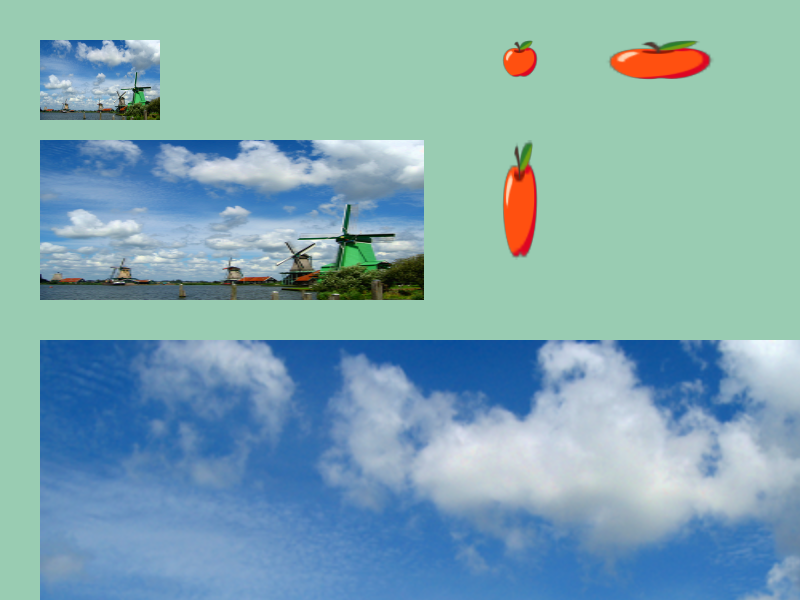
31.13 拡大縮小した描画
- テクスチャを拡大縮小して描画するには、次のメンバ関数を使って、拡大縮小を適用した
TextureRegionを作成します
| コード | 説明 |
|---|---|
.scaled(s) |
テクスチャを縦横 s 倍の大きさに拡大縮小した TextureRegion を作成する |
.scaled(sx, sy) |
テクスチャを縦横 sx, sy 倍の大きさに拡大縮小した TextureRegion を作成する |
.resized(size) |
テクスチャの長辺を size(ピクセル)の大きさに拡大縮小した TextureRegion を作成する |
.resized(width, height) |
テクスチャを幅 width(ピクセル), 高さ height(ピクセル)の大きさに拡大縮小した TextureRegion を作成する |
TextureRegionはTextureと同じように描画できます- 既存の
TextureからTextureRegionを作成するコストは小さいため、メインループ内で実行して問題ありません
# include <Siv3D.hpp>

void Main()
{
	Scene::SetBackground(ColorF{ 0.6, 0.8, 0.7 });

	const Texture texture{ U"example/windmill.png", TextureDesc::Mipped };
	const Texture emoji{ U"🍎"_emoji };

	while (System::Update())
	{
		texture.scaled(0.25).draw(40, 40);
		texture.scaled(0.8, 0.5).draw(40, 140);
		texture.scaled(2).draw(40, 340);

		emoji.resized(40).draw(500, 40);
		emoji.resized(120, 40).draw(600, 40);
		emoji.resized(40, 120).draw(500, 140);
	}
}
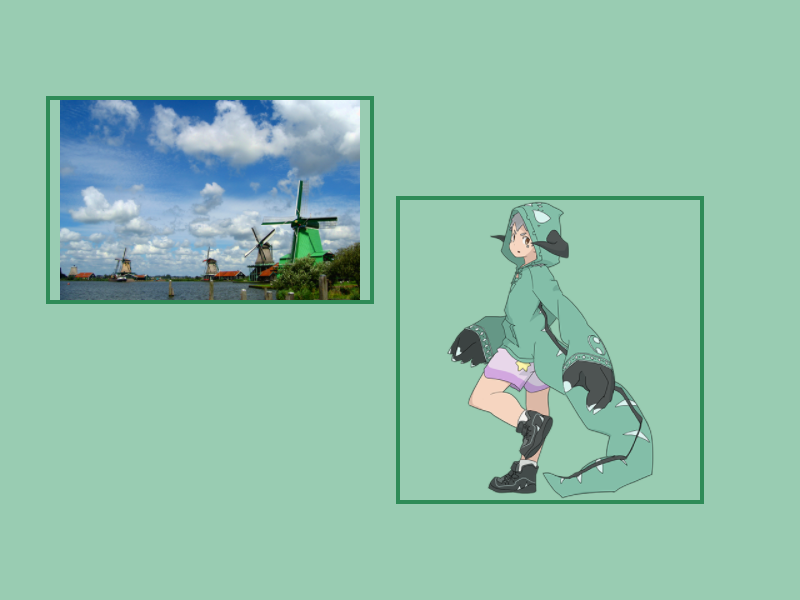
31.14 長方形内に収めた描画
- あるサイズ内で最大限大きくなるようにテクスチャを描くには、次のメンバ関数を使って、拡大縮小を適用した
TextureRegionを作成します
| コード | 説明 |
|---|---|
.fitted(size) |
テクスチャのアスペクト比を保ったまま、幅 size.x, 高さ size.y 以内に収まり、最大限大きくなるよう拡大縮小した TextureRegion を返す |
.fitted(width, height) |
テクスチャのアスペクト比を保ったまま、幅 width, 高さ height 以内に収まり、最大限大きくなるよう拡大縮小した TextureRegion を返す |
TextureRegionはTextureと同じように描画できます- 既存の
TextureからTextureRegionを作成するコストは小さいため、メインループ内で実行して問題ありません
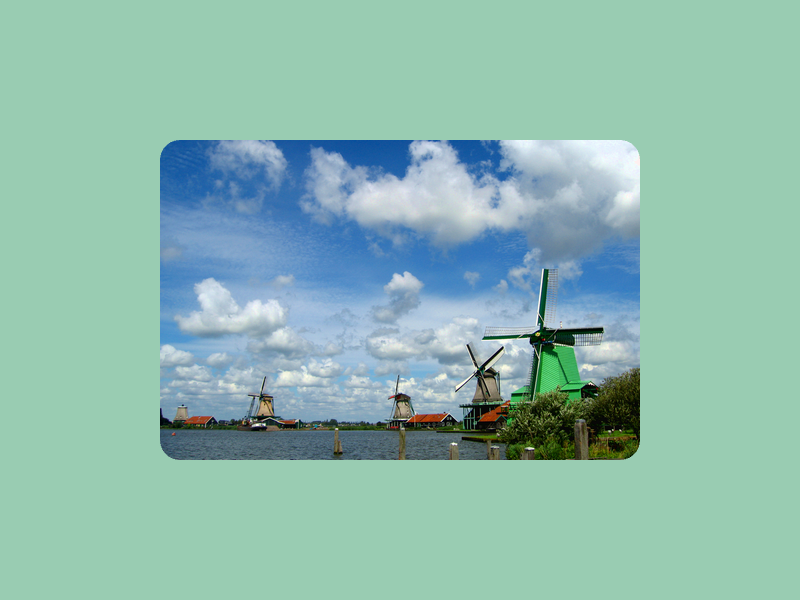
# include <Siv3D.hpp>

void Main()
{
	Scene::SetBackground(ColorF{ 0.6, 0.8, 0.7 });

	const Texture texture1{ U"example/windmill.png", TextureDesc::Mipped };
	const Texture texture2{ U"example/siv3d-kun.png", TextureDesc::Mipped };

	const Rect rect1{ 50, 100, 320, 200 };
	const Rect rect2{ 400, 200, 300 };

	while (System::Update())
	{
		rect1.drawFrame(0, 4, Palette::Seagreen);
		texture1.fitted(rect1.size).drawAt(rect1.center());

		rect2.drawFrame(0, 4, Palette::Seagreen);
		texture2.fitted(rect2.size).drawAt(rect2.center());
	}
}
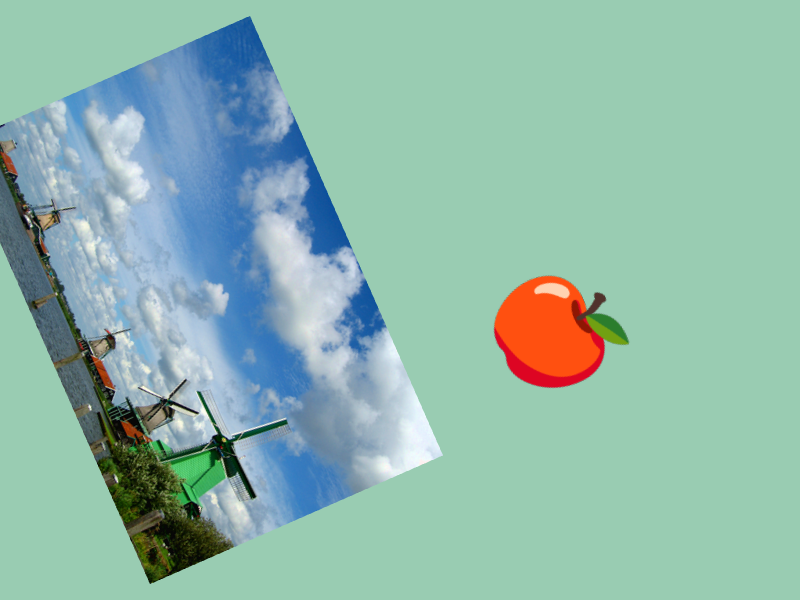
31.15 回転した描画
- テクスチャを回転して描画するには、次のメンバ関数を使って、回転を適用した
TexturedQuadを作成します.rotated()は、テクスチャの中心に画鋲を打ち込んだようなイメージで、テクスチャを回転させます.rotatedAt()は、テクスチャ上の指定した座標に画鋲を打ち込んだようなイメージで、テクスチャを回転させます
| コード | 説明 |
|---|---|
.rotated(angle) |
テクスチャを angle(ラジアン)だけ回転させた TexturedQuad を作成する |
.rotatedAt(x, y, angle) |
テクスチャを座標 (x, y) を軸に angle(ラジアン)だけ回転させた TexturedQuad を作成する |
.rotatedAt(pos, angle) |
テクスチャ上の pos を軸に angle(ラジアン)だけ回転させた TexturedQuad を作成する |
TexturedQuadはTextureのように描画できます- 既存の
TextureからTexturedQuadを作成するコストは小さいため、メインループ内で実行して問題ありません TexturedQuadで座標を指定した描画した場合の描画位置は、回転前のテクスチャを基準とした位置です
# include <Siv3D.hpp>

void Main()
{
	Scene::SetBackground(ColorF{ 0.6, 0.8, 0.7 });

	const Texture texture{ U"example/windmill.png" };
	const Texture emoji{ U"🍎"_emoji };

	while (System::Update())
	{
		const double angle = (Scene::Time() * 30_deg);

		texture.rotated(angle).drawAt(200, 300);

		emoji.rotatedAt(Vec2{ 58, 13 }, angle).drawAt(600, 300);
	}
}
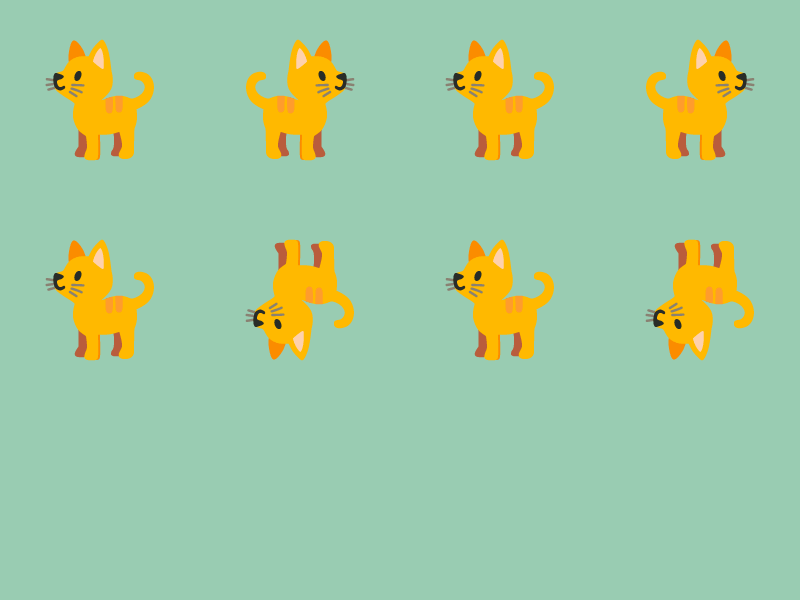
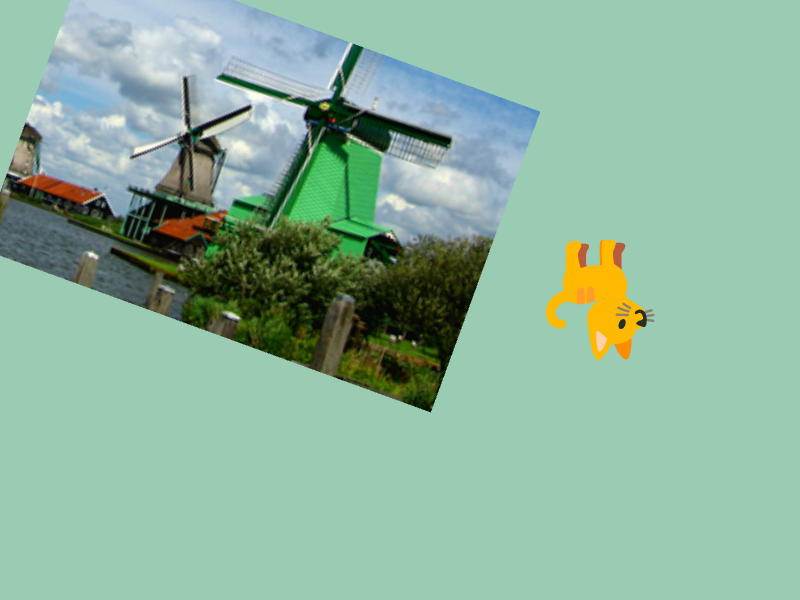
31.16 上下・左右反転した描画
- テクスチャを上下・左右反転して描画するには、次のメンバ関数を使って、反転を適用した
TextureRegionを作成します
| コード | 説明 |
|---|---|
.flipped() |
テクスチャを上下反転した TextureRegion を作成する |
.flipped(onOff) |
テクスチャを上下反転した TextureRegion を作成する。onOff が true のとき反転する |
.mirrored() |
テクスチャを左右反転した TextureRegion を作成する |
.mirrored(onOff) |
テクスチャを左右反転した TextureRegion を作成する。onOff が true のとき反転する |
TextureRegionはTextureと同じように描画できます- 既存の
TextureからTextureRegionを作成するコストは小さいため、メインループ内で実行して問題ありません
# include <Siv3D.hpp>

void Main()
{
	Scene::SetBackground(ColorF{ 0.6, 0.8, 0.7 });

	const Texture emoji{ U"🐈"_emoji };

	while (System::Update())
	{
		emoji.drawAt(100, 100);
		emoji.mirrored().drawAt(300, 100);
		emoji.mirrored(false).drawAt(500, 100);
		emoji.mirrored(true).drawAt(700, 100);

		emoji.drawAt(100, 300);
		emoji.flipped().drawAt(300, 300);
		emoji.flipped(false).drawAt(500, 300);
		emoji.flipped(true).drawAt(700, 300);
	}
}
31.17 部分描画
- テクスチャの一部の長方形領域だけを描画するには、次のメンバ関数を使って、部分切り出しを適用した
TextureRegionを作成します
| コード | 説明 |
|---|---|
(x, y, w, h) |
テクスチャの (x, y) から幅 w, 高さ h を切り出した TextureRegion を作成する |
(rect) |
テクスチャの rect の領域を切り出した TextureRegion を作成する |
.uv(u, v, w, h) |
テクスチャの UV 座標 (u, v) から幅 w, 高さ h を切り出した TextureRegion を作成する |
.uv(rect) |
テクスチャの UV 座標 rect の領域を切り出した TextureRegion を作成する |
- 前者 2 つはピクセル座標で、後者 2 つは UV 座標で指定します
- UV 座標はテクスチャの左上を (0.0, 0.0)、右下を (1.0, 1.0) としたときの座標で、画像の大きさに関係なく、常に 0.0 から 1.0 の範囲です
- テクスチャ
textureのサイズが 400 × 200 のとき、texture(0.5, 0.0, 0.5, 1.0)はtexture(200, 0, 200, 200)と同じです
TextureRegionはTextureと同じように描画できます- 既存の
TextureからTextureRegionを作成するコストは小さいため、メインループ内で実行して問題ありません
# include <Siv3D.hpp>

void Main()
{
	Scene::SetBackground(ColorF{ 0.6, 0.8, 0.7 });

	const Texture texture{ U"example/windmill.png" };
	const Texture emoji{ U"🍎"_emoji };

	while (System::Update())
	{
		// 画像の (250, 100) から幅 200, 高さ 150 の部分を描画する
		texture(250, 100, 200, 150).draw(40, 40);

		// 画像の UV 座標 (0.5, 0.0) から幅 0.5, 高さ 0.75 の部分を描画する
		emoji.uv(0.5, 0.0, 0.5, 0.75).drawAt(400, 300);
	}
}
31.18 敷き詰め描画
31.18.1 敷き詰め描画
- テクスチャを繰り返し敷き詰めて描画するには、次のメンバ関数を使って、敷き詰めを適用した
TextureRegionを作成し、適切なテクスチャアドレスモードを適用した状態で描画します
| コード | 説明 |
|---|---|
.mapped(幅, 高さ) |
テクスチャを指定した幅、高さで敷き詰めた TextureRegion を作成する |
.mapped(サイズ) |
テクスチャを指定したサイズで敷き詰めた TextureRegion を作成する |
.repeated(X 回数, Y 回数) |
テクスチャを横に X 回、縦に Y 回敷き詰めた TextureRegion を作成する |
TextureRegionはTextureと同じように描画できます- 既存の
TextureからTextureRegionを作成するコストは小さいため、メインループ内で実行して問題ありません
31.18.2 テクスチャアドレスモード
- 2D 描画時のデフォルトのテクスチャアドレスモードは Clamp です
- テクスチャの範囲外を描こうとすると、その部分はテクスチャの端の色で塗りつぶされます
- UV 座標で 0.0 より小さい値や 1.0 より大きい値を指定したとき、それぞれ 0.0 と 1.0 として扱うということです
- 時計の針で 13 を指そうとしても、時計の針が 12 から進まないイメージです
- 一方、時計の針で 13 を指そうとしたとき、時計の針が 12 から進み、0 に戻って 1 になるように繰り返すこともできます
- UV 座標で
1.1や2.3,-0.3といった値を指定したとき、それぞれ0.1や0.3,0.7として扱うということです - このようなテクスチャアドレスモードを Repeat といいます
- テクスチャアドレスモードは、次のようにサンプラーステートを設定することで変更できます
- サンプラーステートについては チュートリアル 48 を参照してください
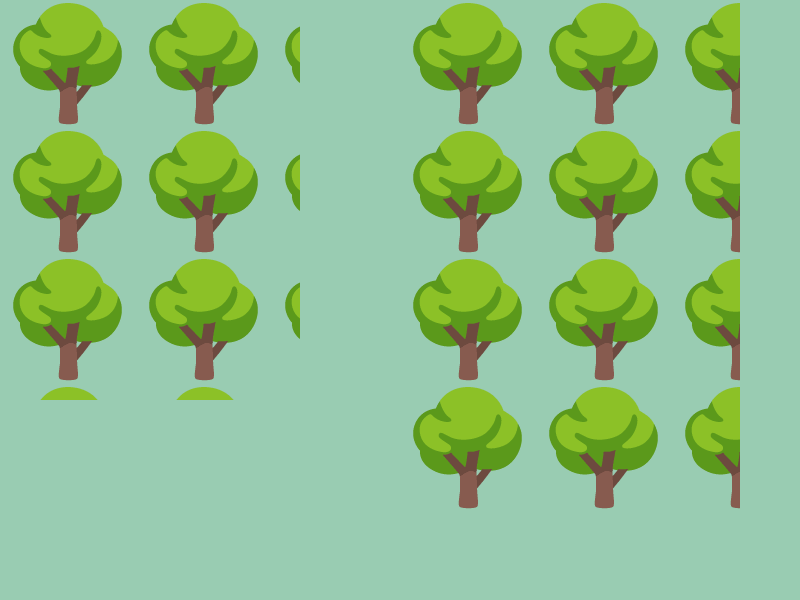
# include <Siv3D.hpp>

void Main()
{
	Scene::SetBackground(ColorF{ 0.6, 0.8, 0.7 });

	const Texture emoji{ U"🌳"_emoji };

	while (System::Update())
	{
		{
			// テクスチャアドレスモードをリピートに設定する
			const ScopedRenderStates2D sampler{ SamplerState::RepeatLinear };

			emoji.mapped(300, 400).draw();

			emoji.repeated(2.5, 4).draw(400, 0);
		}
	}
}
31.19 角を丸めた描画
- テクスチャの角を丸めて描画するには、次のメンバ関数を使って、角を丸めた
TexturedRoundRectを作成します
| コード | 説明 |
|---|---|
.rounded(半径) |
テクスチャの角を 半径 で丸めた TexturedRoundRect を作成する |
TexturedRoundRectはTextureのように描画できます- 既存の
TextureからTexturedRoundRectを作成するコストは小さいため、メインループ内で実行して問題ありません
# include <Siv3D.hpp>

void Main()
{
	Scene::SetBackground(ColorF{ 0.6, 0.8, 0.7 });

	const Texture texture{ U"example/windmill.png"};

	while (System::Update())
	{
		texture.rounded(20).drawAt(400, 300);
	}
}
31.20 操作の組み合わせ
TextureRegionは、Textureと同じような操作のためのメンバ関数を持ち、追加の複数の操作を組み合わせてテクスチャを描画できます- 例えば、
(x, y, w, h)で切り抜いたテクスチャを.scaled()で拡大縮小して、さらに.rotated()で回転させて描くことができます
- 例えば、
TexturedQuadには、追加の操作を適用するメンバ関数がありません
| 操作 | 戻り値 | Texture |
TextureRegion |
TexturedQuad |
|---|---|---|---|---|
.scaled() |
TextureRegion |
✅ | ✅ | ❌ |
.resized() |
TextureRegion |
✅ | ✅ | ❌ |
.fitted() |
TextureRegion |
✅ | ✅ | ❌ |
.rotated() |
TexturedQuad |
✅ | ✅ | ❌ |
.rotatedAt() |
TexturedQuad |
✅ | ✅ | ❌ |
.flipped() |
TextureRegion |
✅ | ✅ | ❌ |
.mirrored() |
TextureRegion |
✅ | ✅ | ❌ |
(x, y, w, h) |
TextureRegion |
✅ | ❌ | ❌ |
.uv(u, v, w, h) |
TextureRegion |
✅ | ❌ | ❌ |
.mapped() |
TextureRegion |
✅ | ❌ | ❌ |
.repeated() |
TextureRegion |
✅ | ❌ | ❌ |
.rounded() |
TexturedRoundRect |
✅ | ✅ | ❌ |
# include <Siv3D.hpp>

void Main()
{
	Scene::SetBackground(ColorF{ 0.6, 0.8, 0.7 });

	const Texture texture{ U"example/windmill.png" };
	const Texture emoji{ U"🐈"_emoji };

	while (System::Update())
	{
		texture
			.uv(0.5, 0.5, 0.5, 0.5)
			.scaled(2.0)
			.rotated(20_deg)
			.draw(20, 20);

		emoji
			.mirrored()
			.flipped()
			.drawAt(600, 300);
	}
}
31.21 図形の形に合わせた描画
- テクスチャ全体またはテクスチャの一部領域を
RectやRectF,Circle,Quad,RoundRectに貼り付けて描画できます - 次のメンバ関数を使って、図形の形に応じたオブジェクトを作成します
| コード | 説明 |
|---|---|
rect(texture) |
長方形(Rect または RectF)にテクスチャ(Texture または TextureRegion)を貼り付けた TexturedQuad を作成する |
circle(texture) |
Circle にテクスチャ(Texture または TextureRegion)を貼り付けた TexturedCircle を作成する |
quad(texture) |
Quad にテクスチャ(Texture または TextureRegion)を貼り付けた TexturedQuad を作成する |
roundRect(texture) |
角丸長方形(RoundRect)にテクスチャ(Texture または TextureRegion)を貼り付けた TexturedRoundRect を作成する |
TexturedQuad,TexturedCircle,TexturedRoundRectはTextureのように描画できます- 既存の
TextureからTexturedQuad,TexturedCircle,TexturedRoundRectを作成するコストは小さいため、メインループ内で実行して問題ありません

# include <Siv3D.hpp>

void Main()
{
	Scene::SetBackground(ColorF{ 0.6, 0.8, 0.7 });

	const Texture texture1{ U"example/windmill.png", TextureDesc::Mipped };
	const Texture texture2{ U"example/siv3d-kun.png", TextureDesc::Mipped };

	const Rect rect{ 430, 50, 100, 100 };
	const Circle circle{ 480, 240, 50 };
	const RoundRect roundRect{ 430, 330, 100, 100, 25 };

	while (System::Update())
	{
		Rect{ 50, 50, 350, 400 }(texture1).draw();

		rect
			.drawShadow(Vec2{ 2, 2 }, 12, 1)
			.draw(HSV{ 0, 0.5, 1.0 });
		rect(texture2(90, 3, 110, 110)).draw();

		circle
			.drawShadow(Vec2{ 2, 2 }, 12, 1)
			.draw(HSV{ 240, 0.5, 1.0 });
		circle(texture2(90, 3, 110, 110)).draw();

		roundRect
			.drawShadow(Vec2{ 2, 2 }, 12, 1)
			.draw(HSV{ 120, 0.5, 1.0 });
		roundRect(texture2(90, 3, 110, 110)).draw();
	}
}
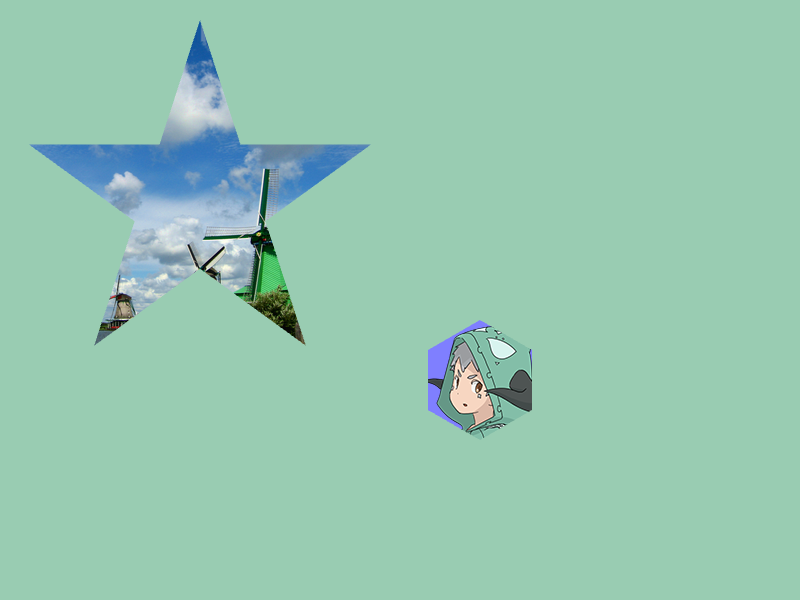
31.22 Polygon に合わせた描画
Polygonにテクスチャを貼り付ける場合は、次のような関数を使ってPolygonからBuffer2Dを作成し、Buffer2Dの描画関数を使ってテクスチャを描画します
| コード | 説明 |
| polygon.toBuffer2D(offset, size) | offset を原点としてサイズ size のテクスチャを並べる Buffer2D を作成する |
| polygon.toBuffer2D(Arg::center = offset, size) | offset を中心としてサイズ size のテクスチャを並べる Buffer2D を作成する |
offsetは、テクスチャを画面座標基準でどの位置に貼り付けるかを制御しますsizeは貼り付けるテクスチャのサイズですsizeが元のテクスチャのサイズより小さい場合、テクスチャは縮小され、大きい場合は拡大されます
Buffer2Dの作成は少しだけコストがかかるため、可能であればメインループの前で作成し、作成したオブジェクトを使い回すようにしますBuffer2Dオブジェクトをb,Textureをtとすると、b.draw(t)でテクスチャを描画します
# include <Siv3D.hpp>

void Main()
{
	Scene::SetBackground(ColorF{ 0.6, 0.8, 0.7 });

	const Texture texture1{ U"example/windmill.png", TextureDesc::Mipped };
	const Texture texture2{ U"example/siv3d-kun.png", TextureDesc::Mipped };

	const Polygon star = Shape2D::Star(180, Vec2{ 200, 200 });
	const Polygon hexagon = Shape2D::Hexagon(60, Vec2{ 480, 380 });

	while (System::Update())
	{
		const double xOffset = (200 + Periodic::Sine1_1(5s) * 80.0);

		// star に対し、(xOffset, 200) を画像の中心とするようにテクスチャを貼り付けて描画する
		star.toBuffer2D(Arg::center(xOffset, 200), texture1.size())
			.draw(texture1);

		hexagon.draw(HSV{ 240, 0.5, 1.0 });

		// hexagon に対し、(515, 562) を画像の中心とするようにテクスチャを貼り付けて描画する
		hexagon.toBuffer2D(Arg::center = Vec2{ 515, 562 }, texture2.size())
			.draw(texture2);
	}
}
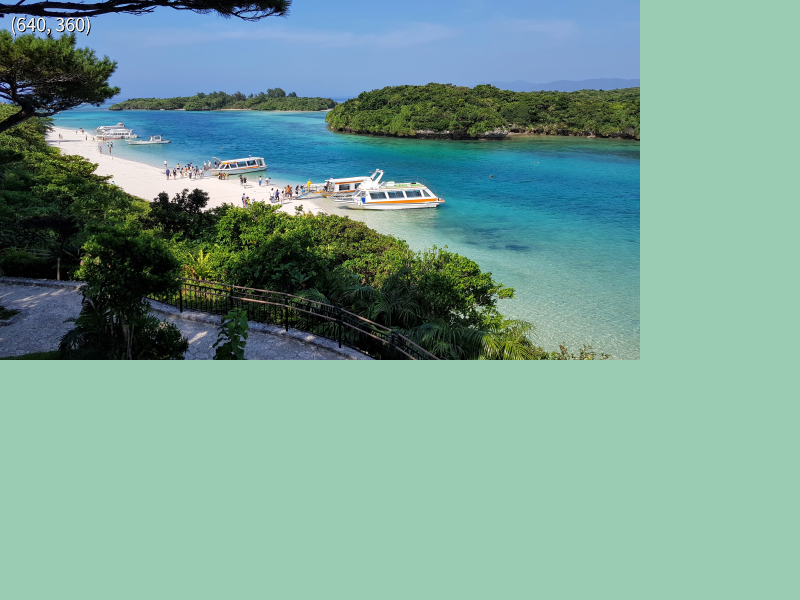
31.23 大きな画像の事前縮小
- 解像度の大きい画像ファイルを読み込むと、メモリの使用量が増え、実行時性能が低下することがあります
- そのような場合、画像を縮小してからテクスチャを作成することで、メモリの節約や描画速度の向上が期待できます
- 画像ファイルを
Imageに読み込んでから.scaled()で縮小し、その結果のImageからテクスチャを作成します
# include <Siv3D.hpp>

void Main()
{
	Scene::SetBackground(ColorF{ 0.6, 0.8, 0.7 });

	// 画像を 1/4 に縮小してテクスチャを作成する
	const Texture texture{ Image{ U"example/bay.jpg"}.scaled(0.25) };

	Print << texture.size();

	while (System::Update())
	{
		texture.draw();
	}
}
31.24 テクスチャ描画に関するトラブル
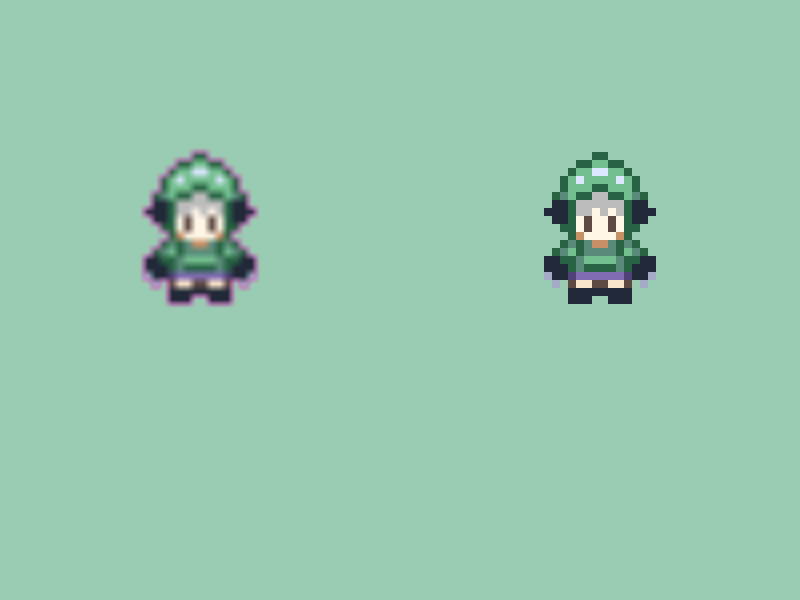
31.24.1 拡大したときにドット絵のドット感が失われる
- デフォルトのサンプラーステートでは、テクスチャを拡大すると、なめらかに補間されます
- これにより、ドット絵を拡大した場合は、ドット感が失われ、ぼやけた印象になります
- これはサンプラーステートを
Nearestに変更することで解決できます- サンプラーステートについては チュートリアル 48 を参照してください
# include <Siv3D.hpp>

void Main()
{
	Scene::SetBackground(ColorF{ 0.6, 0.8, 0.7 });

	const Texture texture{ U"example/spritesheet/siv3d-kun-16.png" };

	while (System::Update())
	{
		{
			texture(20, 0, 20, 28).scaled(8).drawAt(200, 200);
		}

		{
			const ScopedRenderStates2D rs{ SamplerState::ClampNearest };

			texture(20, 0, 20, 28).scaled(8).drawAt(600, 200);
		}
	}
}
31.24.2 マップチップで周囲のピクセルの色がにじむ
- マップチップが並ぶ画像から特定のマップチップを切り出し、それを拡大したり、浮動小数点数座標で描画した場合に、隣接するマップチップの色がにじみ出てしまうことがあります
- これは補間の過程で、周囲のピクセルを巻き込んでサンプリングしてしまうために起こります
- いくつかの対策があります
- サンプラーステートを
Nearestに変更する - テクスチャの周囲に 1 ピクセルの塗り足しを行い、にじみ出ても影響が少なくなるようにする
- 浮動小数点数座標で描画せず、整数座標で描画する
Texture2DArray(Siv3D v0.8 から使えるようになる機能)で、それぞれのマップチップを独立したテクスチャとして扱う
- サンプラーステートを
31.24.3 透明に囲まれた画像を拡大すると輪郭が黒くなる
- 絵文字のように、周囲が透明ピクセルで囲まれた画像を拡大描画すると、周囲の黒がにじんでしまうことがあります
- いくつかの対策があります
- サンプラーステートを
Nearestに変更する- サンプラーステートについては チュートリアル 48 を参照してください
- アルファ乗算済み描画を行う
- アルファ乗算済み描画は Siv3D v0.8 で標準サポートされます。現行バージョンでは、次のようなコードが必要です
- サンプラーステートを

# include <Siv3D.hpp>

Image PremultiplyAlpha(Image image)
{
	Color* p = image.data();
	const Color* const pEnd = (p + image.num_pixels());

	while (p != pEnd)
	{
		p->r = static_cast<uint8>((static_cast<uint16>(p->r) * p->a) / 255);
		p->g = static_cast<uint8>((static_cast<uint16>(p->g) * p->a) / 255);
		p->b = static_cast<uint8>((static_cast<uint16>(p->b) * p->a) / 255);
		++p;
	}

	return image;
}

void Main()
{
	Scene::SetBackground(ColorF{ 0.6, 0.8, 0.7 });

	const Texture emoji1{ U"⛄"_emoji };
	const Texture emoji2{ PremultiplyAlpha(Image{ U"⛄"_emoji }) };

	while (System::Update())
	{
		{
			emoji1.scaled(3).drawAt(200, 300);
		}

		// アルファ乗算済み描画
		{
			const ScopedRenderStates2D rs{ BlendState::Premultiplied };

			emoji2.scaled(3).drawAt(600, 300);
		}
	}
}