30. 時間と動き
Siv3D で時間や動きを扱う方法を学びます。
30.1 経過時間の計測
Scene::DeltaTime()は、前フレームからの経過時間(秒)をdouble型で返します- この値を使って、フレームレートに左右されないモーションを作ることができます
- 詳しくは チュートリアル 14 を参照してください
- 一般に、直前のフレームからの経過時間が大きすぎると、ゲーム内のアニメーションや物理シミュレーションの変化ステップが大きくなり、安定性が損なわれる場合があります
- そのため、
Scene::DeltaTime()はScene::GetMaxDeltaTime()の値(デフォルトでは0.1)よりも大きくならないよう制限されます
30.2 経過時間の蓄積
Scene::Time()は プログラムが起動されてからの経過時間(秒)をdouble型で返しますSystem::Update()を呼び出した際に更新されるため、同一フレーム内でのScene::Time()の呼び出しは同じ値を返します
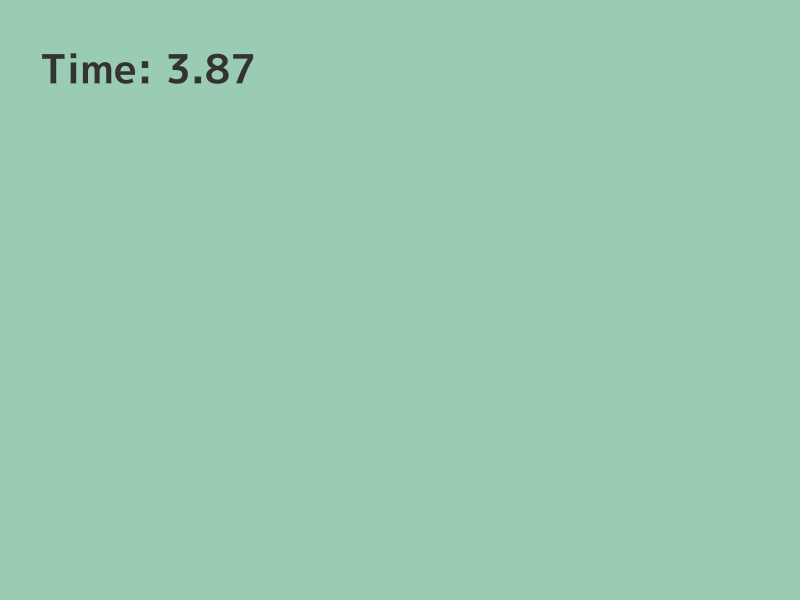
# include <Siv3D.hpp>

void Main()
{
	Scene::SetBackground(ColorF{ 0.6, 0.8, 0.7 });

	const Font font{ FontMethod::MSDF, 48, Typeface::Bold };

	while (System::Update())
	{
		font(U"Time: {:.2f}"_fmt(Scene::Time())).draw(40, Vec2{ 40, 40 }, ColorF{ 0.2 });
	}
}
Scene::Time()が返す値はScene::DeltaTime()の累積です- 前述したように、
Scene::DeltaTime()は実際のフレーム経過時間より短い場合があるため、Scene::Time()は現実の時間経過よりも短い場合があります - 現実と同期した時間が必要な場合は、次のような方法があります
Stopwatchを使って時間を計測するTimerを使って時間を計測するTime::GetMillisec()を使って現実のタイムポイントを取得する
30.3 時間に基づくモーション
- 位置・大きさ・角度などを時間の経過に応じて変化させて、モーションを表現できます

# include <Siv3D.hpp>

void Main()
{
	Scene::SetBackground(ColorF{ 0.6, 0.8, 0.7 });

	const Font font{ FontMethod::MSDF, 48, Typeface::Bold };

	const Texture emoji{ U"🍎"_emoji };

	while (System::Update())
	{
		const double t = Scene::Time();

		RectF{ (t * 50), 40, 40, 200 }.draw(ColorF{ 0.2 });

		Circle{ 200, 400, (t * 20) }.draw(Palette::Seagreen);

		emoji.rotated(t * 90_deg).drawAt(600, 400);
	}
}
30.4 一定時間おきに何かをする
- イベントの周期を決めておき、蓄積時間(秒)がその周期(秒)を超えたらイベントを発生させます

0.5 秒ごとにカウントアップ
# include <Siv3D.hpp>

void Main()
{
	Scene::SetBackground(ColorF{ 0.6, 0.8, 0.7 });

	const double interval = 0.5;

	double accumlatedTime = 0.0;

	int32 count = 0;

	while (System::Update())
	{
		accumlatedTime += Scene::DeltaTime();

		if (interval <= accumlatedTime)
		{
			Print << ++count;

			accumlatedTime -= interval;
		}
	}
}
- イベント周期が短い(1 フレームの時間よりも短い)場合、1 フレーム内で複数回イベントを発生させる必要があります
- そのような状況に対処するには、
ifの代わりにwhile (eventPeriod <= accumulatedTime)を使います
0.01 秒ごとにカウントアップ
# include <Siv3D.hpp>

void Main()
{
	Scene::SetBackground(ColorF{ 0.6, 0.8, 0.7 });

	const double interval = 0.01;

	double accumlatedTime = 0.0;

	int32 count = 0;

	while (System::Update())
	{
		accumlatedTime += Scene::DeltaTime();

		while (interval <= accumlatedTime)
		{
			Print << ++count;

			accumlatedTime -= interval;
		}
	}
}
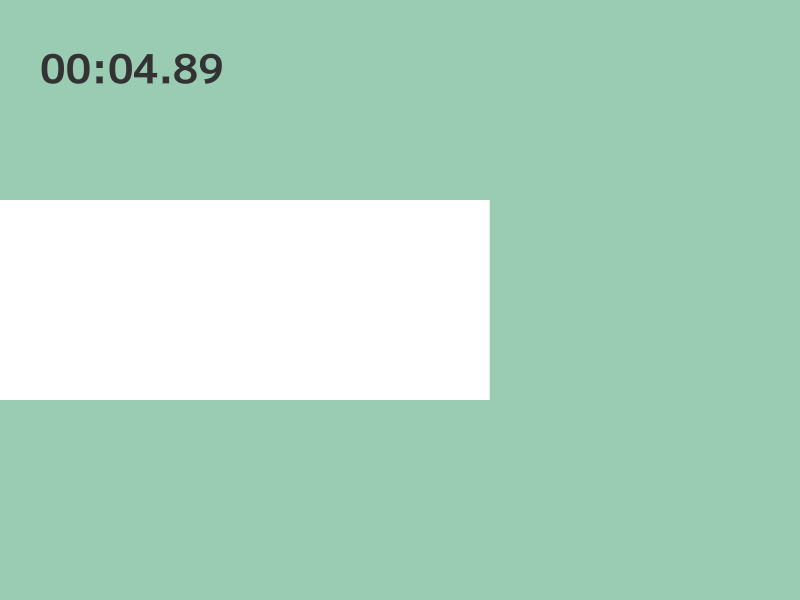
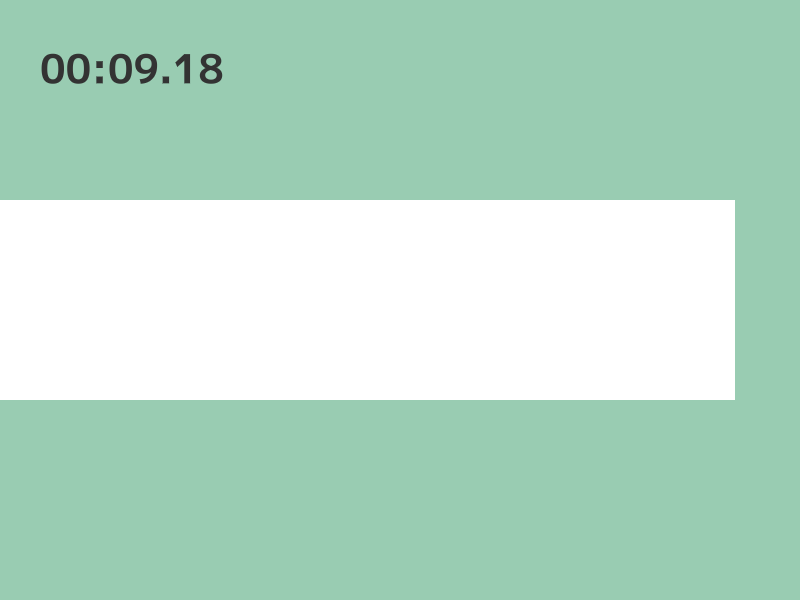
30.5 ストップウォッチ
Stopwatchは、経過時間の計測やリセットを便利に行えるクラスですStopwatchのコンストラクタ引数でStartImmediately::Yesを指定すると、作成と同時に計測を開始しますStopwatchの主要なメンバ関数は次のとおりです
| コード | 説明 |
|---|---|
.start() |
計測を開始・再開する |
.pause() |
計測を一時停止する |
.resume() |
一時停止中の計測を再開する |
.reset() |
計測を停止して経過時間を 0 にリセットする |
.restart() |
計測をリセットして再び 0 から計測を開始する |
.isRunning() |
計測中かどうかを bool 型で返す |
.isPaused() |
一時停止中かどうかを bool 型で返す |
.isStarted() |
計測が開始されているかどうかを bool 型で返す |
.min() |
経過時間を分単位で int32 型で返す |
.s() |
経過時間を分単位で int32 型で返す |
.s64() |
経過時間を秒単位で int64 型で返す |
.sF() |
経過時間を秒単位で double 型で返す |
.ms() |
経過時間をミリ秒単位で int32 型で返す |
.ms64() |
経過時間をミリ秒単位で int64 型で返す |
.msF() |
経過時間をミリ秒単位で double 型で返す |
.us() |
経過時間をマイクロ秒単位で int32 型で返す |
.us64() |
経過時間をマイクロ秒単位で int64 型で返す |
.usF() |
経過時間をマイクロ秒単位で double 型で返す |
.fotmat(...) |
経過時間を指定したフォーマットで文字列化して返す |
- 経過時間は
Scene::GetMaxDeltaTime()の影響を受けず、常に現実の時間で計測されます - 経過時間を単位ごとに取得する必要はありません
- 経過時間が 65.4 秒の時、
s()は65を、sF()は65.4を、ms()は65400を返します
- 経過時間が 65.4 秒の時、
- 同一フレーム内で複数回呼び出すと、タイミングによって経過時間は変わります
# include <Siv3D.hpp>

void Main()
{
	Scene::SetBackground(ColorF{ 0.6, 0.8, 0.7 });

	const Font font{ FontMethod::MSDF, 48, Typeface::Bold };

	// 作成と同時に計測を開始
	Stopwatch stopwatch{ StartImmediately::Yes };

	while (System::Update())
	{
		if (MouseL.down())
		{
			if (stopwatch.isPaused())
			{
				// 再開
				stopwatch.resume();
			}
			else
			{
				// 一時停止
				stopwatch.pause();
			}
		}

		if (MouseR.down())
		{
			// リスタート
			stopwatch.restart();
		}

		RectF{ 0, 200, (stopwatch.sF() * 100), 200 }.draw();

		font(stopwatch.format(U"mm:ss.xx")).draw(40, Vec2{ 40, 40 }, ColorF{ 0.2 });
	}
}
30.6 時間型
- 時間を表現する次のような型が用意されています
Fの付く型は浮動小数点数で値を保持しますDurationはSecondsFのエイリアスです
| 型 | 表現する時間 |
|---|---|
Days または DaysF |
日 |
Hours または HoursF |
時 |
Minutes または MinutesF |
分 |
Seconds または SecondsF |
秒 |
Milliseconds または MillisecondsF |
ミリ秒 |
Microseconds または MicrosecondsF |
マイクロ秒 |
Nanoseconds または NanosecondsF |
ナノ秒 |
Duration |
SecondsF の別名 |
- 整数や浮動小数点数リテラルに、次のような時間リテラルのサフィックスを付けて時間型を簡単に作成できます
- 例えば
10sはSeconds{ 10 }, 0.5s はSecondsF{ 0.5 }と同じです
- 例えば
| サフィックス | 時間 |
|---|---|
_d |
日 |
h |
時 |
min |
分 |
s |
秒 |
ms |
ミリ秒 |
us |
マイクロ秒 |
ns |
ナノ秒 |
- 時間型は、算術演算や比較演算が可能です
- 時間型は相互に変換可能です
- 浮動小数点数で表現する時間型 → 整数で表現する時間型の変換には
DurationCast<Type>()が必要です
# include <Siv3D.hpp>

void Main()
{
	Scene::SetBackground(ColorF{ 0.6, 0.8, 0.7 });

	const MinutesF m = 3min;

	const SecondsF s = 5.5s;

	Print << (m + s);

	const Seconds s2 = DurationCast<Seconds>(s);

	Print << s2;

	const Duration d = 123.456s;

	Print << d;

	while (System::Update())
	{

	}
}
30.7 タイマー
Timerは指定した時間からのカウントダウンで残り時間を計測するクラスですTimerのコンストラクタ引数でStartImmediately::Yesを指定すると、作成と同時に計測を開始しますTimerの主要なメンバ関数は次のとおりです
| コード | 説明 |
|---|---|
.start() |
タイマーを開始・再開する |
.pause() |
タイマーを一時停止する |
.resume() |
一時停止中のタイマーを再開する |
.reset() |
タイマーを停止して残り時間をリセットする |
.restart() |
タイマーをリセットして再び開始する |
.isRunning() |
計測中かどうかを bool 型で返す |
.isPaused() |
一時停止中かどうかを bool 型で返す |
.isStarted() |
計測が開始されているかどうかを bool 型で返す |
.reachedZero() |
残り時間が 0 に達したかどうかを bool 型で返す |
.min() |
残り時間を分単位で int32 型で返す |
.s() |
残り時間を秒単位で int32 型で返す |
.s64() |
残り時間を秒単位で int64 型で返す |
.sF() |
残り時間を秒単位で double 型で返す |
.ms() |
残り時間をミリ秒単位で int32 型で返す |
.ms64() |
残り時間をミリ秒単位で int64 型で返す |
.msF() |
残り時間をミリ秒単位で double 型で返す |
.us() |
残り時間をマイクロ秒単位で int32 型で返す |
.us64() |
残り時間をマイクロ秒単位で int64 型で返す |
.usF() |
残り時間をマイクロ秒単位で double 型で返す |
.progress1_0() |
タイマーの進み具合(1.0 で始まり 0.0 で終わる)を double 型で返す |
.progress0_1() |
タイマーの進み具合(0.0 で始まり 1.0 で終わる)を double 型で返す |
- 残り時間は
Scene::GetMaxDeltaTime()の影響を受けず、常に現実の時間で計測されます - 残り時間を単位ごとに取得する必要はありません
- 残り時間が 65.4 秒の時、
s()は65を、sF()は65.4を、ms()は65400を返します
- 残り時間が 65.4 秒の時、
# include <Siv3D.hpp>

void Main()
{
	Scene::SetBackground(ColorF{ 0.6, 0.8, 0.7 });

	const Font font{ FontMethod::MSDF, 48, Typeface::Bold };

	// 作成と同時に計測を開始
	Timer timer{ 10s, StartImmediately::Yes };

	while (System::Update())
	{
		if (MouseL.down())
		{
			if (timer.isPaused())
			{
				// 再開
				timer.resume();
			}
			else
			{
				// 一時停止
				timer.pause();
			}
		}

		if (MouseR.down())
		{
			// リスタート
			timer.restart();
		}

		RectF{ 0, 200, (timer.progress1_0() * 800), 200 }.draw();

		if (timer.reachedZero())
		{
			font(U"Time's up!").draw(40, Vec2{ 40, 40 }, Palette::Red);
		}
		else
		{
			font(timer.format(U"mm:ss.xx")).draw(40, Vec2{ 40, 40 }, ColorF{ 0.2 });
		}
	}
}
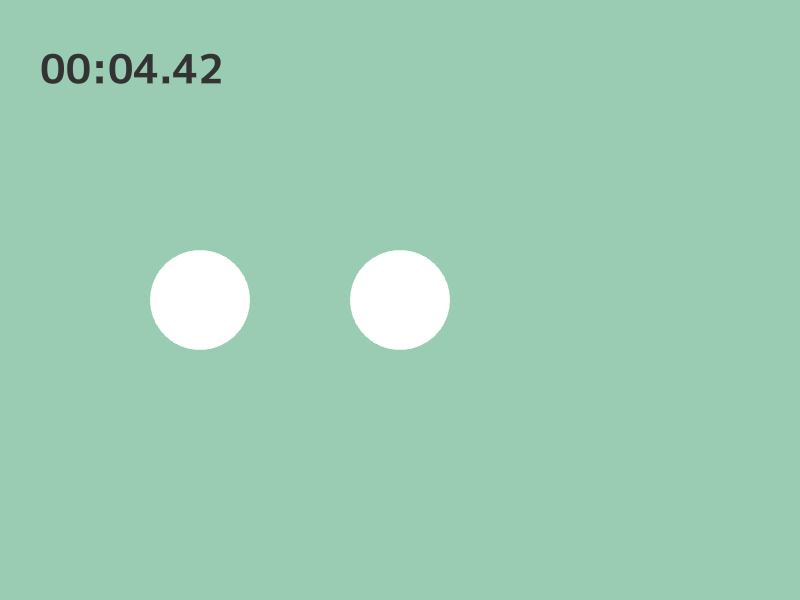
30.8 時間の比較
StopwatchやTimerオブジェクトと時間型の値を比較することができますif (3 <= stopwatch.s())の代わりにif (3s <= stopwatch)で、ストップウォッチが 3 秒以上経過したかどうかを判定できますif (timer.sF() < 10.0)の代わりにif (timer < 10s)で、タイマーが残り 10 秒未満であるかどうかを判定できます
# include <Siv3D.hpp>

void Main()
{
	Scene::SetBackground(ColorF{ 0.6, 0.8, 0.7 });

	const Font font{ FontMethod::MSDF, 48, Typeface::Bold };

	// 作成と同時に計測を開始
	Stopwatch stopwatch{ StartImmediately::Yes };

	while (System::Update())
	{
		// 2 秒以上経過していたら
		if (2s <= stopwatch)
		{
			Circle{ 200, 300, 50 }.draw();
		}

		// 4 秒以上経過していたら
		if (4s <= stopwatch)
		{
			Circle{ 400, 300, 50 }.draw();
		}

		// 6 秒以上経過していたら
		if (6s <= stopwatch)
		{
			Circle{ 600, 300, 50 }.draw();
		}

		font(stopwatch.format(U"mm:ss.xx")).draw(40, Vec2{ 40, 40 }, ColorF{ 0.2 });
	}
}
30.9 周期的なモーション
- 周期的に 0 ↔ 1 または -1 ↔ 1 の間で変化する値が必要な場合、
Periodic::名前空間に用意されている周期関数を使うと便利です - これらの関数は、時間経過に応じて特定の周期とパターンで 0~1, または -1~1 の範囲の値を返します
Periodic::関数(周期, 経過時間)- 周期は
2sや0.5sのように時間リテラルを使って指定します - 経過時間(秒)は
double型で渡します。デフォルトではScene::Time()が使われます
- 周期は
| 周期関数 | 動き |
|---|---|
Periodic::Square0_1 |
 |
Periodic::Triangle0_1 |
 |
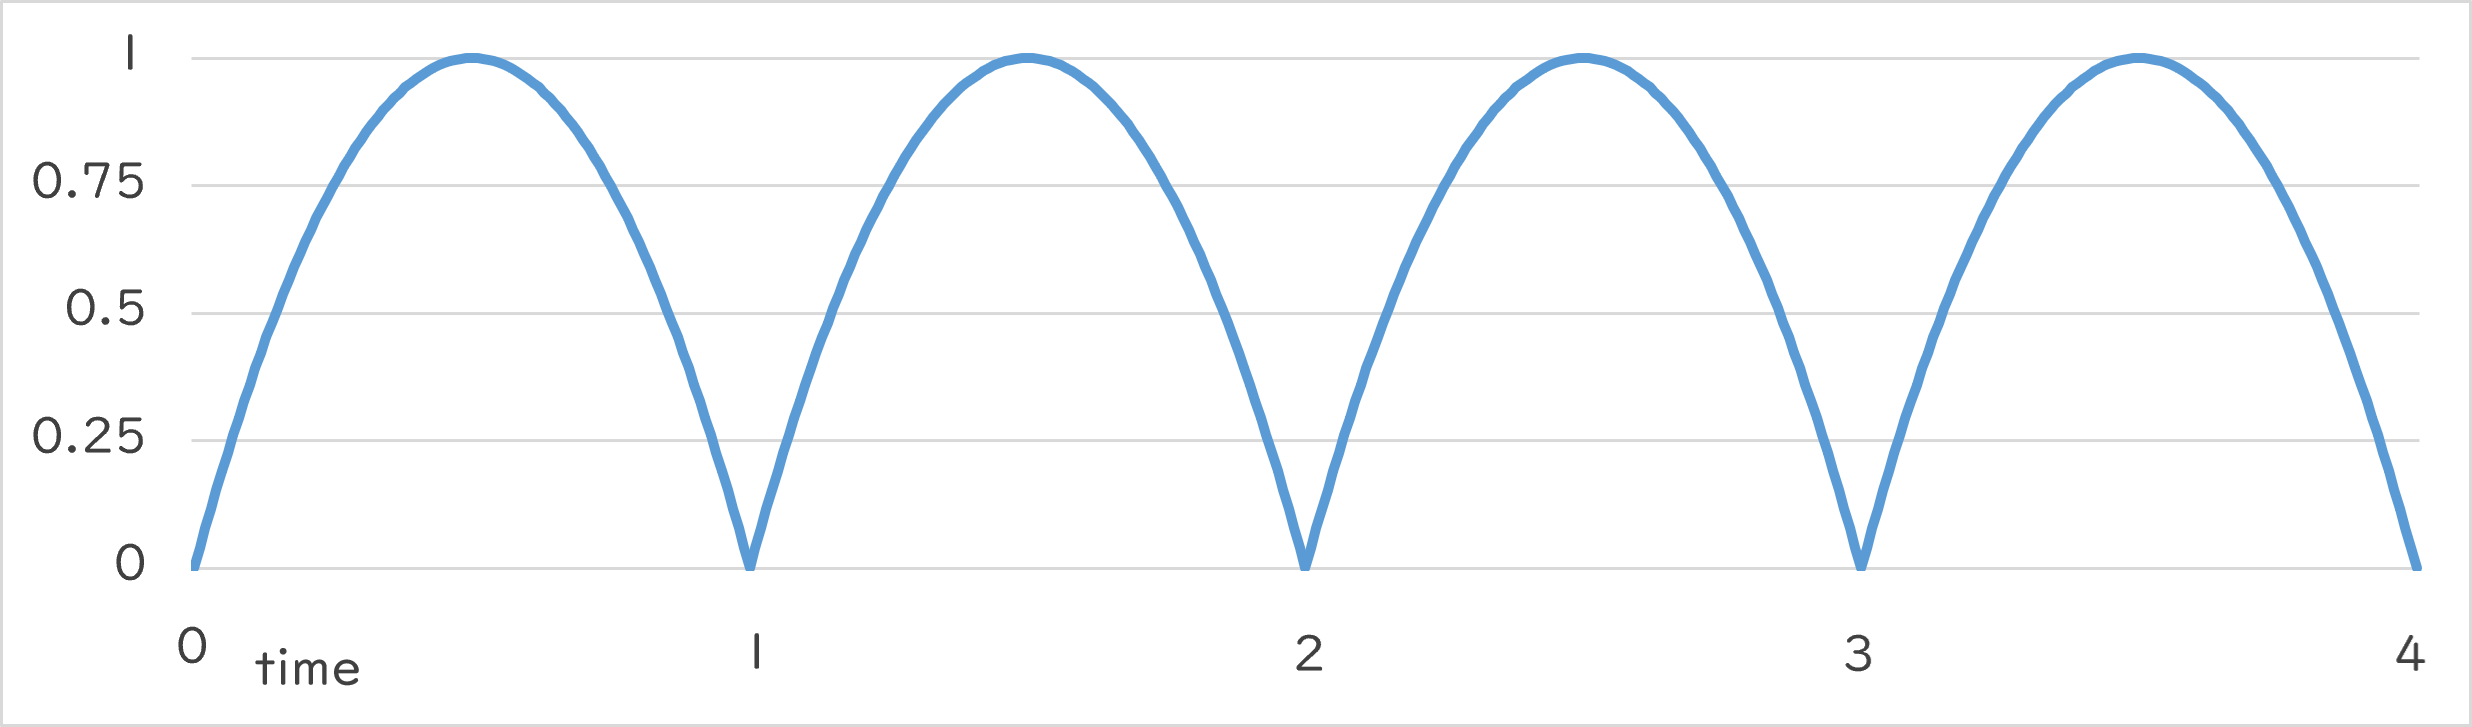
Periodic::Sine0_1 |
 |
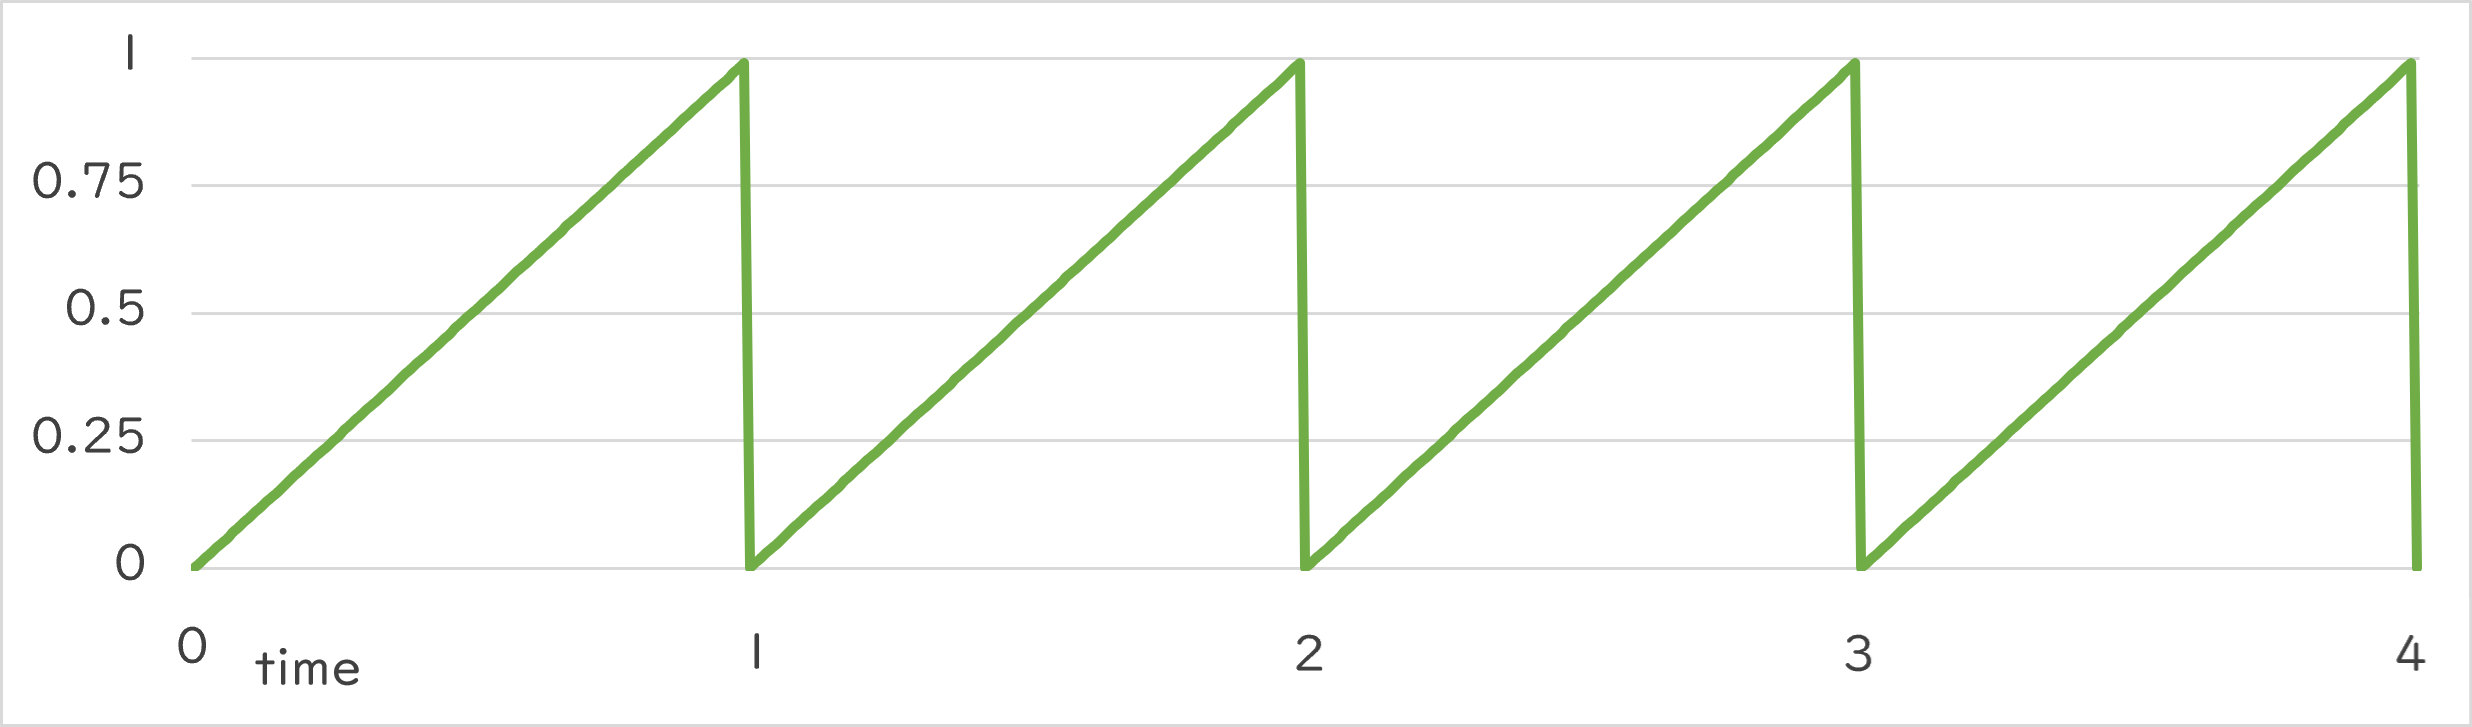
Periodic::Sawtooth0_1 |
 |
Periodic::Jump0_1 |
 |
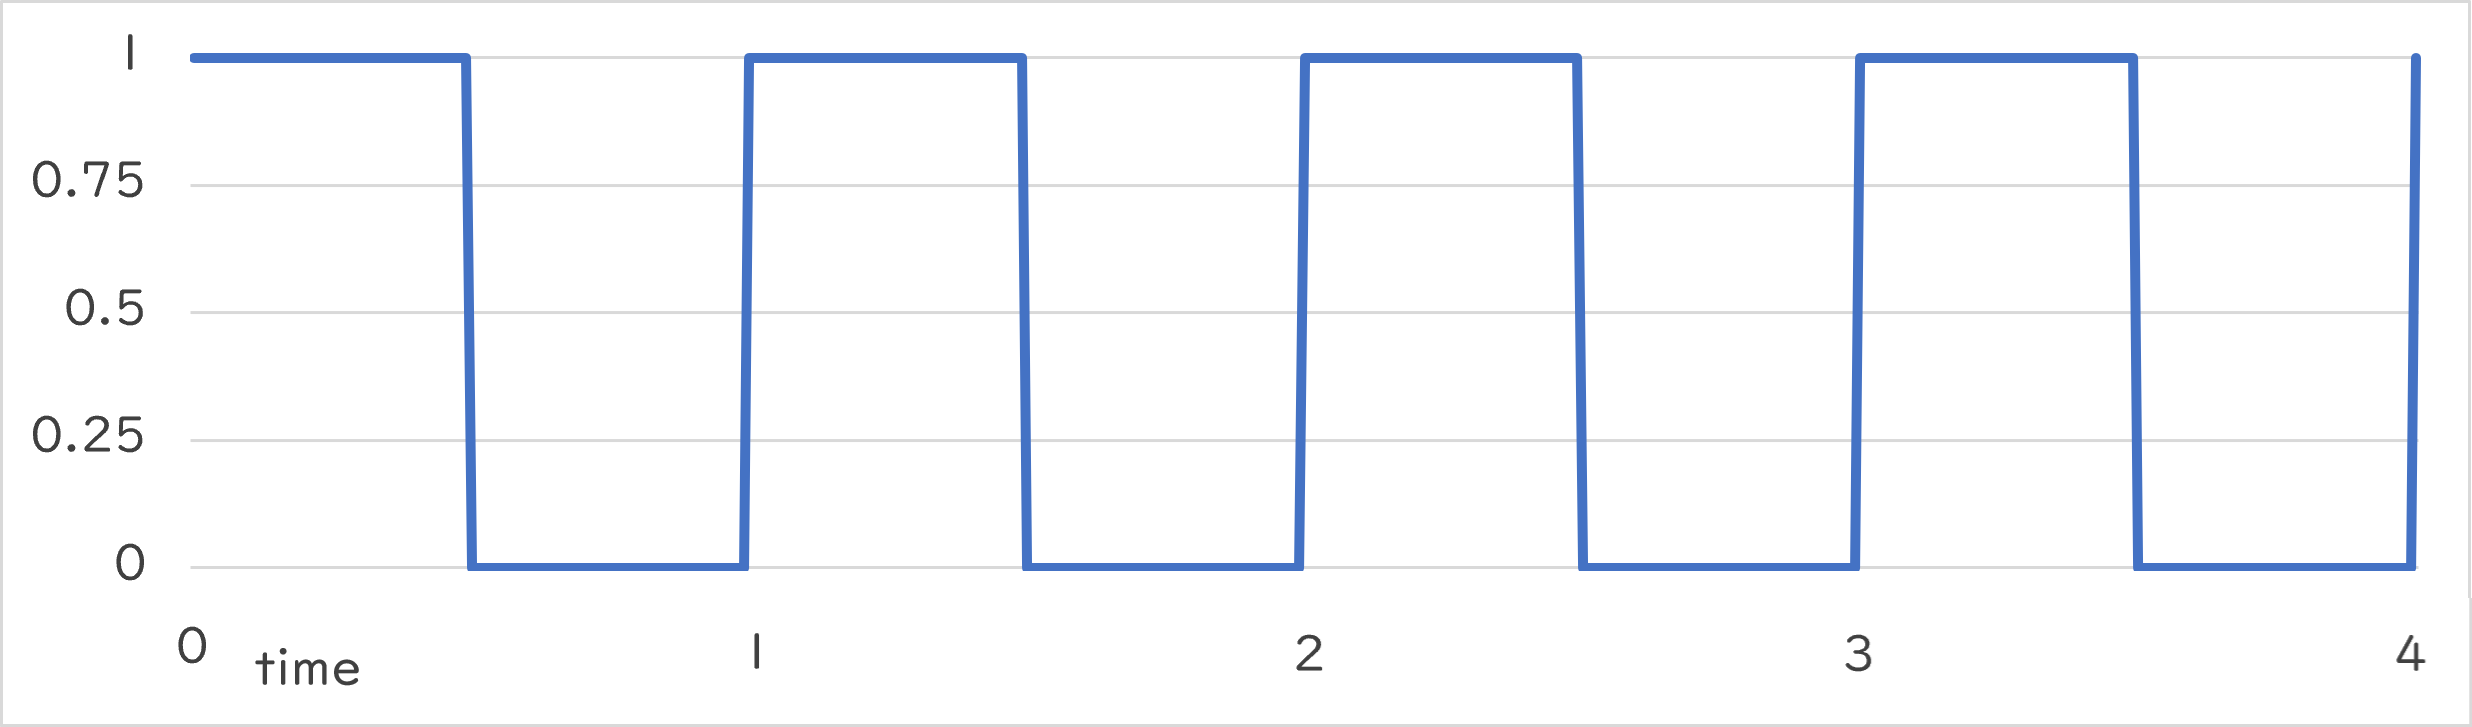
Periodic::Square0_1()
- 指定した周期で 0.0 か 1.0 を交互に返します
- 周期の前半では 1.0 を、残りの半分では 0.0 を返します
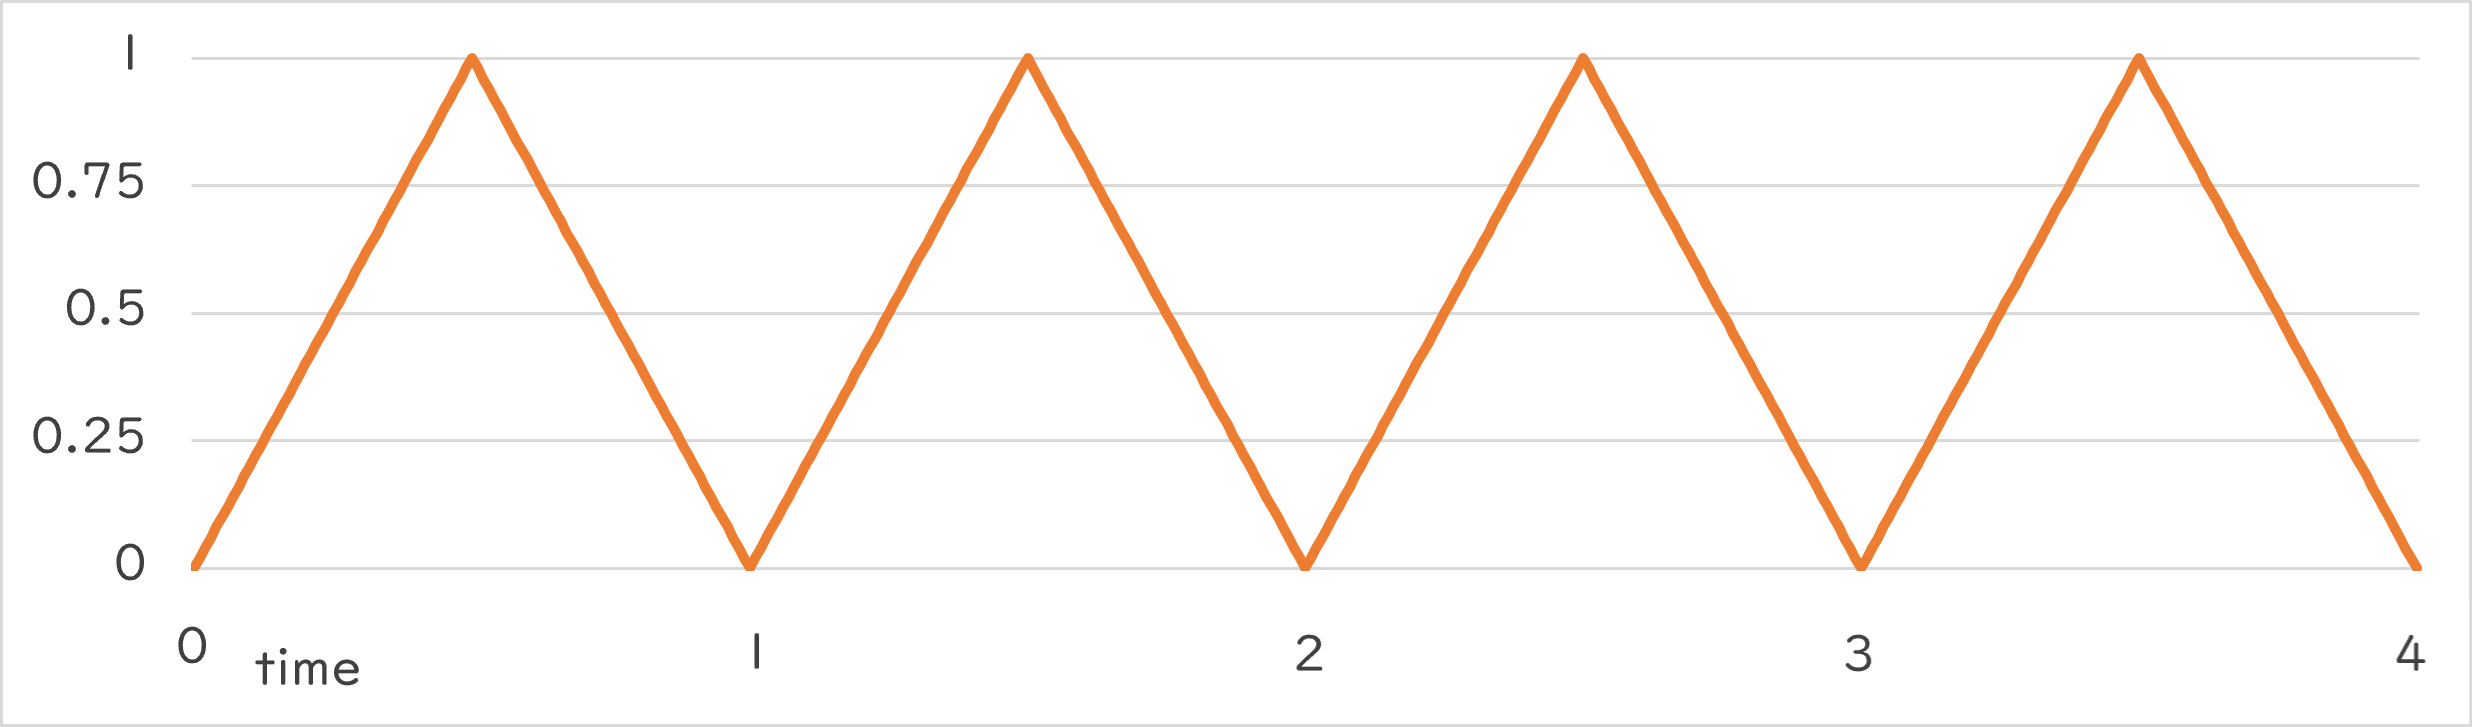
Periodic::Triangle0_1()
- 0.0 から一定の速度で値が大きくなって 1.0 に、そこから一定の速度で小さくなって 0.0 に、という変化を指定した周期で繰り返します
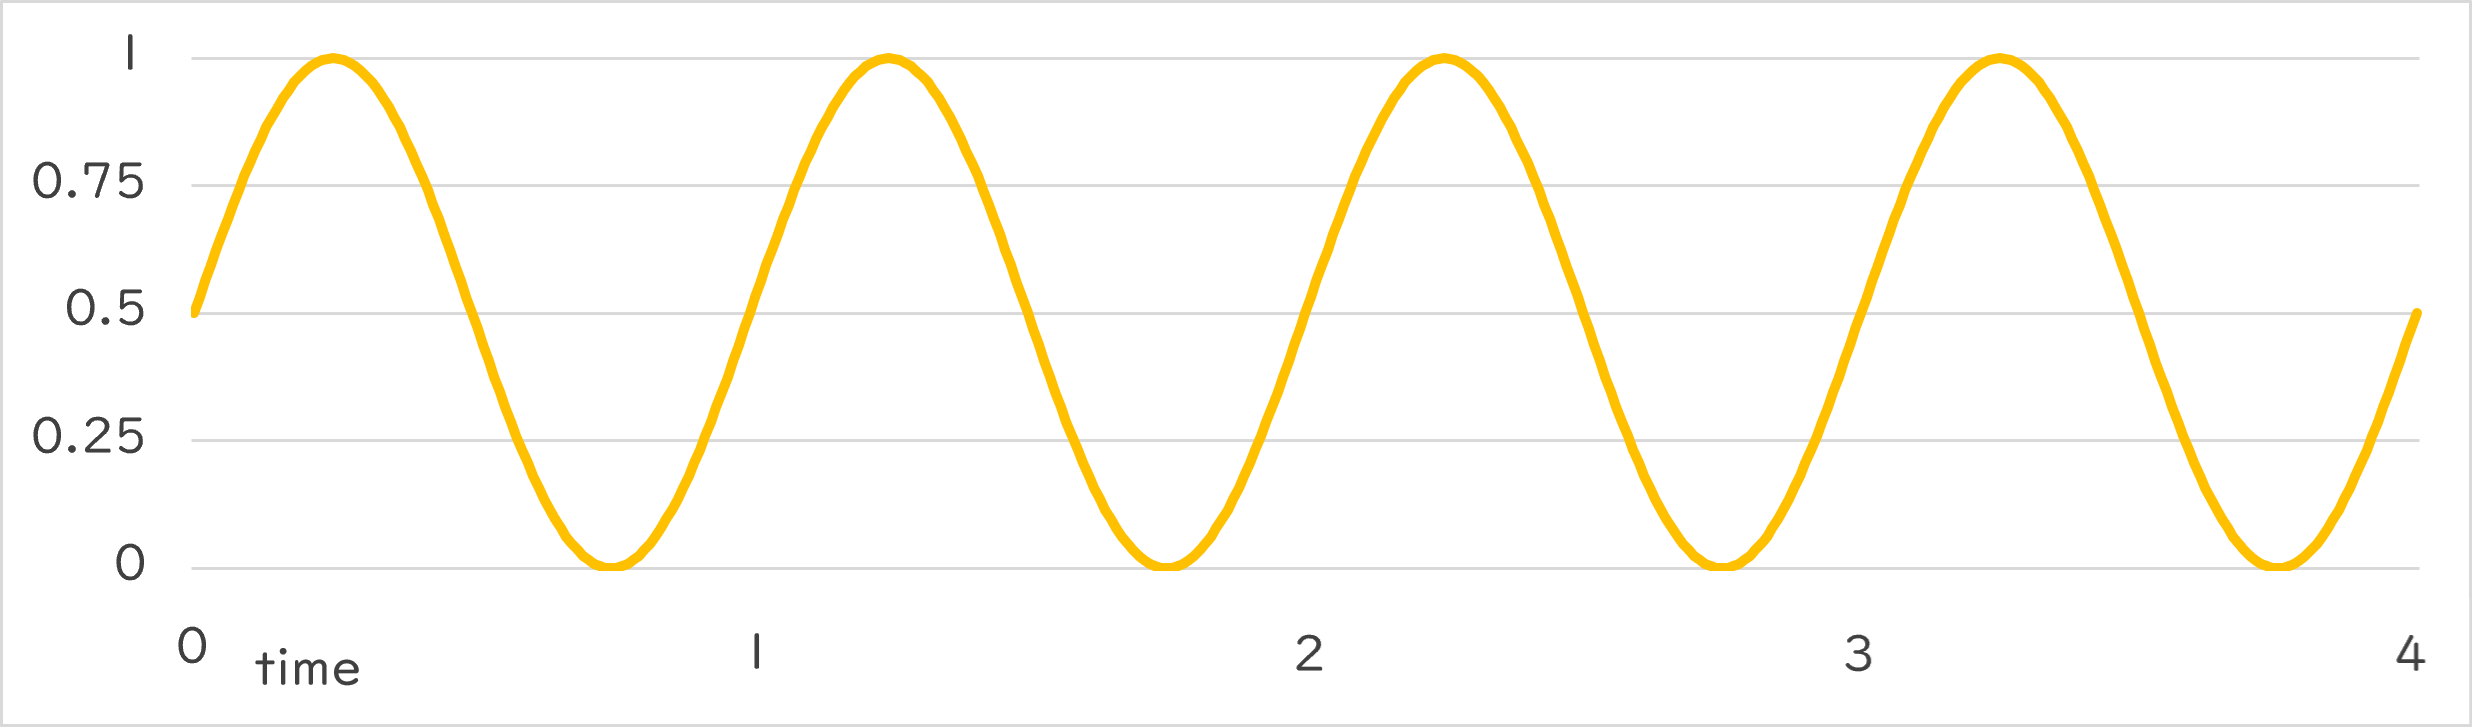
Periodic::Sine0_1()
- 指定した周期で、0.0~1.0 の範囲で正弦波(サインカーブ)を描く数値の変化を返します
Periodic::Sawtooth0_1()
- 指定した周期で、0.0 → 1.0 への変化を繰り返します
Periodic::Jump0_1()
- 指定した周期で、地面からジャンプしたときの速度のような数値変化を繰り返します
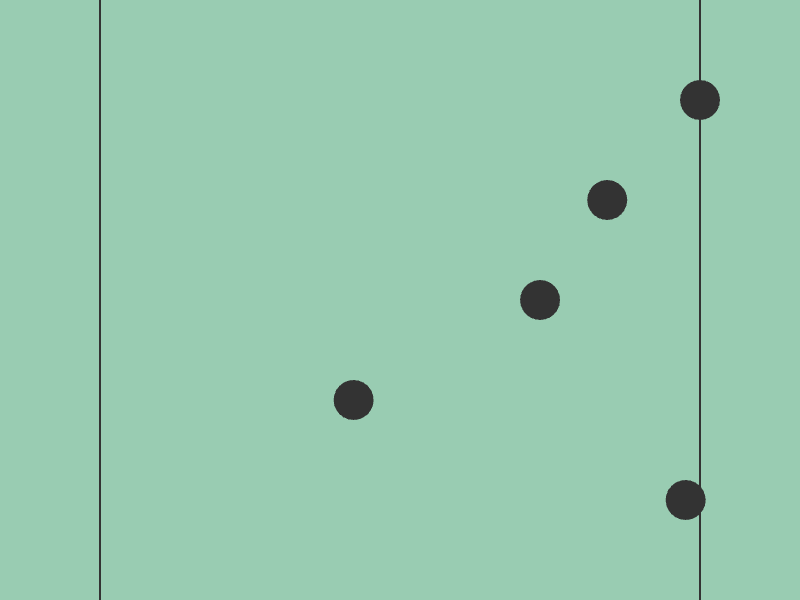
サンプルコード
# include <Siv3D.hpp>

void Main()
{
	Scene::SetBackground(ColorF{ 0.6, 0.8, 0.7 });

	while (System::Update())
	{
		const double p0 = Periodic::Square0_1(2s);
		const double p1 = Periodic::Triangle0_1(2s);
		const double p2 = Periodic::Sine0_1(2s);
		const double p3 = Periodic::Sawtooth0_1(2s);
		const double p4 = Periodic::Jump0_1(2s);

		Line{ 100, 0, 100, 600 }.draw(2, ColorF{ 0.2 });
		Line{ 700, 0, 700, 600 }.draw(2, ColorF{ 0.2 });

		Circle{ (100 + p0 * 600), 100, 20 }.draw(ColorF{ 0.2 });
		Circle{ (100 + p1 * 600), 200, 20 }.draw(ColorF{ 0.2 });
		Circle{ (100 + p2 * 600), 300, 20 }.draw(ColorF{ 0.2 });
		Circle{ (100 + p3 * 600), 400, 20 }.draw(ColorF{ 0.2 });
		Circle{ (100 + p4 * 600), 500, 20 }.draw(ColorF{ 0.2 });
	}
}
| 周期関数 | 動き |
|---|---|
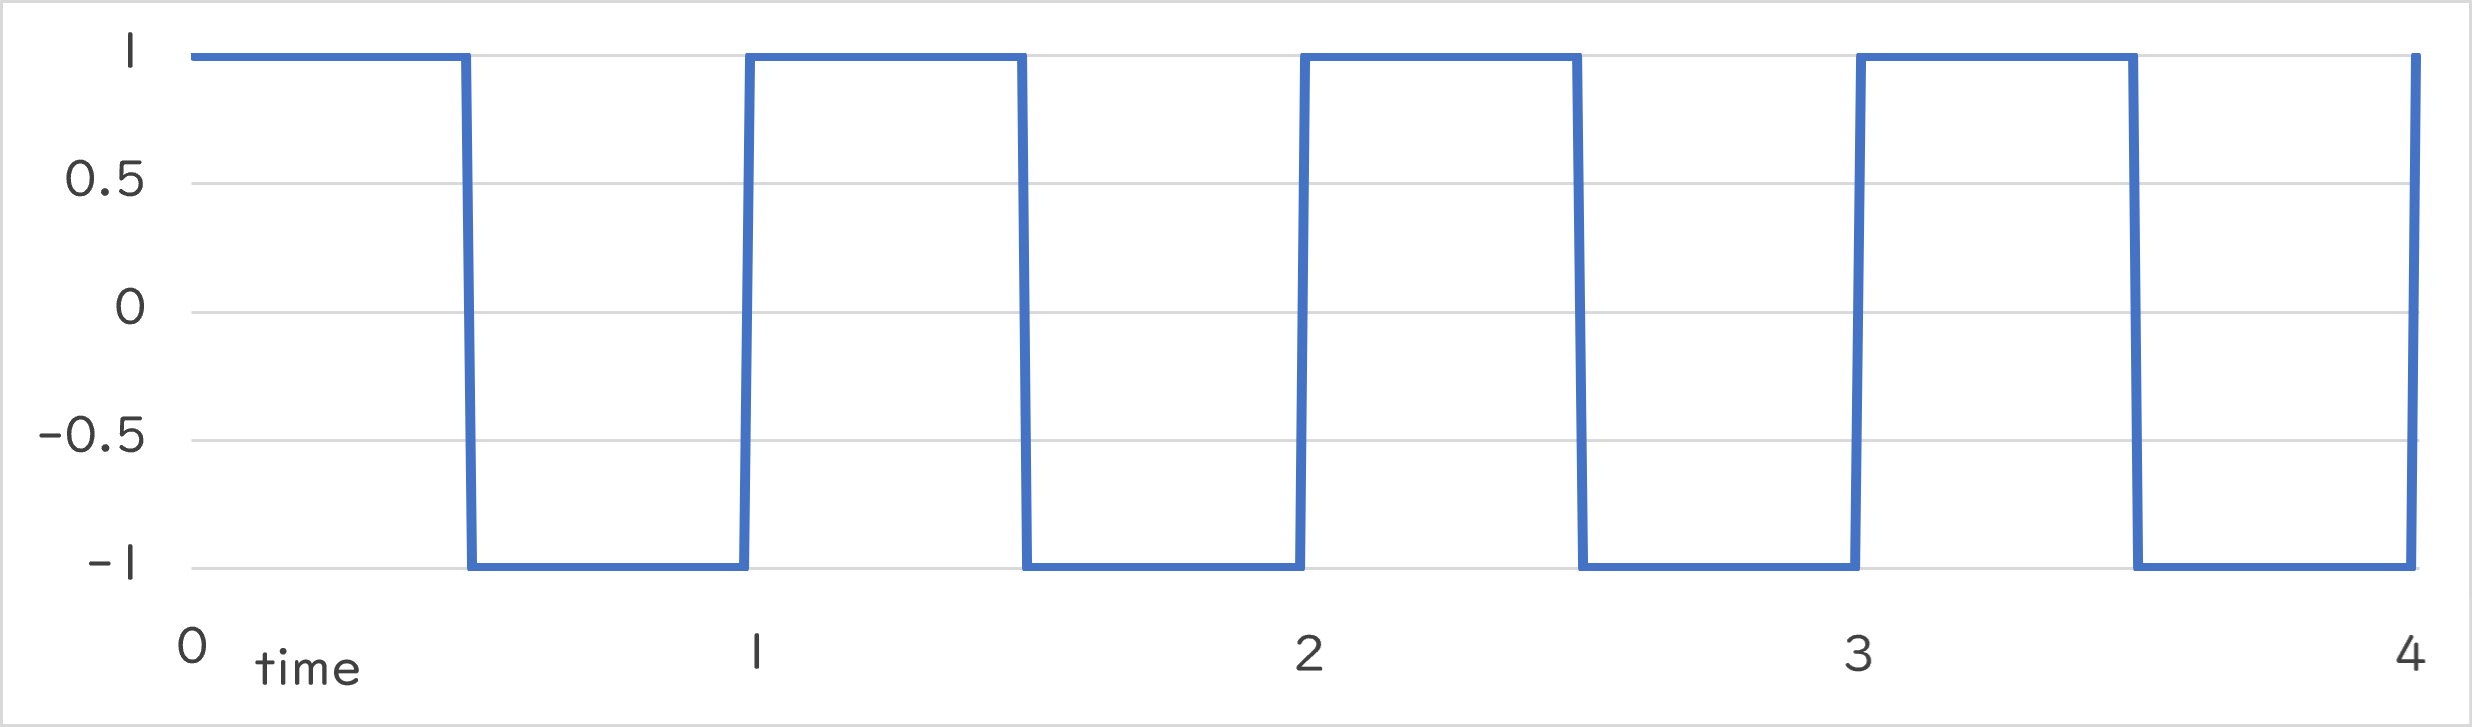
Periodic::Square1_1 |
 |
Periodic::Triangle1_1 |
 |
Periodic::Sine1_1 |
 |
Periodic::Sawtooth1_1 |
 |
Periodic::Jump1_1 |
 |
Periodic::Square1_1()
- 指定した周期で -1.0 か 1.0 を交互に返します
- 周期の前半では 1.0 を、残りの半分では -1.0 を返します
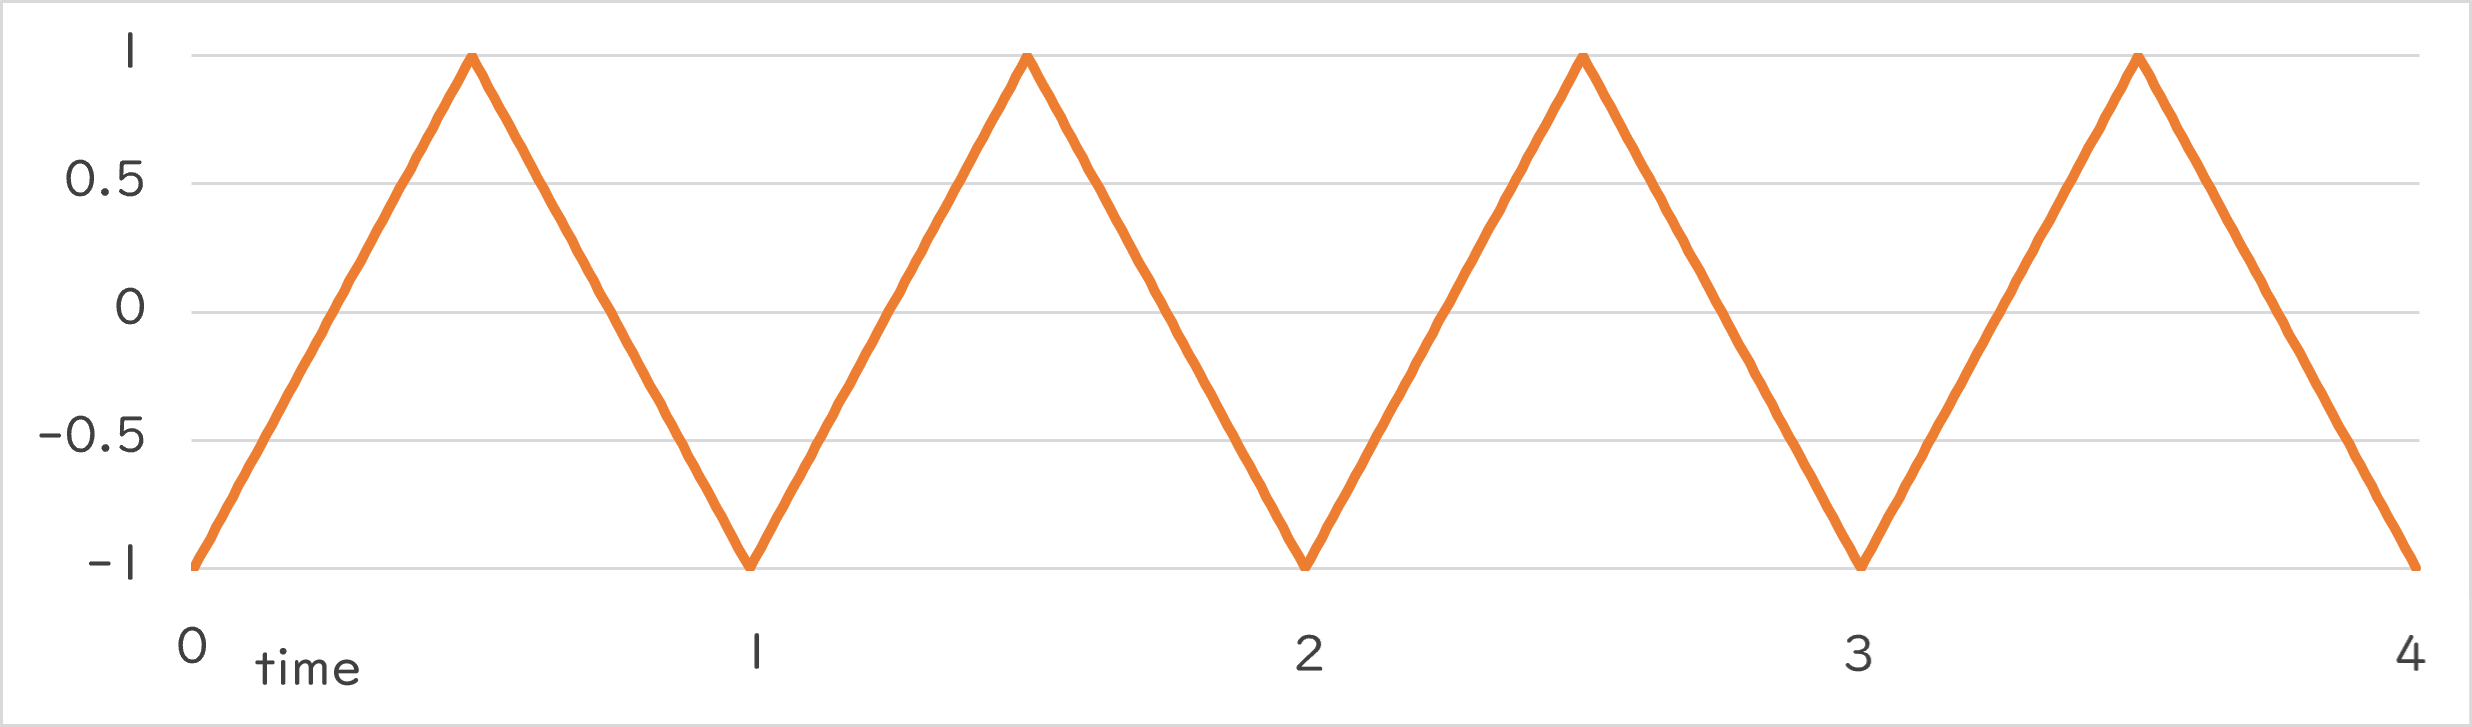
Periodic::Triangle1_1()
- -1.0 から一定の速度で値が大きくなって 1.0 に、そこから一定の速度で小さくなって -1.0 に、という変化を指定した周期で繰り返します
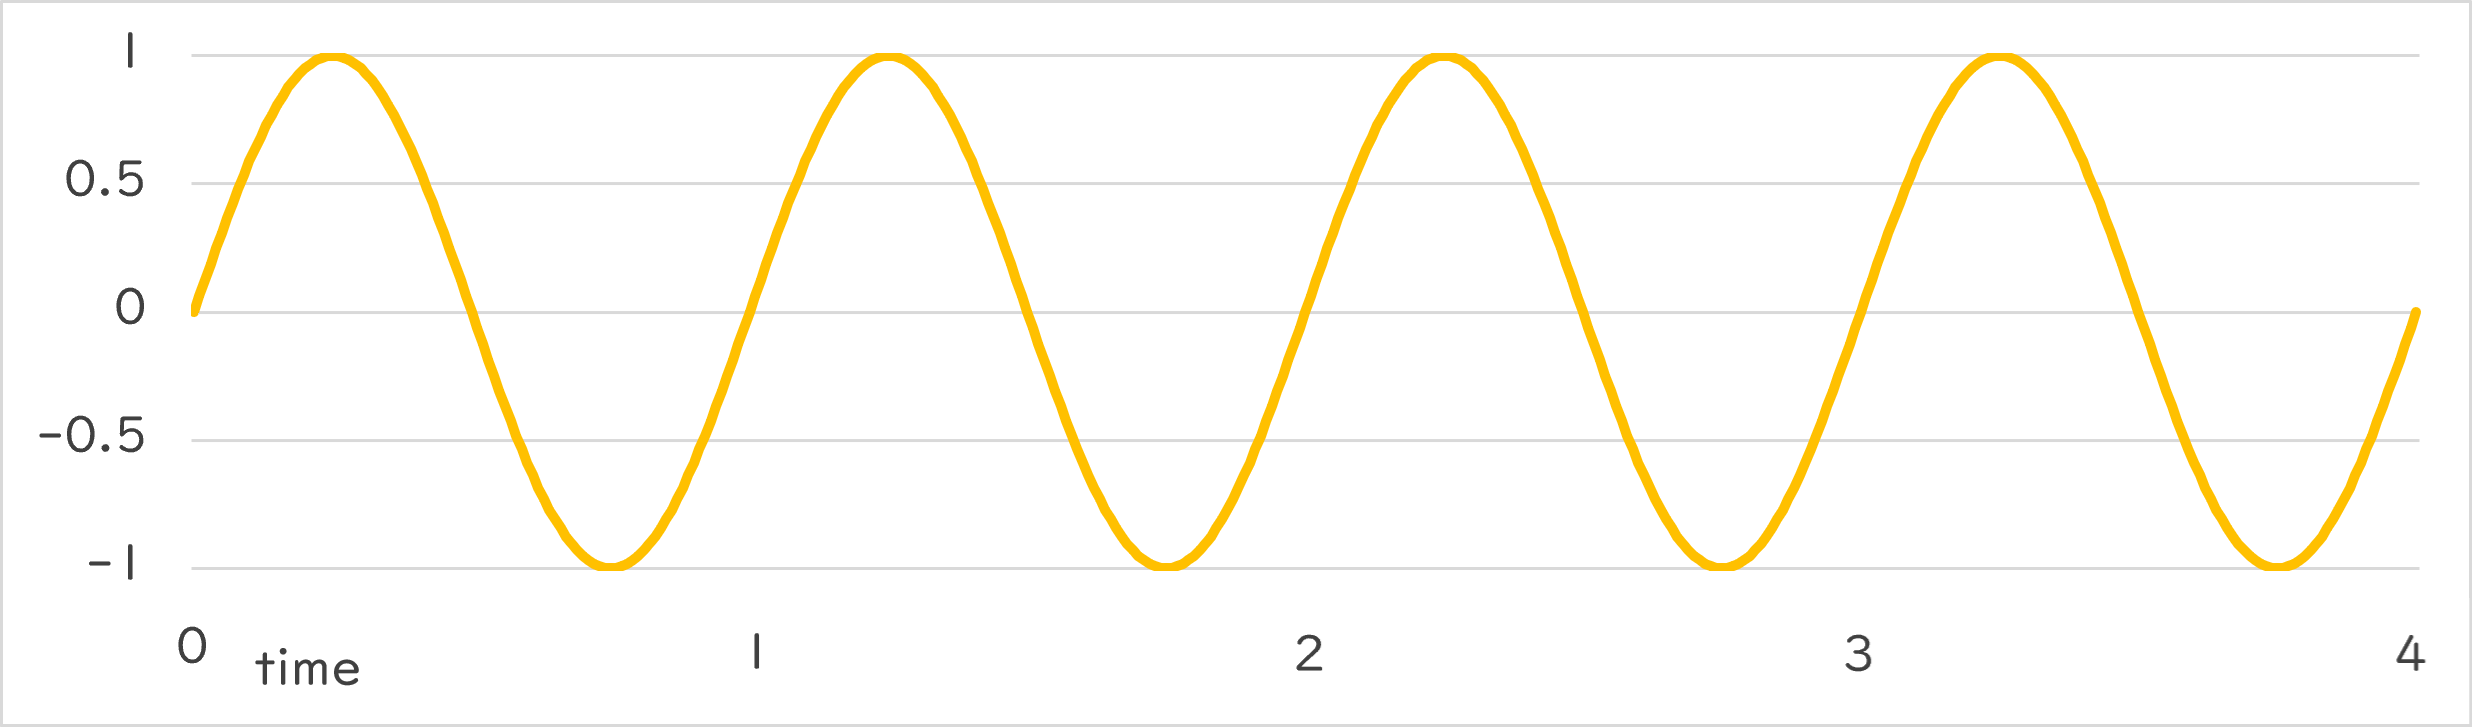
Periodic::Sine1_1()
- 指定した周期で、-1.0~1.0 の範囲で正弦波(サインカーブ)を描く数値の変化を返します
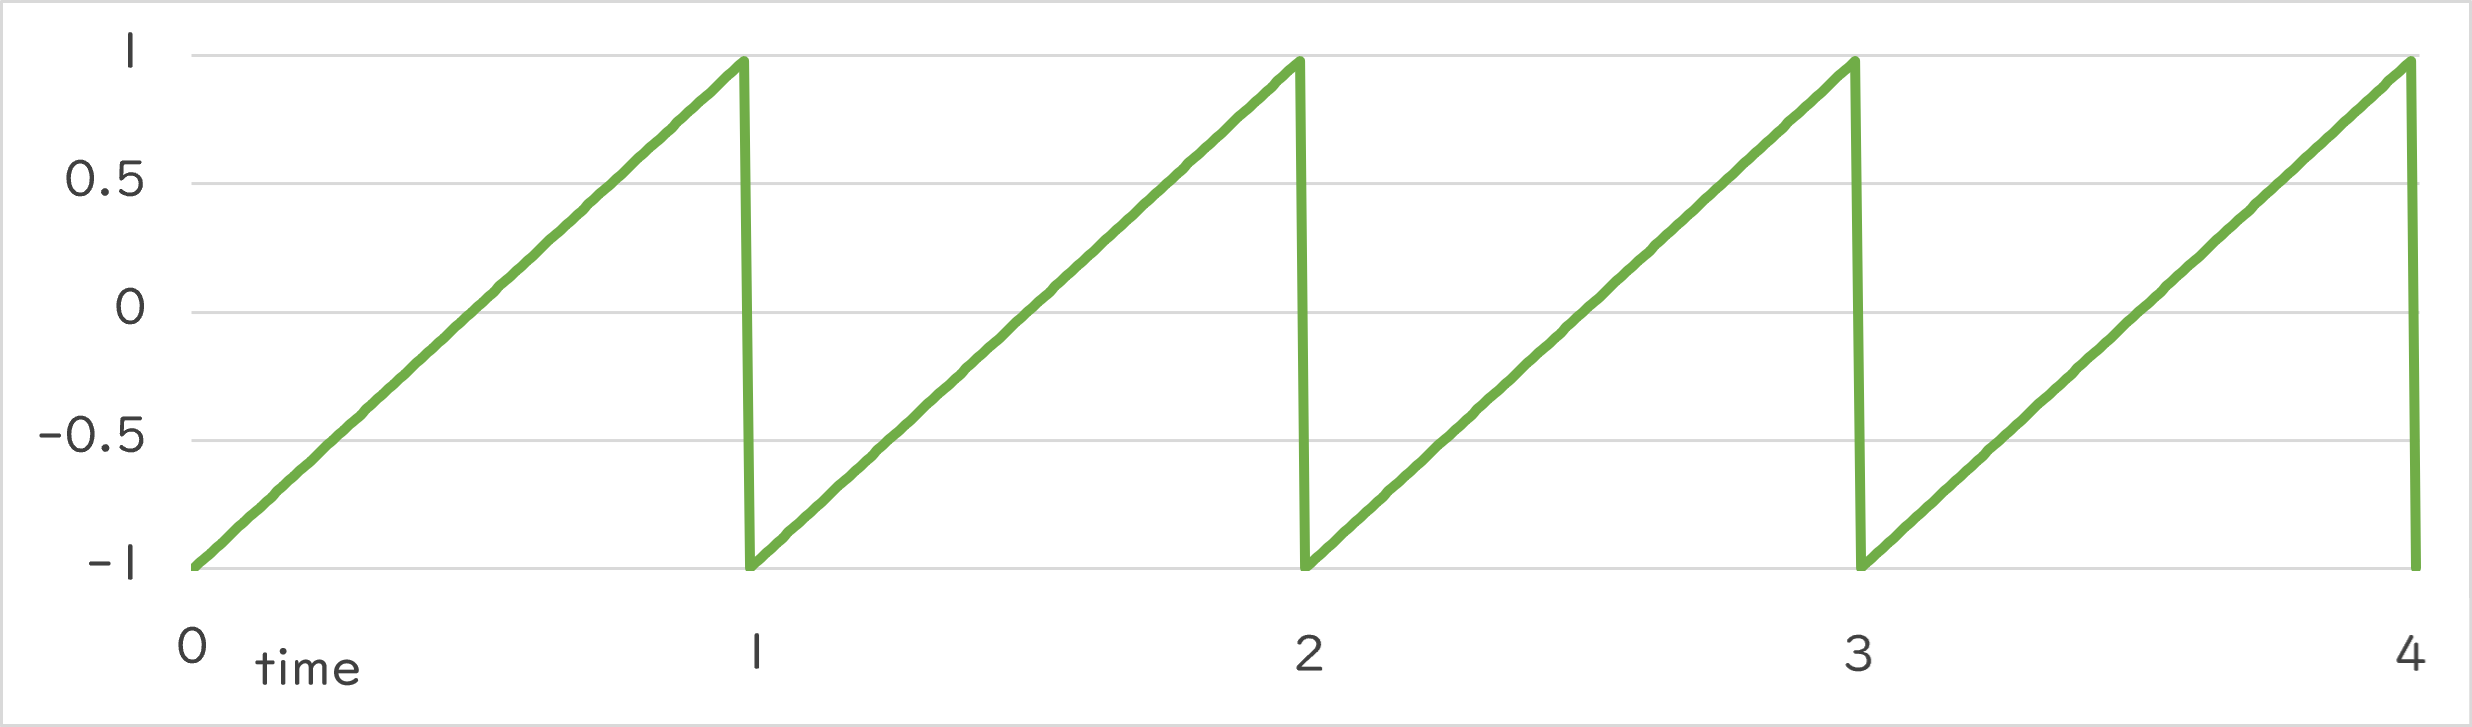
Periodic::Sawtooth1_1()
- 指定した周期で、-1.0 → 1.0 への変化を繰り返します
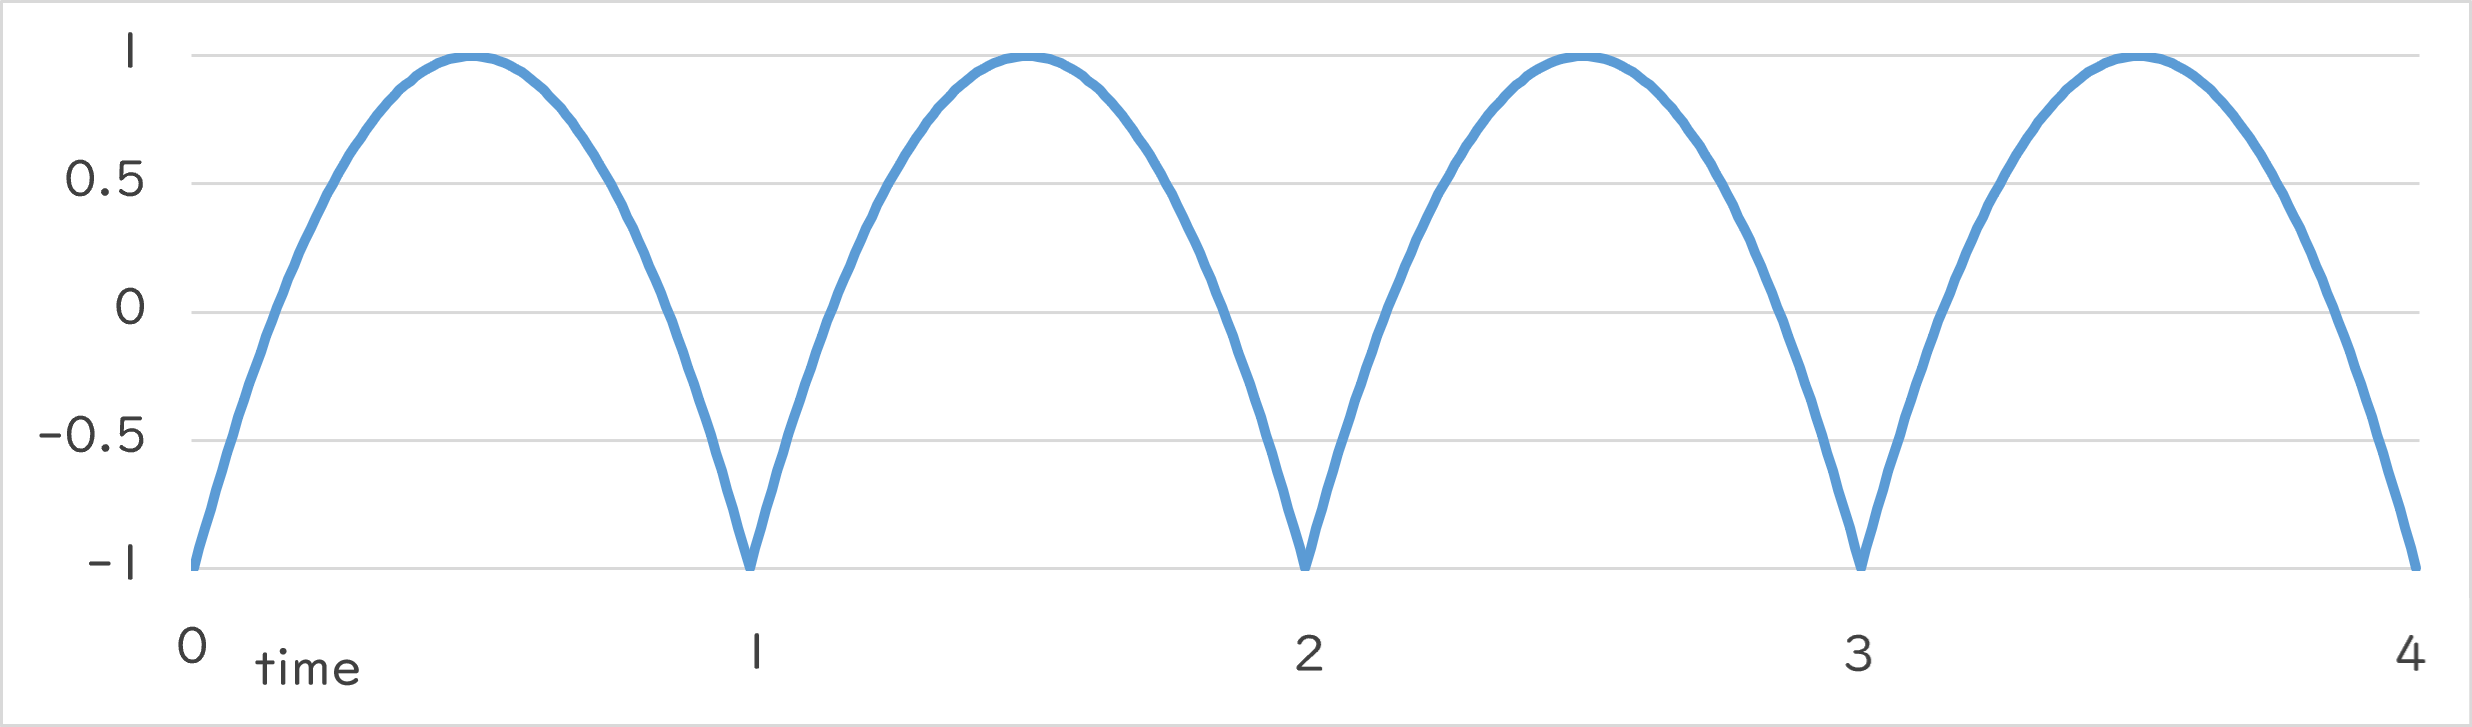
Periodic::Jump1_1()
- 指定した周期で、地面からジャンプしたときの速度のような数値変化を繰り返します
サンプルコード
# include <Siv3D.hpp>

void Main()
{
	Scene::SetBackground(ColorF{ 0.6, 0.8, 0.7 });

	while (System::Update())
	{
		const double p0 = Periodic::Square1_1(2s);
		const double p1 = Periodic::Triangle1_1(2s);
		const double p2 = Periodic::Sine1_1(2s);
		const double p3 = Periodic::Sawtooth1_1(2s);
		const double p4 = Periodic::Jump1_1(2s);

		Line{ 100, 0, 100, 600 }.draw(2, ColorF{ 0.2 });
		Line{ 700, 0, 700, 600 }.draw(2, ColorF{ 0.2 });

		Circle{ (400 + p0 * 300), 100, 20 }.draw(ColorF{ 0.2 });
		Circle{ (400 + p1 * 300), 200, 20 }.draw(ColorF{ 0.2 });
		Circle{ (400 + p2 * 300), 300, 20 }.draw(ColorF{ 0.2 });
		Circle{ (400 + p3 * 300), 400, 20 }.draw(ColorF{ 0.2 });
		Circle{ (400 + p4 * 300), 500, 20 }.draw(ColorF{ 0.2 });
	}
}
30.10 トランジション
- 「条件を満たしている間、値を少しずつ 1.0 に近づける。条件を満たしていなければ徐々に 0.0 に戻す」という処理を行う場合、
Transitionクラスを使うと便利です Transitionのコンストラクタには、0.0 から 1.0 に達するまでの最短所要時間と、最大値から最小値に減少するまでの最短所要時間を設定します- 毎フレーム
.update(state)に、増加の場合はtrueを、減少の場合はfalseを渡せば、設定された速度で値が増加・減少します .value()で現在値を取得できます

# include <Siv3D.hpp>

void Main()
{
	Scene::SetBackground(ColorF{ 0.6, 0.8, 0.7 });

	const Font font{ FontMethod::MSDF, 48, Typeface::Bold };

	Transition transition{ 1.0s, 0.25s };

	while (System::Update())
	{
		// マウスの左ボタンが押されていたら増加、そうでなければ減少
		transition.update(MouseL.pressed());

		RectF{ 0, 200, (transition.value() * 800), 200 }.draw();

		font(U"{:.2f}"_fmt(transition.value())).draw(40, Vec2{ 40, 40 }, ColorF{0.2});
	}
}
30.11 線形補間
- ある状態 A と B があり、その間を補間係数
tで補間したい場合、A.lerp(B, t)を使います - 補間係数は
tは、通常 0.0 ~ 1.0 の範囲です - 次のようなクラスがメンバ関数
.lerp()を持っています
| 要素 | クラス |
|---|---|
| 色 | ColorF, HSV |
| ベクトル | Point, Vec2, Vec3, Vec4 |
| 図形 | Line, Circle, Rect, RectF, Triangle, Quad, Ellipse, RoundRect |

# include <Siv3D.hpp>

void Main()
{
	Scene::SetBackground(ColorF{ 0.6, 0.8, 0.7 });

	const ColorF color0{ 0.1, 0.5, 1.0 };
	const ColorF color1{ 0.1, 1.0, 0.5 };

	const Circle circle0{ 100, 200, 20 };
	const Circle circle1{ 700, 200, 40 };

	const RectF rect0{ Arg::center(100, 300), 80 };
	const RectF rect1{ Arg::center(700, 300), 40 };

	const Triangle triangle0{ 100, 400, 100, 0_deg };
	const Triangle triangle1{ 700, 400, 100, 120_deg };

	const Line line0{ 50, 450, 150, 550 };
	const Line line1{ 750, 450, 650, 550 };

	while (System::Update())
	{
		const double t = Periodic::Triangle0_1(3s);

		RectF{ 200, 50, 400, 80 }.draw(color0.lerp(color1, t));

		circle0.lerp(circle1, t).draw(ColorF{ 0.2 });

		rect0.lerp(rect1, t).draw(ColorF{ 0.2 });

		triangle0.lerp(triangle1, t).draw(ColorF{ 0.2 });

		line0.lerp(line1, t).draw(2, ColorF{ 0.2 });
	}
}
30.12 イージング
- 0.0 から 1.0 へ線形に(一定の速度で)値を増加させるだけでは、単調な動きになってしまいます
- はじめは少しずつ加速し、ゴールに近づくとゆっくりになるといったように、速度に変化を与えると、洗練された視覚効果を実現できます
- 0.0 ↔ 1.0 の移動を、特徴を持ったカーブに変換できる イージング関数 を使い、モーションの印象を改善できます
- イージング関数は全部で約 30 種類用意されていて、一覧を Easing Functions Cheat Sheet で確認できます

# include <Siv3D.hpp>

void Main()
{
	Scene::SetBackground(ColorF{ 0.6, 0.8, 0.7 });

	// スタート位置
	Vec2 from{ 100, 100 };

	// ゴール位置
	Vec2 to{ 700, 500 };

	Stopwatch stopwatch{ StartImmediately::Yes };

	while (System::Update())
	{
		// 移動の割合 0.0~1.0
		const double t = Min(stopwatch.sF(), 1.0);

		// イージング関数を適用
		const double e = EaseInOutExpo(t);

		// スタート位置からゴール位置へ e の割合だけ進んだ位置
		const Vec2 pos = from.lerp(to, e);

		if (MouseL.down())
		{
			// スタート位置を現在の位置に
			from = pos;

			// ゴール位置をマウスカーソルの位置に
			to = Cursor::Pos();

			stopwatch.restart();
		}

		pos.asCircle(40).draw(ColorF{ 0.2 });
		to.asCircle(50).drawFrame(5, ColorF{ 0.2 });
	}
}
30.13 SmoothDamp
- 線形補間とイージングは、開始値と終了値(目標値)が固定されているケースに適しています
- 一方で、移動中に目標値が変更された場合、移動の速さや方向が急に変化して不自然な印象を与えてしまいます
- 目標値が変更されても、現在の速度を考慮してなめらかに移動・変化し続けるには、
Math::SmoothDamp関数を使います Math::SmoothDamp関数は、現在位置と目標位置、そして現在の速度から、時間ベースで次の位置を計算する、非常に便利で強力な補間関数です- 次のような型が
Math::SmoothDamp関数に対応しています
| 要素 | 型・クラス |
|---|---|
| 数値型 | float, double |
| ベクトル | Vec2, Vec3, Vec4 |
| 色 | ColorF |
- Siv3D v0.8 ではより多くのクラスがサポートされる予定です
関数の概要
Vec2用のMath::SmoothDamp関数は次のとおりです。
Vec2 Math::SmoothDamp(const Vec2& from, const Vec2& to, Vec2& velocity, double smoothTime, const Optional<double>& maxSpeed = unspecified, double deltaTime = Scene::DeltaTime());`
from: 現在位置to: 目標位置velocity: 現在の速度(速度を保存している変数を参照で渡す)smoothTime: 平滑化時間(最大速度で目標に向かうときに期待される所要時間)。動く目標を追いかけるときの遅延時間で、小さいと目標に早く到達するmaxSpeed: 最大速度。無制限の場合はunspecifiedを指定するdeltaTime: 前回からの経過時間(デフォルトはScene::DeltaTime())- 戻り値: 次の位置

# include <Siv3D.hpp>

void Main()
{
	Scene::SetBackground(ColorF{ 0.6, 0.8, 0.7 });

	// 現在位置
	Vec2 currentPos{ 100, 100 };

	// 移動速度
	Vec2 velocity{ 0, 0 };

	while (System::Update())
	{
		// 目標位置
		const Vec2 targetPos = Cursor::Pos();

		currentPos = Math::SmoothDamp(currentPos, targetPos, velocity, 0.5);

		currentPos.asCircle(40).draw(ColorF{ 0.2 });

		targetPos.asCircle(50).drawFrame(4, ColorF{ 0.2 });
	}
}
30.14 アプリケーションの起動時間の取得
- アプリケーションの起動からの経過時間を現実の時間で取得するには、次のような関数を使います
- 戻り値は
uint64型です
- 戻り値は
| コード | 説明 |
|---|---|
Time::GetSec() |
アプリケーションの起動からの経過時間を秒単位で返す |
Time::GetMillisec() |
アプリケーションの起動からの経過時間をミリ秒単位で返す |
Time::GetMicrosec() |
アプリケーションの起動からの経過時間をマイクロ秒単位で返す |
Time::GetNanosec() |
アプリケーションの起動からの経過時間をナノ秒単位で返す |
# include <Siv3D.hpp>

void Main()
{
	while (System::Update())
	{
		ClearPrint();
		Print << Time::GetSec();
		Print << Time::GetMillisec();
		Print << Time::GetMicrosec();
		Print << Time::GetNanosec();
	}
}
30.15 UNIX 時間の取得
- 1970 年 1 月 1 日午前 0 時 0 分 0 秒(UNIX エポック)からの経過時間(UNIX 時間)を取得するには、次の関数を使います
- 戻り値は
uint64型です
- 戻り値は
| コード | 説明 |
|---|---|
Time::GetSecSinceEpoch() |
現在の UNIX 時間を秒単位で返す |
Time::GetMillisecSinceEpoch() |
現在の UNIX 時間をミリ秒単位で返す |
Time::GetMicrosecSinceEpoch() |
現在の UNIX 時間をマイクロ秒単位で返す |
# include <Siv3D.hpp>

void Main()
{
	while (System::Update())
	{
		ClearPrint();
		Print << Time::GetSecSinceEpoch();
		Print << Time::GetMillisecSinceEpoch();
		Print << Time::GetMicrosecSinceEpoch();
	}
}
30.16 日付と時刻クラス
- 日付と時刻を扱うためのクラス
DateTimeが用意されています
struct DateTime
{
	int32 year;
	int32 month;
	int32 day;
	int32 hour;
	int32 minute;
	int32 second;
	int32 milliseconds;
};
- 時間型の値を使って加減算ができます
DateTime::Now()は現在の日付と時刻をDateTime型で返します
# include <Siv3D.hpp>

void Main()
{
	// 現在の日付と時刻を取得
	const DateTime t = DateTime::Now();
	Print << t;
	Print << t.year;
	Print << t.month;
	Print << t.day;
	Print << t.hour;
	Print << t.minute;
	Print << t.second;
	Print << t.milliseconds;

	// 30 分前
	Print << (t - 30min);

	// 来週
	Print << (t + 7_d);

	// 2030 年まであと
	const Duration s = (DateTime{ 2030, 1, 1 } - t);
	Print << s;
	Print << DaysF{ s };
	Print << DurationCast<Days>(s);

	while (System::Update())
	{

	}
}
30.17 時差の取得
Time::UTCOffsetMinutes()は、使用しているコンピュータの、協定世界時 (UTC) との時差を分単位で返します