48. 2D レンダーステート
2D 描画の設定(レンダーステート)をカスタマイズして、さまざまな画面効果を得る方法を学びます。
48.1 2D レンダーステートの概要
- 2D 描画では、次のような設定を変更できます
48.1.1 描画色の乗算
- 図形やテクスチャを描く際に、本来の色に RGBA 成分を乗算して描画します
ScopedColorMul2Dで設定する方法を 48.3 で説明します
48.1.2 描画色の加算
- 図形やテクスチャを描く際に、本来の色に RGBA 成分を加算・減算して描画します
ScopedColorAdd2Dで設定する方法を 48.4 で説明します
48.1.3 ブレンドステート
- 描画先のピクセル色と、描画する色をどのように合成するかを設定します
BlendStateで設定を行い、ScopedRenderStates2Dで適用する方法を 48.7 で説明します
48.1.4 サンプラーステート
- テクスチャを拡大・縮小して描画する際の補間方法を設定します
- UV 座標が 0.0~1.0 の範囲を超えたときの処理を設定します
SamplerStateで設定を行い、ScopedRenderStates2Dで適用する方法を 48.8 および 48.9 で説明します
48.1.5 ラスタライザーステート
- ワイヤフレーム表示モードを設定します
- シザー矩形を設定します
- 時計回りの三角形・反時計回りの三角形について、無視(カリング)するかどうかを設定します
RasterizerStateで設定を行い、ScopedRenderStates2Dで適用する方法を 48.10 ~ 48.12 で説明します
48.1.6 ビューポート
- 描画領域を変更します
ScopedViewport2Dで設定する方法を 48.13 で説明します
48.2 Scoped~ のはたらき
- この章では、
Scoped~という名前の付いたクラスが登場します:
| コード | 説明 |
|---|---|
ScopedColorMul2D |
描画時に色を乗算する |
ScopedColorAdd2D |
描画時に色を加算する |
ScopedRenderStates2D |
2D 描画時のレンダーステートを変更する |
ScopedViewport2D |
描画領域を変更する |
- ソースコード上では、これらのクラスのオブジェクトを作るだけで、その変数を使っていないため、何も作用をしていないように見えるかもしれません
- 実際はコンストラクタの中で、渡された設定をエンジンに設定し、自身が破棄されるとき(スコープが終了するとき)に、デストラクタで以前の設定に戻す仕事を行っています
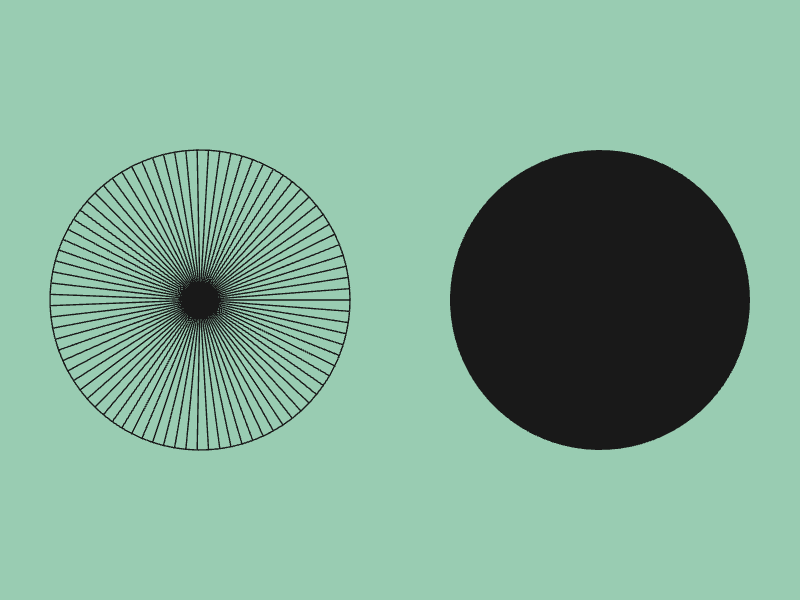
- 次のサンプルコードで
ScopedRenderStates2Dのはたらきを確認してみましょう- 1 つ目の円はワイヤフレーム表示モードで描画され、2 つ目の円は通常の描画モードで描画されます
# include <Siv3D.hpp>

void Main()
{
	Scene::SetBackground(ColorF{ 0.6, 0.8, 0.7 });

	while (System::Update())
	{
		{
			// レンダーステートを変更する(以前の状態も保存)
			const ScopedRenderStates2D rasterizer{ RasterizerState::WireframeCullNone };

			Circle{ 200, 300, 150 }.draw(ColorF{ 0.1 });

		} // ここで rasterizer のデストラクタが呼び出され、レンダーステートを以前の状態に戻す

		Circle{ 600, 300, 150 }.draw(ColorF{ 0.1 });
	}
}
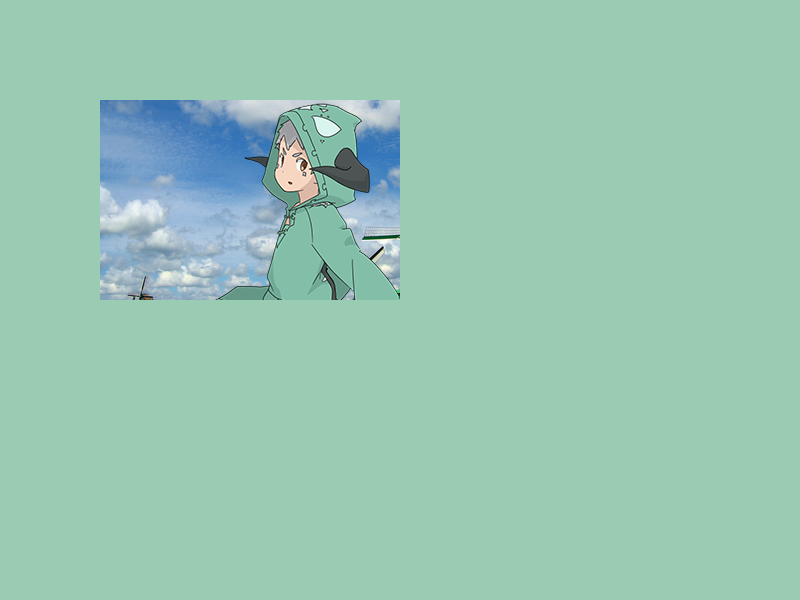
48.3 描画色への乗算
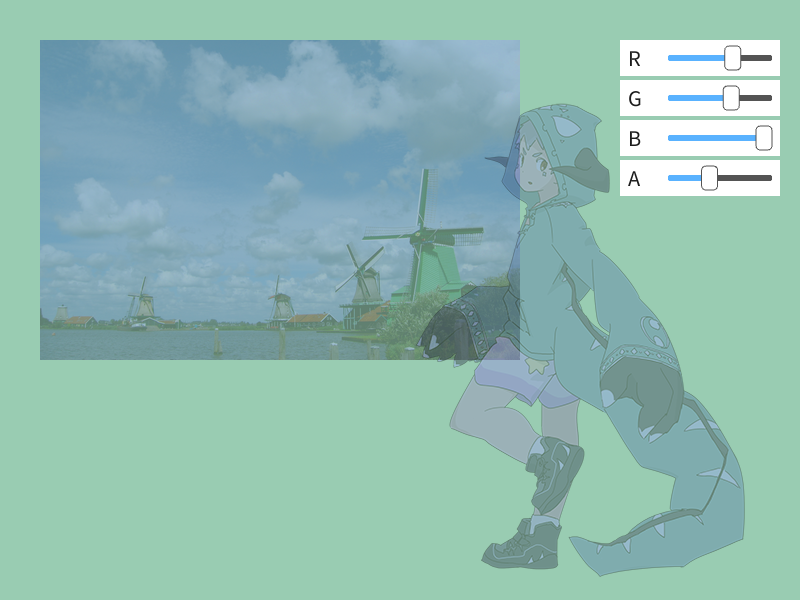
- 画像や図形を描く際、本来の色に RGBA 成分を乗算して描画するには、
ScopedColorMul2Dオブジェクトのコンストラクタに、乗算したい値を設定します - そのオブジェクトが有効な間、描画の RGBA 値が乗算されます
- デフォルト値は
ColorF{ 1.0, 1.0, 1.0, 1.0 }です Textureの.draw()に色を渡すことで乗算の色を設定することもできます(チュートリアル 31.12)。ScopedColorMul2Dはその設定を一括して行うものです
# include <Siv3D.hpp>

void Main()
{
	Scene::SetBackground(ColorF{ 0.6, 0.8, 0.7 });

	const Texture texture1{ U"example/windmill.png" };
	const Texture texture2{ U"example/siv3d-kun.png" };
	ColorF color{ 1.0, 1.0, 1.0, 1.0 };

	while (System::Update())
	{
		{
			// 描画時に色を乗算するように設定する
			const ScopedColorMul2D colorMul{ color };

			texture1.draw(40, 40);
			texture2.draw(400, 100);
		}

		SimpleGUI::Slider(U"R", color.r, Vec2{ 620, 40 }, 40);
		SimpleGUI::Slider(U"G", color.g, Vec2{ 620, 80 }, 40);
		SimpleGUI::Slider(U"B", color.b, Vec2{ 620, 120 }, 40);
		SimpleGUI::Slider(U"A", color.a, Vec2{ 620, 160 }, 40);
	}
}
48.4 描画色への加算
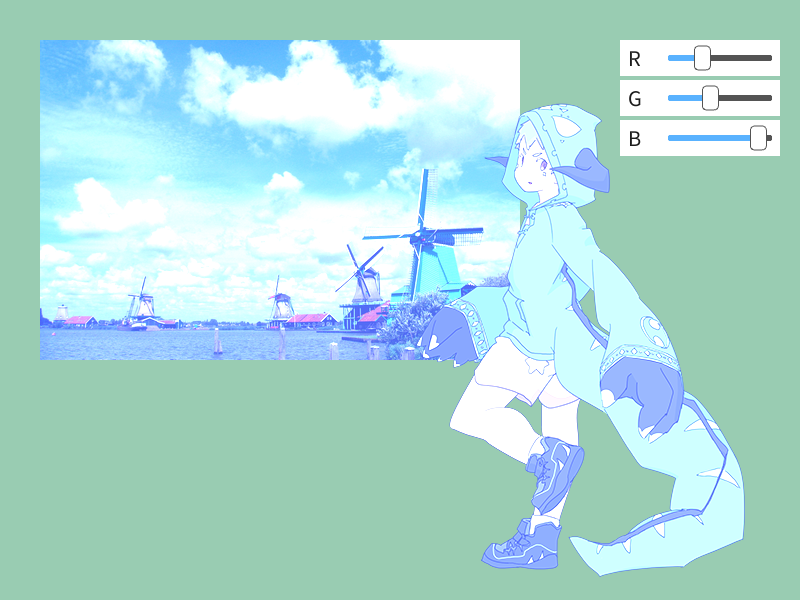
- 画像や図形を描く際、本来の色に RGBA 成分を加算して描画するには、
ScopedColorAdd2Dオブジェクトのコンストラクタに、加算したい値を設定します - そのオブジェクトが有効な間、描画に対して RGBA 値が加算されます
- デフォルト値は
ColorF{ 0.0, 0.0, 0.0, 0.0 }です - 負の値を設定することで減算も可能です
- 48.3 の描画色乗算後に適用されます
# include <Siv3D.hpp>

void Main()
{
	Scene::SetBackground(ColorF{ 0.6, 0.8, 0.7 });

	const Texture texture1{ U"example/windmill.png" };
	const Texture texture2{ U"example/siv3d-kun.png" };
	ColorF color{ 0.0, 0.0, 0.0, 0.0 };

	while (System::Update())
	{
		{
			// 描画時に色を加算するように設定する
			const ScopedColorAdd2D colorAdd{ color };

			texture1.draw(40, 40);
			texture2.draw(400, 100);
		}

		SimpleGUI::Slider(U"R", color.r, Vec2{ 620, 40 }, 40);
		SimpleGUI::Slider(U"G", color.g, Vec2{ 620, 80 }, 40);
		SimpleGUI::Slider(U"B", color.b, Vec2{ 620, 120 }, 40);
	}
}
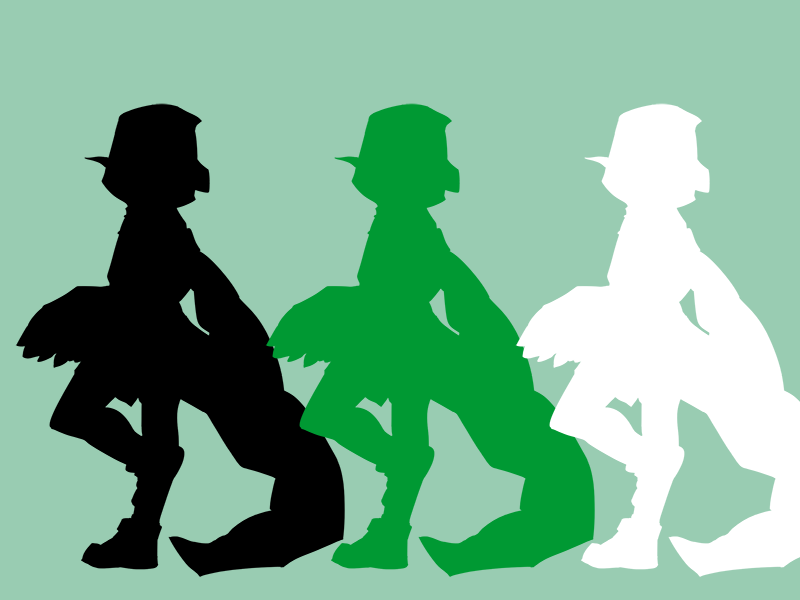
48.5 テクスチャの単色描画
.draw(ColorF{ 0.0 })で黒く描画したテクスチャに、ScopedColorAdd2Dを使って色を加算することで、単色で描画することができます
# include <Siv3D.hpp>

void Main()
{
	Scene::SetBackground(ColorF{ 0.6, 0.8, 0.7 });
	const Texture texture{ U"example/siv3d-kun.png" };

	while (System::Update())
	{
		// 黒で塗りつぶし
		{
			texture.draw(0, 100, ColorF{ 0.0 });
		}

		// 緑で塗りつぶし
		{
			const ScopedColorAdd2D color{ 0.0, 0.6, 0.2 };
			texture.draw(250, 100, ColorF{ 0.0 });
		}

		// 白で塗りつぶし
		{
			const ScopedColorAdd2D color{ 1.0, 1.0, 1.0 };
			texture.draw(500, 100, ColorF{ 0.0 });
		}
	}
}
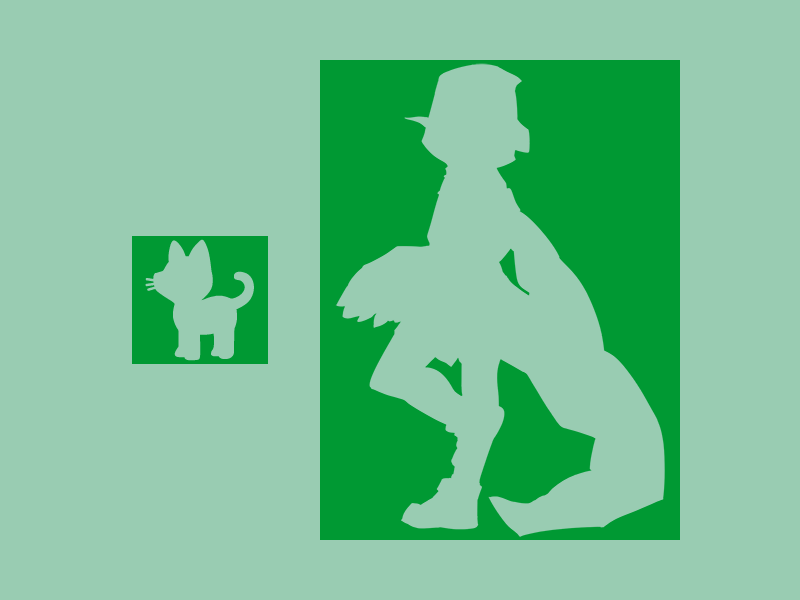
48.6 透過部分の反転
.draw(ColorF{ 0.0, -1.0 })で透過部分のアルファ値を0.0, 非透過部分のアルファ値を-1.0にしたあとに、ScopedColorAdd2Dを使ってアルファ値を1.0加算することで、透過と非透過部分を反転させることができます
# include <Siv3D.hpp>

void Main()
{
	Scene::SetBackground(ColorF{ 0.6, 0.8, 0.7 });
	const Texture emoji{ U"🐈"_emoji };
	const Texture texture{ U"example/siv3d-kun.png" };

	while (System::Update())
	{
		{
			const ScopedColorAdd2D color{ 0.0, 0.6, 0.2, 1.0 };
			emoji.drawAt(200, 300, ColorF{ 0.0, -1.0 });
			texture.drawAt(500, 300, ColorF{ 0.0, -1.0 });
		}
	}
}
48.7 加算ブレンド
ScopedRenderStates2DオブジェクトのコンストラクタにBlendState::Additiveを渡すと、そのオブジェクトが有効な間、図形や画像が加算ブレンドで描画されます- 加算ブレンドでは、背景色に RGB 成分を加算するように描画されるため、重ねて描画した部分が明るくなります

# include <Siv3D.hpp>

void Main()
{
	Scene::SetBackground(ColorF{ 0.0 });

	Array<Vec2> points;

	for (int32 i = 0; i < 400; ++i)
	{
		points << RandomVec2(Scene::Rect());
	}

	// 加算ブレンドを有効にするか
	bool additiveBlend = true;

	while (System::Update())
	{
		if (additiveBlend)
		{
			// 加算ブレンド有効
			const ScopedRenderStates2D blend{ BlendState::Additive };

			for (const auto& point : points)
			{
				Circle{ point, 20 }.draw(HSV{ (point.y * 100 + point.x * 100), 0.5 });
			}
		}
		else
		{
			// 通常のブレンド
			for (const auto& point : points)
			{
				Circle{ point, 20 }.draw(HSV{ (point.y * 100 + point.x * 100), 0.5 });
			}
		}

		SimpleGUI::CheckBox(additiveBlend, U"AdditiveBlend", Vec2{ 40, 40 });
	}
}
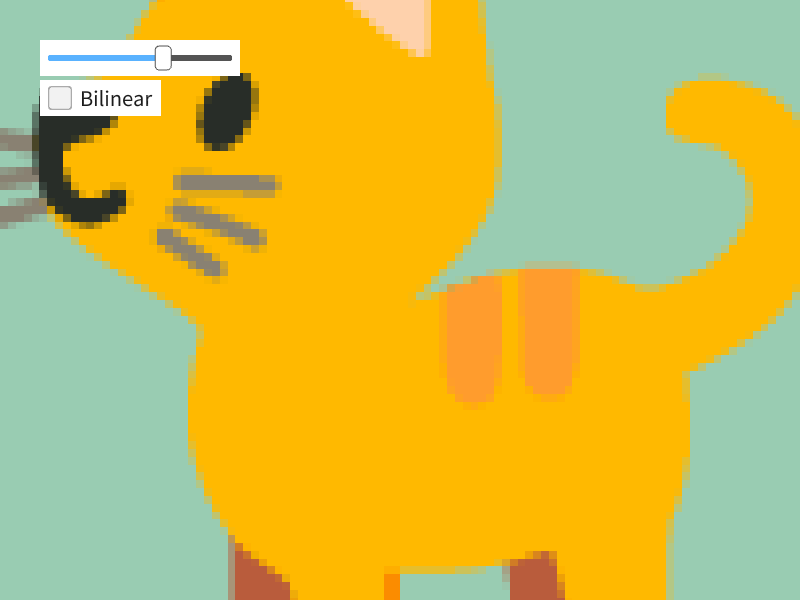
48.8 テクスチャ拡大縮小時のフィルタ
- テクスチャを拡大縮小して描画する際の補間方法は、次の 2 種類があります:
| 設定名 | 説明 |
|---|---|
| Linear | バイリニア補間(2D 描画のデフォルト) |
| Nearest | 最近傍補間 |
- デフォルトではバイリニア補間によって色が補間されます
- ドット感を維持したままテクスチャを拡大描画したいときには Nearest を使います
- サンプラーステート
SamplerState::ClampNearestをScopedRenderStates2Dに設定します
- サンプラーステート
# include <Siv3D.hpp>

void Main()
{
	const Texture texture{ U"🐈"_emoji };
	bool bilinear = true;
	double scale = 1.0;

	while (System::Update())
	{
		if (bilinear)
		{
			// バイリニア補間(デフォルト)
			texture.scaled(scale).drawAt(400, 300);
		}
		else
		{
			// 最近傍補間
			const ScopedRenderStates2D sampler{ SamplerState::ClampNearest };
			texture.scaled(scale).drawAt(400, 300);
		}

		SimpleGUI::Slider(scale, 0.5, 12.0, Vec2{ 40, 40 }, 200);
		SimpleGUI::CheckBox(bilinear, U"Bilinear", Vec2{ 40, 80 });
	}
}
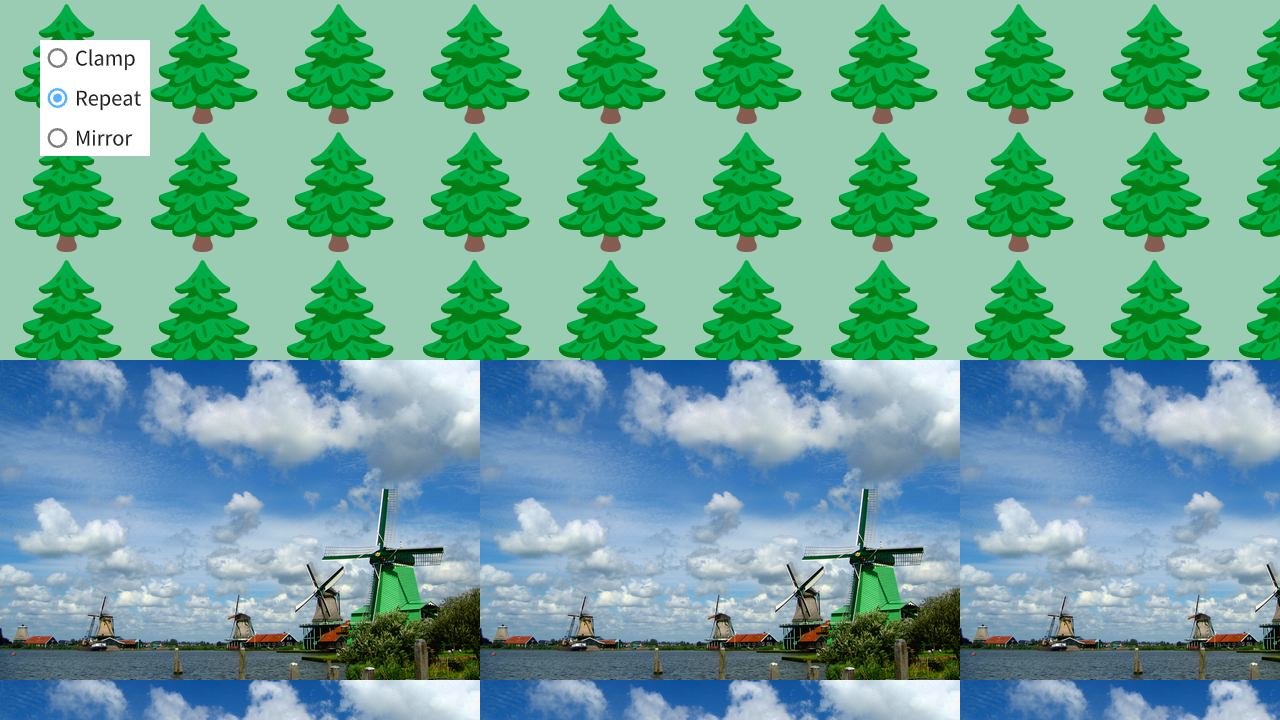
48.9 テクスチャのくり返し
- テクスチャ描画時に UV 座標が 0.0~1.0 の範囲を超えたときの処理の方法をカスタマイズできます
| 設定名 | 説明 |
|---|---|
| Clamp | テクスチャの端の色をそのまま描画する(2D 描画のデフォルト) |
| Repeat | テクスチャの端の色が反対側の端から続くように描画する |
| Mirror | テクスチャの端の色が反対側の端から反転して続くように描画する |
- デフォルトは Clamp で、テクスチャフィルタリングのデフォルト値 Linear と組み合わせた
SamplerState::ClampLinearが適用されています - テクスチャの繰り返し描画については チュートリアル 31.18 も参照してください
#include <Siv3D.hpp>

void Draw(const Texture& tree, const Texture& windmill)
{
	tree.mapped(1280, 360).draw();
	windmill.mapped(1280, 360).draw(0, 360);
}

void Main()
{
	Window::Resize(1280, 720);
	Scene::SetBackground(ColorF{ 0.6, 0.8, 0.7 });

	const Texture tree{ U"🌲"_emoji };
	const Texture windmill{ U"example/windmill.png" };

	size_t option = 0;

	while (System::Update())
	{
		if (option == 0)
		{
			// UV 座標が 0.0~1.0 の範囲を超えたとき、クランプするように設定する
			const ScopedRenderStates2D sampler{ SamplerState::ClampLinear };
			Draw(tree, windmill);
		}
		else if (option == 1)
		{
			// UV 座標が 0.0~1.0 の範囲を超えたとき、くり返しマッピングするように設定する
			const ScopedRenderStates2D sampler{ SamplerState::RepeatLinear };
			Draw(tree, windmill);
		}
		else if (option == 2)
		{
			// UV 座標が 0.0~1.0 の範囲を超えたとき、ミラーリングするように設定する
			const ScopedRenderStates2D sampler{ SamplerState::MirrorLinear };
			Draw(tree, windmill);
		}

		SimpleGUI::RadioButtons(option, { U"Clamp", U"Repeat", U"Mirror" }, Vec2{ 40, 40 });
	}
}
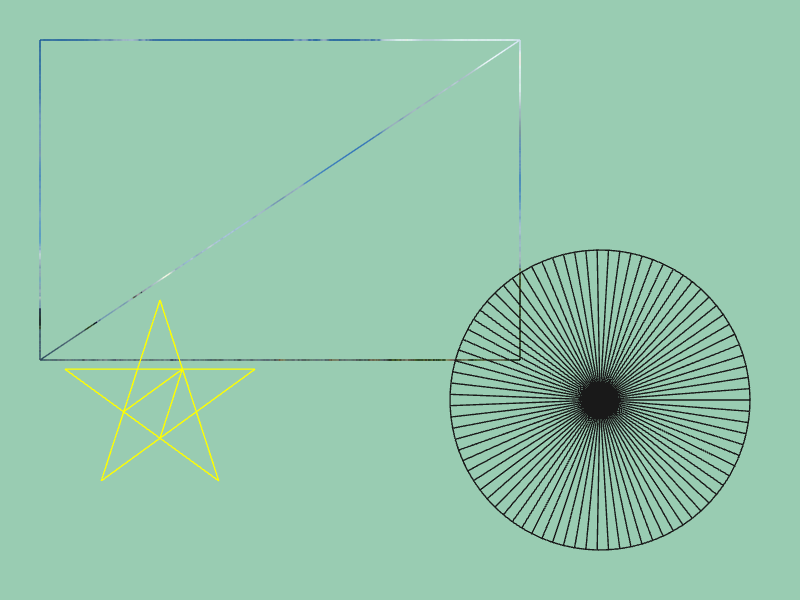
48.10 ワイヤフレーム表示
- 描画時に、図形や画像を構成する三角形のワイヤフレームのみを描画するモードがあります
| 設定名 | 説明 |
|---|---|
| Wireframe | ワイヤフレーム表示 |
| Solid | 通常の描画モード(2D 描画のデフォルト) |
ScopedRenderStates2DオブジェクトのコンストラクタにRasterizerState::WireframeCullNoneを渡すと、そのオブジェクトが有効な間、ワイヤフレーム表示モードになります- ワイヤフレーム表示は Web 版では利用できません
# include <Siv3D.hpp>

void Main()
{
	Scene::SetBackground(ColorF{ 0.6, 0.8, 0.7 });

	const Texture texture{ U"example/windmill.png" };

	while (System::Update())
	{
		{
			// ワイヤフレーム表示モードに設定する
			const ScopedRenderStates2D rasterizer{ RasterizerState::WireframeCullNone };

			texture.draw(40, 40);

			Circle{ 600, 400, 150 }.draw(ColorF{ 0.1 });

			Shape2D::Star(100, Vec2{ 160, 400 }).draw(Palette::Yellow);
		}
	}
}
48.11 シザー矩形
- シザー矩形を設定すると、長方形領域以外への描画を行わないようにできます
Graphics2D::SetScissorRect()でシザー矩形の領域を登録し、.scissorEnableをtrueにしたRasterizerStateをScopedRenderStates2Dで適用することで、シザー矩形が有効になります
#include <Siv3D.hpp>

void Main()
{
	Scene::SetBackground(ColorF{ 0.6, 0.8, 0.7 });

	const Texture texture1{ U"example/windmill.png" };
	const Texture texture2{ U"example/siv3d-kun.png" };

	// シザー矩形の範囲を登録する
	Graphics2D::SetScissorRect(Rect{ 100, 100, 300, 200 });

	while (System::Update())
	{
		{
			RasterizerState rs = RasterizerState::Default2D;
			rs.scissorEnable = true;

			// シザー矩形を有効化する
			const ScopedRenderStates2D rasterizer{ rs };

			texture1.draw(40, 40);
			texture2.draw(160, 100);
		}
	}
}
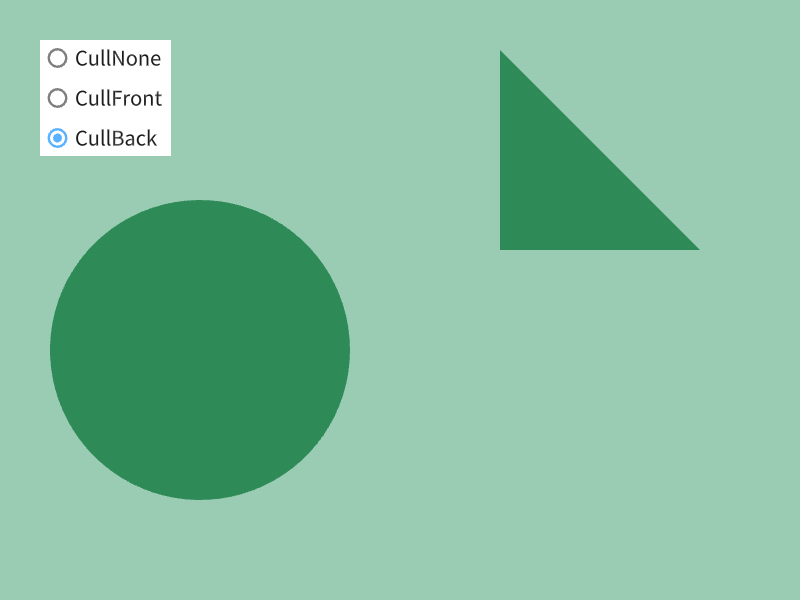
48.12 カリング
- 時計回り(表向き)の三角形、反時計回り(裏向き)の三角形について、それぞれ無視(カリング)するかどうかを設定できます
| 設定名 | 説明 |
|---|---|
| CullNone | カリングしない(2D 描画のデフォルト) |
| CullFront | 時計回り(表向き)の三角形をカリング |
| CullBack | 反時計回り(裏向き)の三角形をカリング |
ScopedRenderStates2DオブジェクトのコンストラクタにRasterizerState::SolidCullBackを渡すと、そのオブジェクトが有効な間、反時計回りの三角形がカリングされます- 通常、明示的に反時計回りの頂点を指定しない限り、裏向きの三角形は生じません
# include <Siv3D.hpp>

void Draw()
{
	// 円(すべての三角形が表向き)
	Circle{ 200, 350, 150 }.draw(Palette::Seagreen);

	// 時計回り(表向き)の三角形
	Triangle{ 500, 50, 700, 250, 500, 250 }.draw(Palette::Seagreen);

	// 反時計回り(裏向き)の三角形
	Triangle{ 500, 300, 500, 500, 700, 500, }.draw(Palette::Seagreen);
}

void Main()
{
	Scene::SetBackground(ColorF{ 0.6, 0.8, 0.7 });

	size_t option = 0;

	while (System::Update())
	{
		if (option == 0)
		{
			// カリングしない
			const ScopedRenderStates2D rasterizer{ RasterizerState::SolidCullNone };
			Draw();
		}
		else if (option == 1)
		{
			// 時計回りの三角形をカリング
			const ScopedRenderStates2D rasterizer{ RasterizerState::SolidCullFront };
			Draw();

		}
		else if (option == 2)
		{
			// 反時計回りの三角形をカリング
			const ScopedRenderStates2D rasterizer{ RasterizerState::SolidCullBack };
			Draw();
		}

		SimpleGUI::RadioButtons(option, { U"CullNone", U"CullFront", U"CullBack" }, Vec2{ 40, 40 });
	}
}
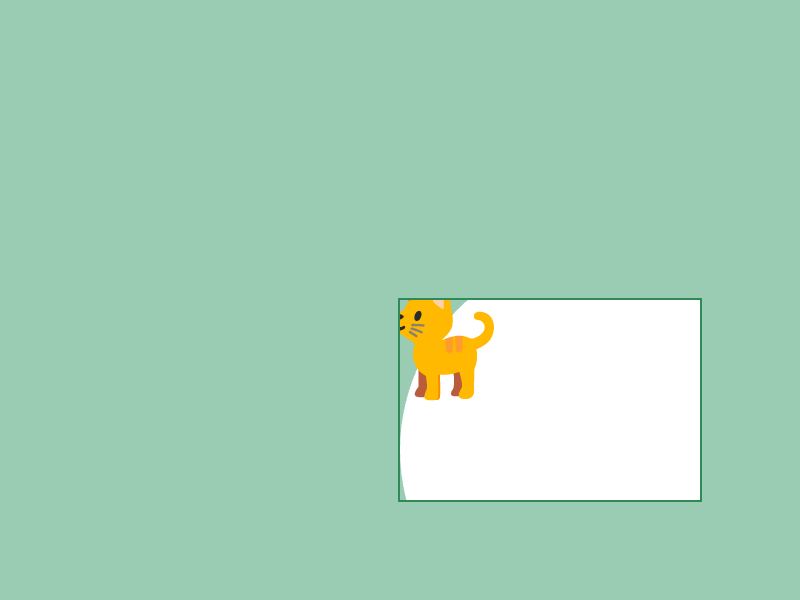
48.13 ビューポート
ScopedViewport2Dオブジェクトを作成すると、シーン内に仮想のシーンを作り、新しい描画領域を定義できます- 描画時にはビューポートの長方形の左上が (0, 0) の描画座標になり、長方形の範囲外にはみ出たものは描画されなくなります
- ビューポートは描画座標にしか影響を及ぼしません。マウスカーソル座標もビューポートに合わせて移動させたい場合は、チュートリアル 49 で学ぶ
Transformer2Dと組み合わせます
# include <Siv3D.hpp>

void Main()
{
	Scene::SetBackground(ColorF{ 0.6, 0.8, 0.7 });

	const Texture cat{ U"🐈"_emoji };

	const Rect viewportRect{ 400, 300, 300, 200 };

	while (System::Update())
	{
		{
			// ビューポートを適用する
			const ScopedViewport2D viewport{ viewportRect };

			Circle{ 200, 150, 200 }.draw();

			cat.drawAt(40, 40);
		}

		viewportRect.drawFrame(0, 2, Palette::Seagreen);
	}
}