63. 画像処理
画像処理を行うための機能と、その結果をシーンに表示する方法を学びます。
63.1 画像処理の概要
Textureクラスに読み込んだ画像データは GPU のメモリ上に配置されるため、C++ プログラムを通して画像の内容にアクセスすることはできません- 一方、
Imageクラスで読み込んだ(または作成した)画像データはメインメモリ上に配置されるため、ArrayやGridのように、C++ プログラムで簡単に内容にアクセスできます Imageには自身をシーンに描画する機能はなく、ImageをもとにTextureやDynamicTexture(63.18)を作成し、テクスチャとして描画する必要があります
| Image | DynamicTexture | Texture | |
|---|---|---|---|
| データの格納場所 | メインメモリ | GPU メモリ | GPU メモリ |
| 内容の更新 | ✅ | ✅.fill() を使う |
|
| 描画 | ✅ | ✅ | |
| CPU からのアクセス | ✅ | ||
| GPU(シェーダ)からのアクセス | ✅ | ✅ |
63.2 Image クラスの基本
- 画像データを扱うときは
Imageクラスを使います Imageクラスは、画像データをGird<Color>のようなインタフェースで扱いますImage image{ int32 幅, int32 高さ, 色 }で、指定したサイズの画像を作成しますImage image{ Size 幅と高さ, 色 }で、指定したサイズの画像を作成しますimage[y][x]で(x, y)のピクセルにアクセスしますimage[pos]で(pos.x, pos.y)のピクセルにアクセスします
Color型は、ColorF型と異なり、r, g, b, a の各色をuint8型で保持する 4 バイトの構造体ですColor⇔ColorFは相互に変換できます
- 次のサンプルコードでは、サイズ 400 x 300 の白い画像を作成し、その左上 120 x 60 の領域を青色で塗りつぶします
- その画像をもとにテクスチャを作成し、シーンに描画します

# include <Siv3D.hpp>

void Main()
{
	Scene::SetBackground(ColorF{ 0.6, 0.8, 0.7 });

	Image image{ Size{ 400 ,300 }, Palette::White };

	for (int32 y = 0; y < 60; ++y)
	{
		for (int32 x = 0; x < 120; ++x)
		{
			image[y][x] = Color{ 0, 127, 255 };
		}
	}

	const Texture texture{ image };

	while (System::Update())
	{
		texture.draw();
	}
}
63.3 画像ファイルの読み込み
- 画像ファイルから
Imageを作成するには、Image{ ファイルパス }を使います - ファイルパスは、実行ファイルがあるフォルダ(開発中は
Appフォルダ)を基準とする相対パスか、絶対パスを使用します - 対応する画像フォーマットは チュートリアル 31.4 を参照してください
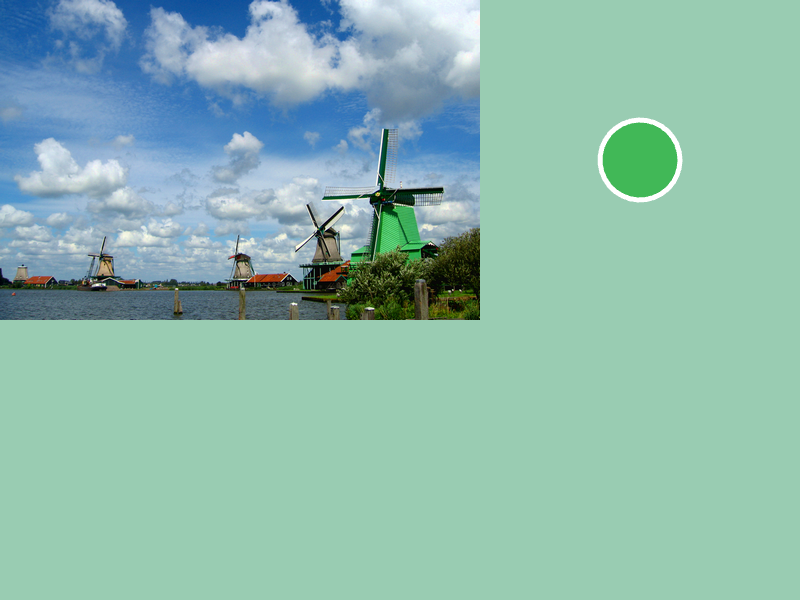
- 次のサンプルでは、画像の任意の位置をマウスカーソルで選択すると、そのピクセル色を表示します
# include <Siv3D.hpp>
void Main()
{
Scene::SetBackground(ColorF{ 0.6, 0.8, 0.7 });
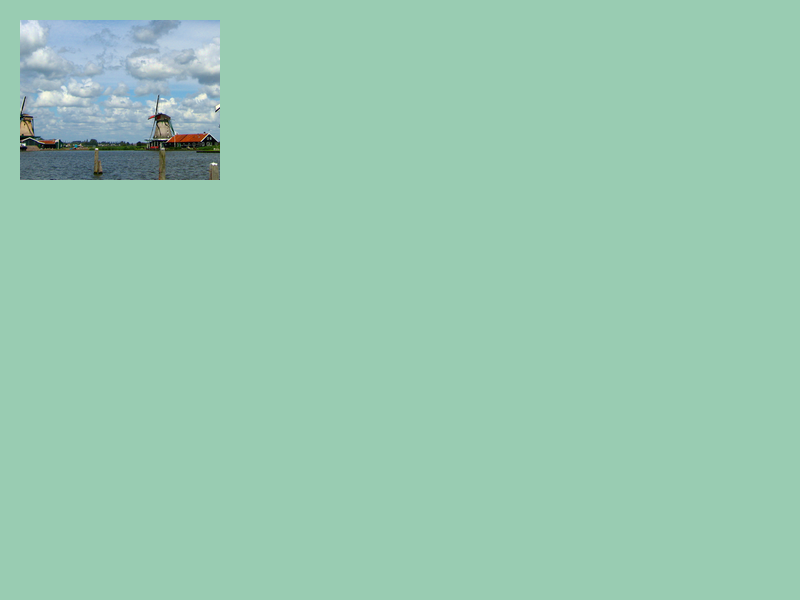
const Image image{ U"example/windmill.png" };
const Texture texture{ image };
while (System::Update())
{
texture.draw();
const Point pos = Cursor::Pos();
if (InRange(pos.x, 0, (image.width() - 1))
&& InRange(pos.y, 0, (image.height() - 1)))
{
const Color color = image[pos];
Circle{ 640, 160, 40 }.draw(color).drawFrame(5);
}
}
}
63.4 絵文字とアイコン
Textureと同様に、絵文字やアイコンからImageを作成できますImage{ U"絵文字"_emoji }で、絵文字の画像データを作成します- 絵文字一覧は Emojipedia: Google Noto Color Emoji で確認できます
Image{ 0xアイコン番号_icon, サイズ }で、アイコンからテクスチャを作成します- アイコン番号は Material Design Icons または Font Awesome の 16 進数コードです
# include <Siv3D.hpp>

void Main()
{
	{
		const Image image{ U"🍎"_emoji };

		// 画像を保存する
		image.save(U"apple.png");
	}

	{
		const Image image{ 0xF0493_icon, 100 };

		// 画像を保存する
		image.save(U"icon.png");
	}

	while (System::Update())
	{

	}
}
63.5 画像のサイズ
- 画像データの幅(ピクセル)は
.width()で取得できます。戻り値はint32型です - 画像データの高さ(ピクセル)は
.height()で取得できます。戻り値はint32型です - 幅と高さを同時に取得するには
.size()を使います。戻り値はSize(Point) 型です - 次のようなループで、
Image内のすべてのピクセルにアクセスできます
# include <Siv3D.hpp>

void Main()
{
	Image image{ U"example/windmill.png" };

	Print << image.width();
	Print << image.height();
	Print << image.size();

	while (System::Update())
	{

	}
}
63.6 メモリの節約
ImageからTextureを作成する際に画像データがコピーされるため、テクスチャ作成後にImageは不要になります- 次のコードでは、不要になった
imageが、メインループ中もメモリを消費し続けています
# include <Siv3D.hpp>

void Main()
{
	Scene::SetBackground(ColorF{ 0.6, 0.8, 0.7 });

	Image image{ Size{ 400, 300 } };

	for (int32 y = 0; y < image.height(); ++y)
	{
		for (int32 x = 0; x < image.width(); ++x)
		{
			image[y][x] = ColorF{ (y / (image.height() - 1.0)), (x / (image.width() - 1.0)), 1.0 };
		}
	}

	const Texture texture{ image };

	while (System::Update())
	{
		texture.draw();
	}
}
Imageの.release()で、画像データおよび消費していたメモリを明示的に解放し、Imageを空の状態にすることができます
# include <Siv3D.hpp>

void Main()
{
	Scene::SetBackground(ColorF{ 0.6, 0.8, 0.7 });

	Image image{ Size{ 400, 300 } };

	for (int32 y = 0; y < image.height(); ++y)
	{
		for (int32 x = 0; x < image.width(); ++x)
		{
			image[y][x] = ColorF{ (y / (image.height() - 1.0)), (x / (image.width() - 1.0)), 1.0 };
		}
	}

	const Texture texture{ image };

	// 画像データを解放する
	image.release();

	while (System::Update())
	{
		texture.draw();
	}
}
Imageを返す関数の戻り値をTextureのコンストラクタに直接渡すことで、Imageがすぐに解放されるよう設計することもできます
# include <Siv3D.hpp>

Image MakeImage()
{
	Image image{ Size{ 400, 300 } };

	for (int32 y = 0; y < image.height(); ++y)
	{
		for (int32 x = 0; x < image.width(); ++x)
		{
			image[y][x] = ColorF{ (y / (image.height() - 1.0)), (x / (image.width() - 1.0)), 1.0 };
		}
	}

	return image;
}

void Main()
{
	Scene::SetBackground(ColorF{ 0.6, 0.8, 0.7 });

	const Texture texture{ MakeImage() };

	while (System::Update())
	{
		texture.draw();
	}
}
63.7 範囲 for 文による全ピクセル走査
- 範囲 for 文を使って画像データの要素を走査します
- 範囲 for 文の中で、対象の画像のサイズを変更する操作は行わないでください
# include <Siv3D.hpp>

void Main()
{
	Scene::SetBackground(ColorF{ 0.6, 0.8, 0.7 });

	Image image{ U"example/windmill.png" };

	// 全ピクセルの R 成分を 0 にする
	for (auto& pixel : image)
	{
		pixel.r = 0;
	}

	const Texture texture{ image };

	while (System::Update())
	{
		texture.draw();
	}
}
63.8 塗りつぶし
- 画像の内容をすべて単色で塗りつぶすには
.fill(color)を使います

# include <Siv3D.hpp>

void Main()
{
	Scene::SetBackground(ColorF{ 0.6, 0.8, 0.7 });

	Image image{ U"example/windmill.png" };

	// 画像を黒で塗りつぶす
	image.fill(Color{ 0, 0, 0 });

	const Texture texture{ image };

	while (System::Update())
	{
		texture.draw();
	}
}
63.9 画像の保存
- 画像データを画像ファイルとして保存するには
.save(path)を使います - 画像の保存形式は、
pathの拡張子から自動的に適切なものが選択されます- 通常は PNG 形式か JPEG 形式を使うとよいでしょう
# include <Siv3D.hpp>

void Main()
{
	const Image image{ U"example/windmill.png" };

	image.save(U"windmill.png");

	image.save(U"windmill.jpg");

	while (System::Update())
	{

	}
}
63.10 画像の保存(ダイアログ)
- 画像データをダイアログでファイル名を指定して画像ファイルとして保存するには
.saveWithDialog()を使います - 画像の保存形式は、ダイアログで選択した拡張子をもとに選択されます
# include <Siv3D.hpp>

void Main()
{
	const Image image{ U"example/windmill.png" };

	image.saveWithDialog();

	while (System::Update())
	{

	}
}
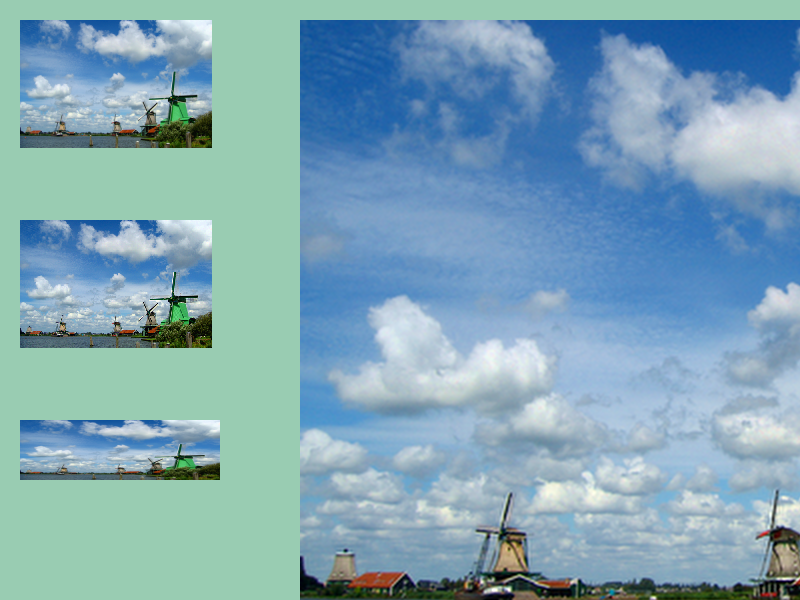
63.11 画像の拡大縮小
.scaled(double scale)は、画像を指定した倍率で拡大縮小した結果を、新しいImageで返します.scaled(Size size)は、画像を指定したサイズに拡大縮小した結果を、新しいImageで返します- デフォルトで高品質な拡大縮小が行われます。第 2 引数に
InterpolationAlgorithm::Nearestを指定すると、フィルタリングなし(最近傍補間)で拡大縮小します
# include <Siv3D.hpp>

void Main()
{
	Scene::SetBackground(ColorF{ 0.6, 0.8, 0.7 });

	const Image image{ U"example/windmill.png" };
	const Texture texture1{ image.scaled(0.4) };
	const Texture texture2{ image.scaled(0.4, InterpolationAlgorithm::Nearest) };
	const Texture texture3{ image.scaled(Size{ 200, 60 })};
	const Texture texture4{ image.scaled(2.0) };

	while (System::Update())
	{
		texture1.draw(20, 20);
		texture2.draw(20, 220);
		texture3.draw(20, 420);
		texture4.draw(300, 20);
	}
}
63.12 画像の部分コピー
.clipped(x, y, w, h)は、画像の指定した範囲をコピーした新しいImageを返します
# include <Siv3D.hpp>

void Main()
{
	Scene::SetBackground(ColorF{ 0.6, 0.8, 0.7 });

	const Image image{ U"example/windmill.png" };

	const Texture texture{ image.clipped(100, 160, 200, 160) };

	while (System::Update())
	{
		texture.draw(20, 20);
	}
}
63.13 画像処理
- さまざまな画像処理関数が用意されています
- 自身を変更するメンバ関数と、画像処理後の結果を新しい
Imageで返し、自身は変更しないメンバ関数の 2 種類があります
| 処理 | 結果の画像の例 | 自身を変更するメンバ関数 / 結果を返すメンバ関数 |
|---|---|---|
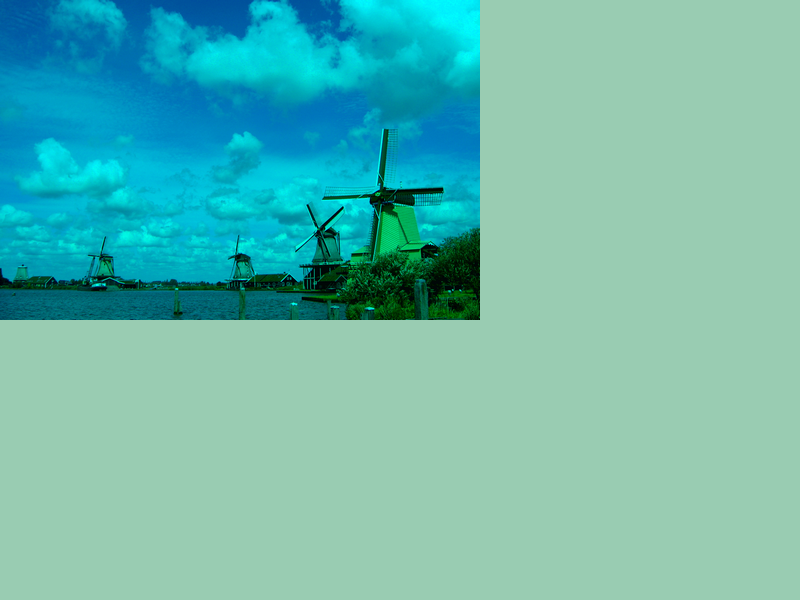
| 色の反転 | 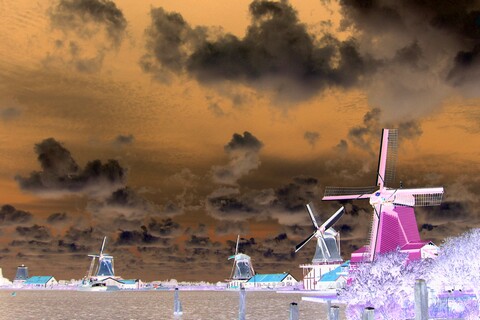 |
negate / negated |
| グレイスケール化 | 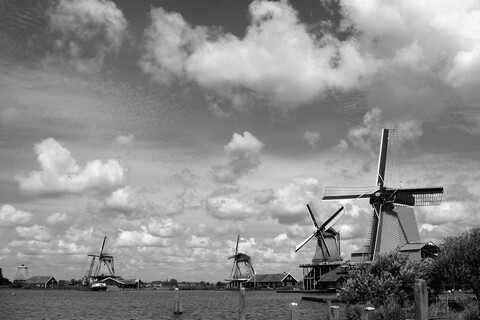 |
grayscale / grayscaled |
| セピアカラー | 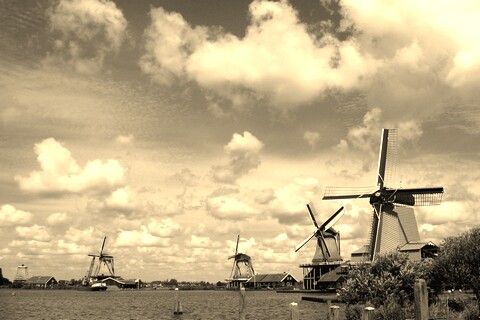 |
sepia / sepiaed |
| ポスタライズ |  |
posterize / posterized |
| 明度レベル変更 | 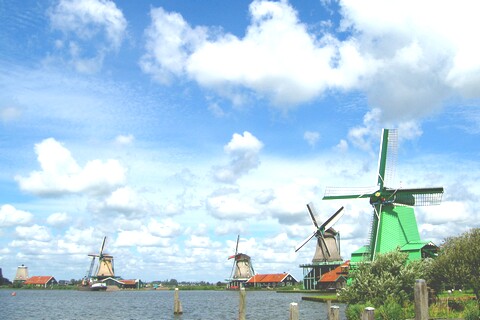 |
brighten / brightened |
| 左右反転 |  |
mirror / mirrored |
| 上下反転 |  |
flip / flipped |
| 90° 回転 |  |
rotate90 / rotated90 |
| 180° 回転 |  |
rotate180 / rotated180 |
| 270° 回転 | 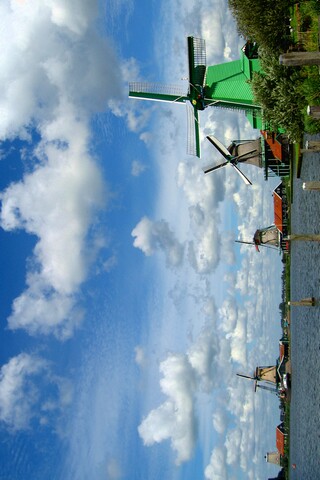 |
rotate270 / rotated270 |
| ガンマ補正 | 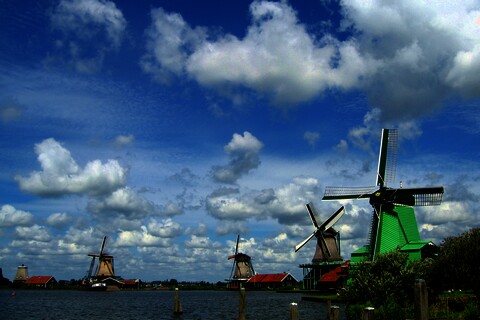 |
gammaCorrect / gammaCorrected |
| 二値化 |  |
threshold / thresholded |
| 大津の手法による二値化 | 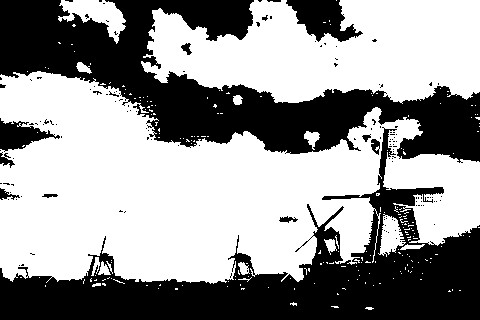 |
threshold_Otsu / thresholded_Otsu |
| 適応的二値化 | 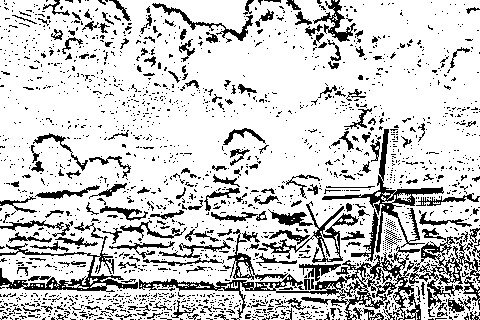 |
adaptiveThreshold / adaptiveThresholded |
| モザイク |  |
mosaic / mosaiced |
| 拡散 |  |
spread / spreaded |
| ブラー |  |
blur / blurred |
| メディアンブラー |  |
medianBlur / medianBlurred |
| ガウスぼかし |  |
gaussianBlur / gaussianBlurred |
| バイラテラルフィルタ | 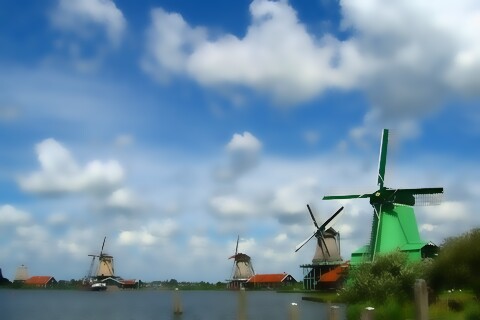 |
bilateralFilter / bilateralFiltered |
| 膨張 |  |
dilate / dilated |
| 収縮 |  |
erode / eroded |
| 周囲に枠を加える | 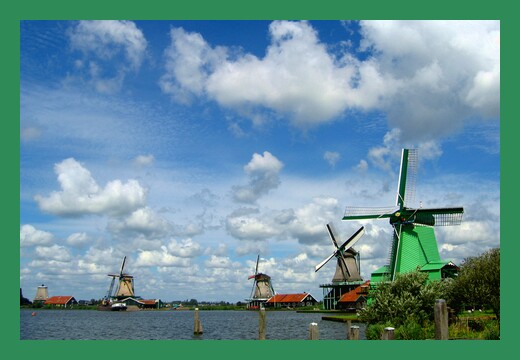 |
border / bordered |
| 任意角度の回転 |  |
なし / rotated |
| 正方形での切り抜き |  |
なし / squareClipped |
# include <Siv3D.hpp>

void Main()
{
	Scene::SetBackground(ColorF{ 0.6, 0.8, 0.7 });

	const Image image{ U"example/windmill.png" };

	const Texture texture{ image.negated() };

	while (System::Update())
	{
		texture.draw(20, 20);
	}
}
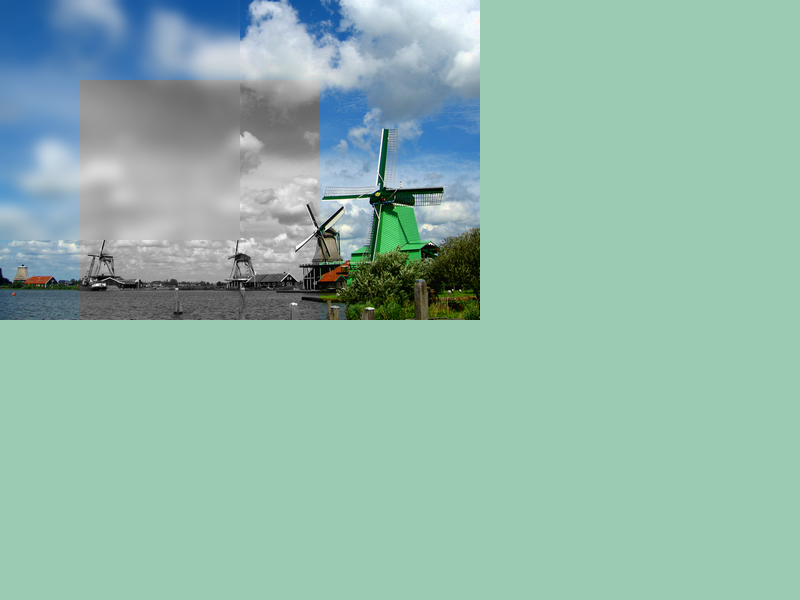
63.14 部分画像処理
- 一部の画像処理関数は、画像の一部の矩形範囲のみに適用できます
image(x, y, w, h).gaussianBlur()で、画像の(x, y)から(x + w, y + h)の範囲にのみガウスぼかしを適用します
# include <Siv3D.hpp>

void Main()
{
	Scene::SetBackground(ColorF{ 0.6, 0.8, 0.7 });

	Image image{ U"example/windmill.png" };
	image(0, 0, 240, 240).gaussianBlur(20);
	image(80, 80, 240, 240).grayscale();

	const Texture texture{ image };

	while (System::Update())
	{
		texture.draw();
	}
}
63.15 図形の書き込み
CircleやLine,Rectなどの図形は、メンバ関数.paint()および.overwrite()を使ってImageに書き込むことができます.paint()はアルファ値に応じて色をブレンドします.overwrite()は引数で指定した色をそのまま書き込みます- 画像の範囲外の部分には何も書き込まれません
Imageへの書き込みは CPU で処理されるため、通常の.draw()よりも大きなコストがかかります

# include <Siv3D.hpp>

void Main()
{
	Scene::SetBackground(ColorF{ 0.6, 0.8, 0.7 });

	Image image{ Size{ 600, 600 }, Palette::White };
	{
		Circle{ 100, 100, 100 }.overwrite(image, Palette::Orange);

		Rect{ 150, 150, 300, 200 }.paint(image, ColorF{ 0.0, 1.0, 0.5, 0.5 });

		Line{ 100, 400, 400, 200 }.overwrite(image, 10, Palette::Seagreen);

		// アンチエイリアスを無効にして線分を描く
		Line{ 100, 500, 400, 300 }.overwrite(image, 10, Palette::Seagreen, Antialiased::No);

		Shape2D::Star(200, Vec2{ 480, 160 }).asPolygon().overwrite(image, Palette::Yellow);

		// 透明な穴を書き込む
		Rect{ 400, 400, 80 }.overwrite(image, ColorF{ 1.0, 0.0 });
	}

	const Texture texture{ image };

	while (System::Update())
	{
		texture.draw();
	}
}
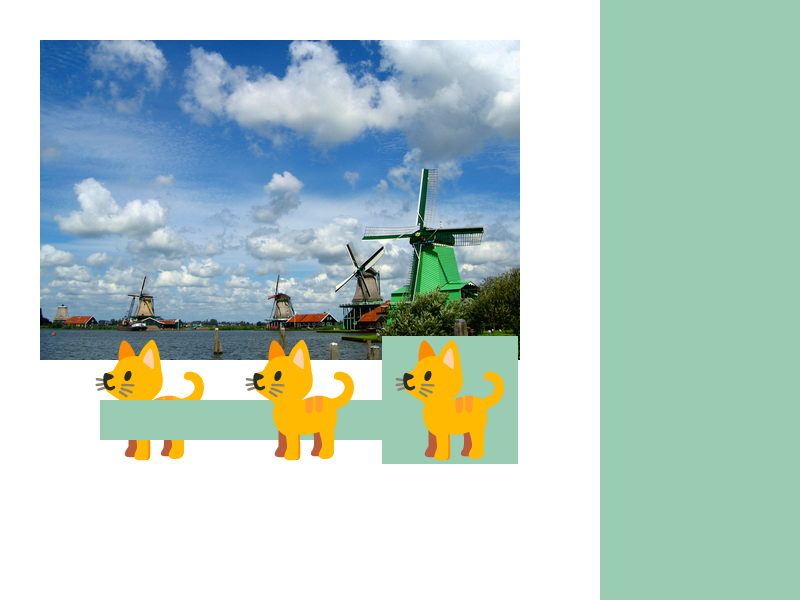
63.16 画像の書き込み
ImageやImageの一部を別のImageに書き込むことができます- 書き込みの対象を自分自身にすることはできません
- 書き込みに使うメンバ関数は次のとおりです:
| コード | アルファブレンド | 書き込み先のアルファ値の更新 |
|---|---|---|
.paint().paintAt() |
✅ | |
.stamp().stampAt() |
✅ | ✅ 大きいほう |
.overwrite().overwriteAt() |
✅ |
Imageへの書き込みは CPU で処理されるため、通常の.draw()よりも大きなコストがかかります
# include <Siv3D.hpp>

void Main()
{
	Scene::SetBackground(ColorF{ 0.6, 0.8, 0.7 });

	Image image{ Size{ 600, 600 }, Palette::White };

	const Image windmill{ U"example/windmill.png" };
	const Image emoji{ U"🐈"_emoji };

	windmill.overwrite(image, Point{ 40, 40 });

	// 透過ピクセルに対する paint / stamp / overwrite の違い
	{
		Rect{ 100, 400, 400, 40 }.overwrite(image, Color{ 255, 0 });
		emoji.paintAt(image, Point{ 150, 400 });
		emoji.stampAt(image, Point{ 300, 400 });
		emoji.overwriteAt(image, Point{ 450, 400 });
	}

	const Texture texture{ image };

	while (System::Update())
	{
		texture.draw();
	}
}
63.17 テキストの書き込み
Fontから各文字の画像をBitmapGlyphとして取得し、その画像を自由描画(チュートリアル 34.24)の要領で書き込みますImageへの書き込みは CPU で処理されるため、通常の.draw()よりも大きなコストがかかります
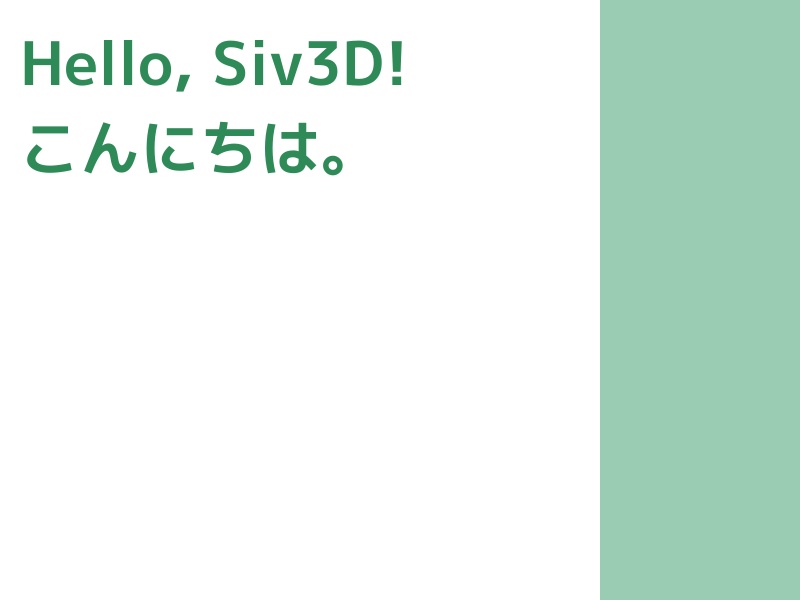
# include <Siv3D.hpp>

void PaintGlyphs(Image& image, const Font& font, const String& text, const Vec2& basePos, const ColorF& color)
{
	Vec2 penPos{ basePos };

	for (const auto& ch : text)
	{
		if (ch == U'\n')
		{
			penPos.x = basePos.x;
			penPos.y += font.height();
			continue;
		}

		const BitmapGlyph bitmapGlyph = font.renderBitmap(ch);

		// 文字のテクスチャをペンの位置に文字ごとのオフセットを加算して描画
		bitmapGlyph.image.paint(image, (penPos + bitmapGlyph.getOffset()).asPoint(), color);

		// ペンの X 座標を文字の幅の分進める
		penPos.x += bitmapGlyph.xAdvance;
	}
}

void Main()
{
	Scene::SetBackground(ColorF{ 0.6, 0.8, 0.7 });

	const Font font{ 60, Typeface::Bold };

	Image image{ Size{ 600, 600 }, Palette::White };

	PaintGlyphs(image, font, U"Hello, Siv3D!\nこんにちは。", Vec2{ 20, 20 }, Palette::Seagreen);

	const Texture texture{ image };

	while (System::Update())
	{
		texture.draw();
	}
}
63.18 DynamicTexture
- ペイントアプリのように、
Imageの内容をプログラムの実行中に頻繁に変更し、その結果をシーンに描きたい場合があります Imageの内容を更新するたびに古いTextureを破棄して新しいTextureを作成するのは非効率です- そのような用途では、
DynamicTextureを使うのが適切です DynamicTextureは、中身を動的に変更できるTextureです。通常のTextureのメンバ関数に加え、.fill(image)メンバ関数を持ちます.fill()は、DynamicTextureが空の場合はimageで新しいテクスチャを作成し、既にデータを持っている場合はその内容をimageで置き換えます- このとき新旧の画像データの縦横サイズは一致している必要があります
DynamicTextureの.fill()は、既に保持しているデータ領域を上書きするだけであるため、新しくTextureを作成するよりも効率的です- しかし、
.fill()のコストも依然と大きいため、不必要な場合には呼び出さないようにする必要があります - 用途によっては
RenderTexture(チュートリアル 52)を使うほうが適切な場合もあります
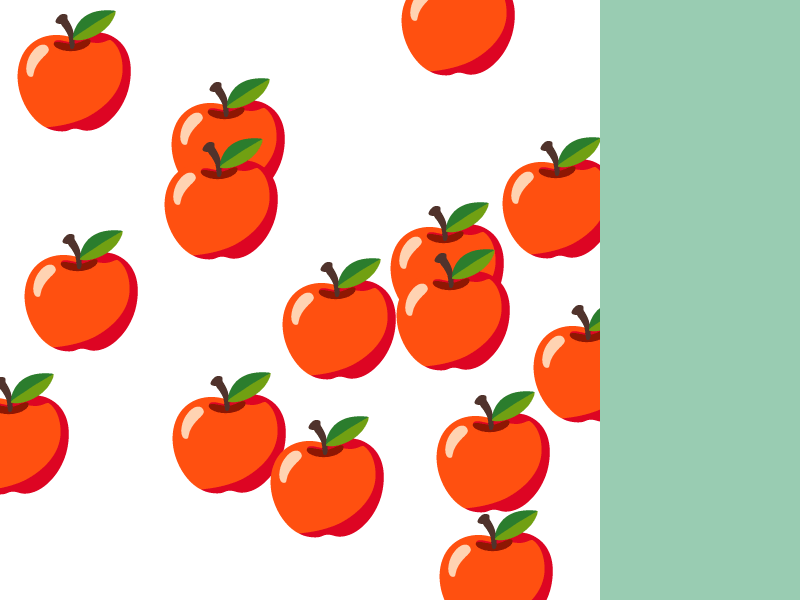
# include <Siv3D.hpp>

void Main()
{
	Scene::SetBackground(ColorF{ 0.6, 0.8, 0.7 });
	const Image emoji{ U"🍎"_emoji };

	Image image{ Size{ 600, 600 }, Palette::White };
	DynamicTexture texture{ image };

	while (System::Update())
	{
		if (MouseL.down())
		{
			emoji.paintAt(image, Cursor::Pos());

			// DynamicTexture の中身を Image で更新する
			texture.fill(image);
		}

		texture.draw();
	}
}
63.19 ペイントアプリ(1)
- 次のようなコードでペイントアプリを作れます
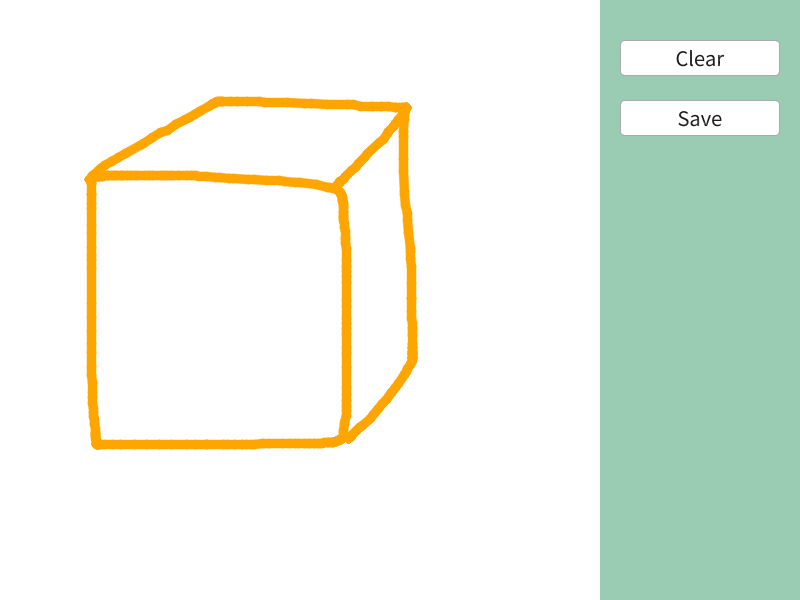
# include <Siv3D.hpp>

void Main()
{
	Scene::SetBackground(ColorF{ 0.6, 0.8, 0.7 });

	constexpr Size CanvasSize{ 600, 600 };
	constexpr int32 PenThickness = 8;
	constexpr Color PenColor = Palette::Orange;

	Image image{ CanvasSize, Palette::White };
	DynamicTexture texture{ image };

	while (System::Update())
	{
		if (MouseL.pressed())
		{
			// 書き込む線の始点は直前のフレームのマウスカーソル座標
			// (タッチ操作時の座標のジャンプを防ぐため、初回は現在のマウスカーソル座標にする)
			const Point from = (MouseL.down() ? Cursor::Pos() : Cursor::PreviousPos());

			// 書き込む線の終点は現在のマウスカーソル座標
			const Point to = Cursor::Pos();

			Line{ from, to }.overwrite(image, PenThickness, PenColor);
			texture.fill(image);
		}

		if (SimpleGUI::Button(U"Clear", Vec2{ 620, 40 }, 160))
		{
			image.fill(Palette::White);
			texture.fill(image);
		}

		if (SimpleGUI::Button(U"Save", Vec2{ 620, 100 }, 160))
		{
			image.saveWithDialog();
		}

		texture.draw();
	}
}
63.20 ペイントアプリ(2)
- 発展的なペイントアプリを作ります
.floodFill()は、指定した座標から同じ色の領域を再帰的に塗りつぶします
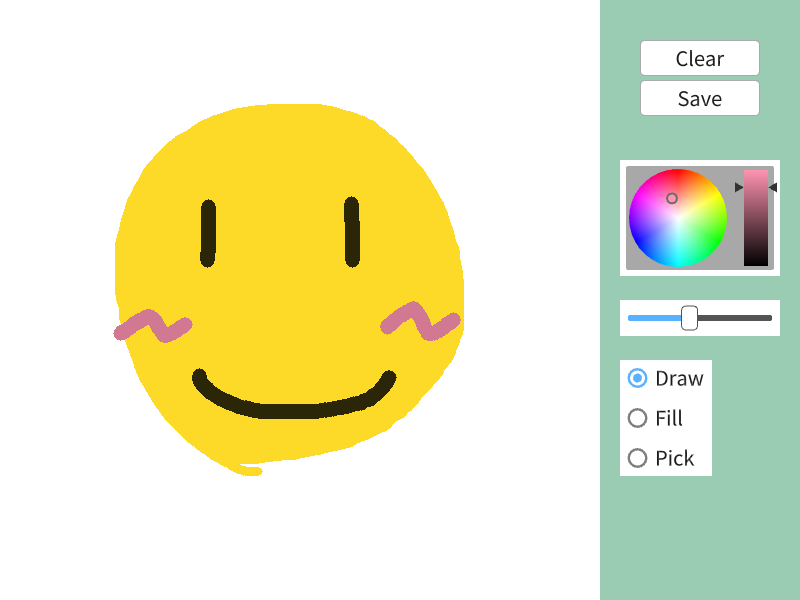
# include <Siv3D.hpp>

void Main()
{
	Scene::SetBackground(ColorF{ 0.6, 0.8, 0.7 });

	constexpr Size CanvasSize{ 600, 600 };
	double penThickness = 8;
	HSV penColor = Palette::Orange;
	size_t toolIndex = 0;

	Image image{ CanvasSize, Palette::White };
	DynamicTexture texture{ image };

	while (System::Update())
	{
		if (toolIndex == 0) // ペン・消しゴム
		{
			if (MouseL.pressed()) // ペン
			{
				const Point from = (MouseL.down() ? Cursor::Pos() : Cursor::PreviousPos());
				const Point to = Cursor::Pos();

				Line{ from, to }.overwrite(image, static_cast<int32>(penThickness), penColor, Antialiased::No);
				texture.fill(image);
			}
			else if (MouseR.pressed()) // 消しゴム
			{
				const Point from = (MouseR.down() ? Cursor::Pos() : Cursor::PreviousPos());
				const Point to = Cursor::Pos();

				Line{ from, to }.overwrite(image, static_cast<int32>(penThickness), Palette::White, Antialiased::No);
				texture.fill(image);
			}
		}
		else if (toolIndex == 1) // 塗りつぶし
		{
			if (MouseL.down()) // 現在の色で塗りつぶし
			{
				image.floodFill(Cursor::Pos(), penColor);
				texture.fill(image);
			}
			else if (MouseR.down()) // 白で塗りつぶし
			{
				image.floodFill(Cursor::Pos(), Palette::White);
				texture.fill(image);
			}
		}
		else // カラーピッカー
		{
			if (MouseL.down())
			{
				const Point cursorPos = Cursor::Pos();

				if (InRange(cursorPos.x, 0, (image.width() - 1))
					&& InRange(cursorPos.y, 0, (image.height() - 1)))
				{
					penColor = image[cursorPos];
				}
			}
		}

		if (SimpleGUI::Button(U"Clear", Vec2{ 640, 40 }, 120))
		{
			image.fill(Palette::White);
			texture.fill(image);
		}

		if (SimpleGUI::Button(U"Save", Vec2{ 640, 80 }, 120))
		{
			image.saveWithDialog();
		}

		// 色の選択
		SimpleGUI::ColorPicker(penColor, Vec2{ 620, 160 });

		// ペンの太さ
		SimpleGUI::Slider(penThickness, 1.0, 30.0, Vec2{ 620, 300 }, 160);

		// ツールの選択
		SimpleGUI::RadioButtons(toolIndex, { U"Draw", U"Fill", U"Pick" }, Vec2{ 620, 360 });

		texture.draw();
	}
}
63.21 グリッドの可視化
- 大量の要素がある
Gridを可視化する場合、幅 × 高さのマスをすべてRectで描くよりも、縦横が同じ要素数のImageを作成して 1 枚のテクスチャとして描画するほうが効率的です- 例えば、60 x 40 のグリッドを
Rectで描画する場合、2400 回の.draw()が必要になりますが、テクスチャとして描画する場合は 1 回の.draw()で済みます
- 例えば、60 x 40 のグリッドを
- 内容が頻繁に更新される場合は
DynamicTextureを使うとよいでしょう
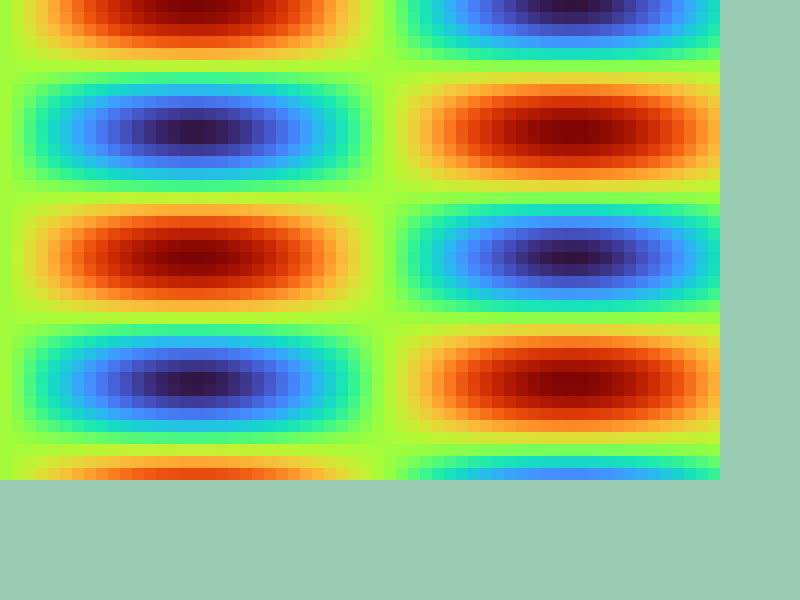
# include <Siv3D.hpp>

Image ToImage(const Grid<double>& grid)
{
	Image image{ grid.size(), Palette::White };

	for (int32 y = 0; y < grid.height(); ++y)
	{
		for (int32 x = 0; x < grid.width(); ++x)
		{
			image[y][x] = Colormap01(grid[y][x]);
		}
	}

	return image;
}

void Main()
{
	Scene::SetBackground(ColorF{ 0.6, 0.8, 0.7 });

	Grid<double> grid(Size{ 60, 40 });

	for (int32 y = 0; y < grid.height(); ++y)
	{
		for (int32 x = 0; x < grid.width(); ++x)
		{
			grid[y][x] = (std::sin(x * 0.1) * std::cos(y * 0.3) * 0.5 + 0.5);
		}
	}

	const Texture texture{ ToImage(grid) };

	while (System::Update())
	{
		{
			const ScopedRenderStates2D states{ SamplerState::ClampNearest };

			texture.scaled(12).draw();
		}
	}
}