72. シリアル通信
シリアル通信を使って、外部デバイスとデータの送受信を行う方法を学びます。
72.1 シリアルポートの列挙
- PC に認識されているシリアルポートの一覧を
System::EnumerateSerialPorts()で取得できます - 結果は
Array<SerialPortInfo>型で返されます SerialPortInfo型のメンバ変数は次のとおりです:
| コード | 説明 |
|---|---|
String port |
シリアルポート名 |
String description |
シリアルポートの説明 |
String hardwareID |
ハードウェア ID |
# include <Siv3D.hpp>

void Main()
{
	for (const auto& info : System::EnumerateSerialPorts())
	{
		Print << U"[{}] {}"_fmt(info.port, info.description);
	}

	while (System::Update())
	{

	}
}
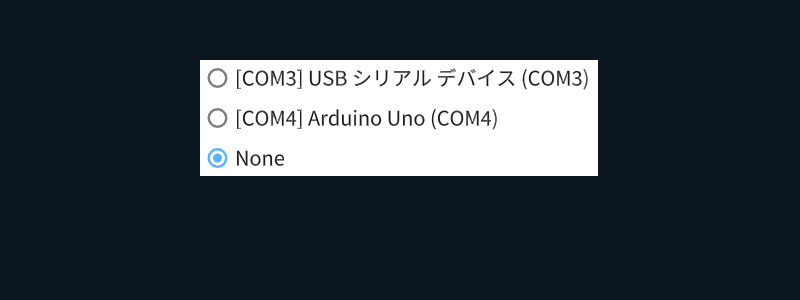
72.2 接続する COM ポートの選択
- 次のような関数を使って、接続するシリアルポートを選択する GUI を作成できます
# include <Siv3D.hpp>

Array<String> GetSerialPortOptions(const Array<SerialPortInfo>& infos)
{
	Array<String> options = infos.map([](const SerialPortInfo& info)
	{
		return U"[{}] {}"_fmt(info.port, info.description);
	});

	options << U"None";
	return options;
}

void Main()
{
	const Array<SerialPortInfo> infos = System::EnumerateSerialPorts();
	const Array<String> options = GetSerialPortOptions(infos);
	size_t index = (options.size() - 1);

	while (System::Update())
	{
		if (SimpleGUI::RadioButtons(index, options, Vec2{ 200, 60 }))
		{

		}
	}
}
72.3 Serial クラスの基本
Serialクラスを使って、シリアル通信を行うことができますSerialクラスの主な機能:- シリアルポートへの接続と切断
- データの送受信(バイト単位、バイナリデータ)
- バッファの管理と消去
- 接続状態の確認
- ハンドシェイク信号(RTS、DTR)の制御
- ライン信号(CTS、DSR、RI、CD)の状態取得
- 読み込み操作:
- バイトデータの読み取り
- 配列への読み取り
- trivially copyable な型への読み取り
- 書き込み操作:
- バイトデータの書き込み
- バイナリデータの書き込み
- trivially copyable な型の書き込み
- コンストラクタでは、必要に応じて次のような詳細項目を設定できます:
- ByteSize(5〜8ビット)
- Parity(None、Odd、Even、Mark、Space)
- StopBits(One、Two、OnePointFive)
- FlowControl(None、Software、Hardware)
72.4 シリアル通信(1 バイト)
- Arduino の LED を PC 側から制御し、同時に Arduino から PC 側へデータを送信する双方向通信のサンプルです
通信が不調なときの対処法
- シリアル通信が不調な場合、Arduino IDE のシリアルモニタを開いて、再度閉じると改善されることがあります
Arduino 側のコード
- Arduino ボード上で動作し、PC との通信と、LED の制御を行います
- 初期設定(setup 関数):
- 13 番ピンを出力モードに設定(LED を制御するため)
- 9600 bps のボーレートでシリアル通信を開始
- メインループ(loop 関数):
- 250 ミリ秒ごとに動作
- 変数
iの値を PC に送信し、その後インクリメント - PC 側からデータを受信して処理:
0を受信: LED をオフ(LOW)1を受信: LED をオン(HIGH)2を受信: カウンターiをリセット
- 受信データがない場合は何もせず次のループへ
void setup()
{
	// 13 番ピンを出力モードに設定する
	pinMode(13, OUTPUT);

	// 9600 bps でシリアルポートを開く
	Serial.begin(9600);
}

uint8_t i = 0; // PC 側に送る値(1 バイト)

void loop()
{
	// 250 ミリ秒止める
	delay(250);

	// シリアルポートに 1 バイト出力する
	Serial.write(i);

	++i;

	if (0 < Serial.available())
	{
		// シリアル通信で受信したデータを読み込む
		const int val = Serial.read();

		if (val == 0)
		{
			// LED をオフ
			digitalWrite(13, LOW);
		}
		else if (val == 1)
		{
			// LED をオン
			digitalWrite(13, HIGH);
		}
		else if (val == 2)
		{
			// カウンターをリセットする
			i = 0;
		}
	}
}
PC 側のコード
- Arduino との通信と GUI のプログラムです
- メイン処理:
- 「Write 0」ボタン: Arduino に 0 を送信(LED をオフに)
- 「Write 1」ボタン: Arduino に 1 を送信(LED をオンに)
- 「Write 2」ボタン: Arduino に 2 を送信(カウンターリセット)
- Arduino から受信したデータを画面に表示
# include <Siv3D.hpp>

Array<String> GetSerialPortOptions(const Array<SerialPortInfo>& infos)
{
	Array<String> options = infos.map([](const SerialPortInfo& info)
	{
		return U"[{}] {}"_fmt(info.port, info.description);
	});

	options << U"None";
	return options;
}

void Main()
{
	const Array<SerialPortInfo> infos = System::EnumerateSerialPorts();
	const Array<String> options = GetSerialPortOptions(infos);
	size_t index = (options.size() - 1);
	Serial serial;

	while (System::Update())
	{
		const bool isOpen = serial.isOpen();

		if (SimpleGUI::Button(U"Write 0", Vec2{ 200, 20 }, 120, isOpen))
		{
			// 1 バイトのデータ (0) を書き込む
			serial.writeByte(0);
		}

		if (SimpleGUI::Button(U"Write 1", Vec2{ 340, 20 }, 120, isOpen))
		{
			// 1 バイトのデータ (1) を書き込む
			serial.writeByte(1);
		}

		if (SimpleGUI::Button(U"Write 2", Vec2{ 480, 20 }, 120, isOpen))
		{
			// 1 バイトのデータ (2) を書き込む
			serial.writeByte(2);
		}

		if (SimpleGUI::RadioButtons(index, options, Vec2{ 200, 60 }))
		{
			ClearPrint();

			if (index == (options.size() - 1))
			{
				// シリアルポートをクローズする
				serial = Serial{};
			}
			else
			{
				Print << U"Open {}"_fmt(infos[index].port);

				// シリアルポートをオープンする
				if (serial.open(infos[index].port))
				{
					Print << U"Succeeded";
				}
				else
				{
					Print << U"Failed";
				}
			}
		}

		if (const size_t available = serial.available())
		{
			// シリアル通信で受信したデータを読み込んで表示する
			Print << U"READ: " << serial.readBytes();
		}
	}
}
72.5 シリアル通信(複数バイト)
- 複数バイトの通信を行うサンプルです
- PC 側から 16 ビットの整数を送信し、Arduino で受信して 1 加算して返信します
Arduino 側のコード
void setup()
{
	Serial.begin(9600);
}

void loop()
{
	delay(250);

	if (2 <= Serial.available())
	{
    	// 2 バイトデータを読み込む
		int low = Serial.read();
		int high = Serial.read();

		// 16 ビット整数に変換して 1 加算する
		uint16_t n = (high << 8) | low;
		n += 1;

		// 結果を送信する
		Serial.write(lowByte(n));
		Serial.write(highByte(n));
	}
}
PC 側のコード
# include <Siv3D.hpp>

Array<String> GetSerialPortOptions(const Array<SerialPortInfo>& infos)
{
	Array<String> options = infos.map([](const SerialPortInfo& info)
	{
		return U"[{}] {}"_fmt(info.port, info.description);
	});

	options << U"None";
	return options;
}

void Main()
{
	const Array<SerialPortInfo> infos = System::EnumerateSerialPorts();
	const Array<String> options = GetSerialPortOptions(infos);
	size_t index = (options.size() - 1);
	Serial serial;

	while (System::Update())
	{
		const bool isOpen = serial.isOpen();

		if (SimpleGUI::Button(U"Write uint16", Vec2{ 200, 20 }, 160, isOpen))
		{
			// 2 バイト (uint16) のデータを書き込む
			const uint16 n = 12300;
			serial.write(n);
		}

		if (SimpleGUI::RadioButtons(index, options, Vec2{ 200, 60 }))
		{
			ClearPrint();

			if (index == (options.size() - 1))
			{
				// シリアルポートをクローズする
				serial = Serial{};
			}
			else
			{
				Print << U"Open {}"_fmt(infos[index].port);

				// シリアルポートをオープンする
				if (serial.open(infos[index].port))
				{
					Print << U"Succeeded";
				}
				else
				{
					Print << U"Failed";
				}
			}
		}

		if (const size_t available = serial.available();
			2 <= available)
		{
			// 2 バイトデータを読み込んで表示する
			uint16 n;
			if (serial.read(n))
			{
				Print << U"READ: " << n;
			}
		}
	}
}
72.6 シリアル通信(文字列)
- 72.5 を改造して、Arduino から文字列を送信するようにしたサンプルです
Arduino 側のコード
void setup()
{
	Serial.begin(9600);
}

void loop()
{
	delay(250);

	if (2 <= Serial.available())
	{
    	// 2 バイトデータを読み込む
		int low = Serial.read();
		int high = Serial.read();

		// 16 ビット整数に変換して 1 加算する
		uint16_t n = (high << 8) | low;
		n += 1;

		// 結果を文字列として送信する
		Serial.print("The answer is ");
		Serial.println(n);
	}
}
PC 側のコード
# include <Siv3D.hpp>

Array<String> GetSerialPortOptions(const Array<SerialPortInfo>& infos)
{
	Array<String> options = infos.map([](const SerialPortInfo& info)
	{
		return U"[{}] {}"_fmt(info.port, info.description);
	});

	options << U"None";
	return options;
}

void Main()
{
	const Array<SerialPortInfo> infos = System::EnumerateSerialPorts();
	const Array<String> options = GetSerialPortOptions(infos);
	size_t index = (options.size() - 1);
	Serial serial;

	std::string buffer;

	while (System::Update())
	{
		const bool isOpen = serial.isOpen();

		if (SimpleGUI::Button(U"Write uint16", Vec2{ 200, 20 }, 160, isOpen))
		{
			// 2 バイト (uint16) のデータを書き込む
			const uint16 n = 12300;
			serial.write(n);
		}

		if (SimpleGUI::RadioButtons(index, options, Vec2{ 200, 60 }))
		{
			ClearPrint();

			if (index == (options.size() - 1))
			{
				// シリアルポートをクローズする
				serial = Serial{};
			}
			else
			{
				Print << U"Open {}"_fmt(infos[index].port);

				// シリアルポートをオープンする
				if (serial.open(infos[index].port))
				{
					Print << U"Succeeded";
				}
				else
				{
					Print << U"Failed";
				}
			}
		}

		if (const size_t available = serial.available())
		{
			const Array<uint8> bytes = serial.readBytes();

			for (const auto& ch : bytes)
			{
				if (ch == '\r') // CR は無視する
				{
					continue;
				}
				else if (ch == '\n') // 行末
				{
					// 1 行読み込んだ文字列を表示する
					Print << Unicode::FromUTF8(buffer);
					buffer.clear();
				}
				else
				{
					buffer.push_back(ch);
				}
			}
		}
	}
}