Getting Started with Siv3D Programming on macOS
1. System Requirements
1.1 Developer System Requirements
- The development environment required for Siv3D programming on macOS is as follows:
| OS | macOS Ventura / Sonoma / Sequoia |
| CPU | Intel CPU / Apple Silicon (Rosetta mode) |
| GPU | OpenGL 4.1 support |
| Video Output | Any video output device such as a monitor |
| Development Environment | Xcode 14.3 or later |
- Apple Silicon (M1 - M4) will have native support starting from Siv3D v0.8.0, which is currently in development.
- Until then, it operates in Rosetta mode.
If you cannot install Xcode
- If your version of macOS is not the latest, you may not be able to install Xcode from the App Store.
- In that case, download and install a previous version of Xcode, such as Xcode 14.3, from the Apple Developer site .
1.2 App Runtime System Requirements
- The environment required to run applications developed with Siv3D v0.6.16 on macOS is as follows:
| OS | macOS Mojave / Catalina / Big Sur / Monterey / Ventura / Sonoma / Sequoia |
| CPU | Intel CPU / Apple Silicon (Rosetta mode) |
| GPU | OpenGL 4.1 support |
| Video Output | Any video output device such as a monitor |
- Apple Silicon (M1 - M4) will have native support starting from Siv3D v0.8.0, which is currently in development.
- Until then, it operates in Rosetta mode.
2. Download Project Templates
- Download OpenSiv3D v0.6.16 Project Templates for macOS and extract the files.
- On macOS Catalina and later, file access permission dialogs will appear every time you run a program. To avoid this, move the project folder to the
(username)/Applicationsfolder (the user's Applications folder, not the root Applications folder) instead of the(username)/Desktopor(username)/Downloadsfolders.
Previous Versions
-
Using previous versions is not recommended, but if necessary, they can be downloaded from the links below:
- Due to compiler updates and other changes, building with previous versions may fail in the latest development environment.
- If you want to run an old Siv3D project, it's better to port its source code to the latest project template.
- OpenSiv3D v0.6.14 Project Templates for macOS
- OpenSiv3D v0.6.13 Project Templates for macOS
- OpenSiv3D v0.6.12 Project Templates for macOS
- OpenSiv3D v0.6.11 Project Templates for macOS
- OpenSiv3D v0.6.10 Project Templates for macOS
- OpenSiv3D v0.6.9 Project Templates for macOS
- OpenSiv3D v0.6.8 Project Templates for macOS
- OpenSiv3D v0.6.7 Project Templates for macOS
- OpenSiv3D v0.6.6 Project Templates for macOS
- OpenSiv3D v0.6.5 Project Templates for macOS
- OpenSiv3D v0.6.4 Project Templates for macOS
- OpenSiv3D v0.6.3 Project Templates for macOS
- OpenSiv3D v0.6.2 Project Templates for macOS
3. Build a Siv3D App
- Open the project file
examples/empty/empty.xcodeprojfrom the project templates in Xcode. - A sample program (Main.cpp) is provided by default.
- For M1 - M4 Macs, enable Rosetta mode by following the steps described below.
- Press the Run button ▶️ to build and run the program.
- To exit the running program, press Esc or close the window.
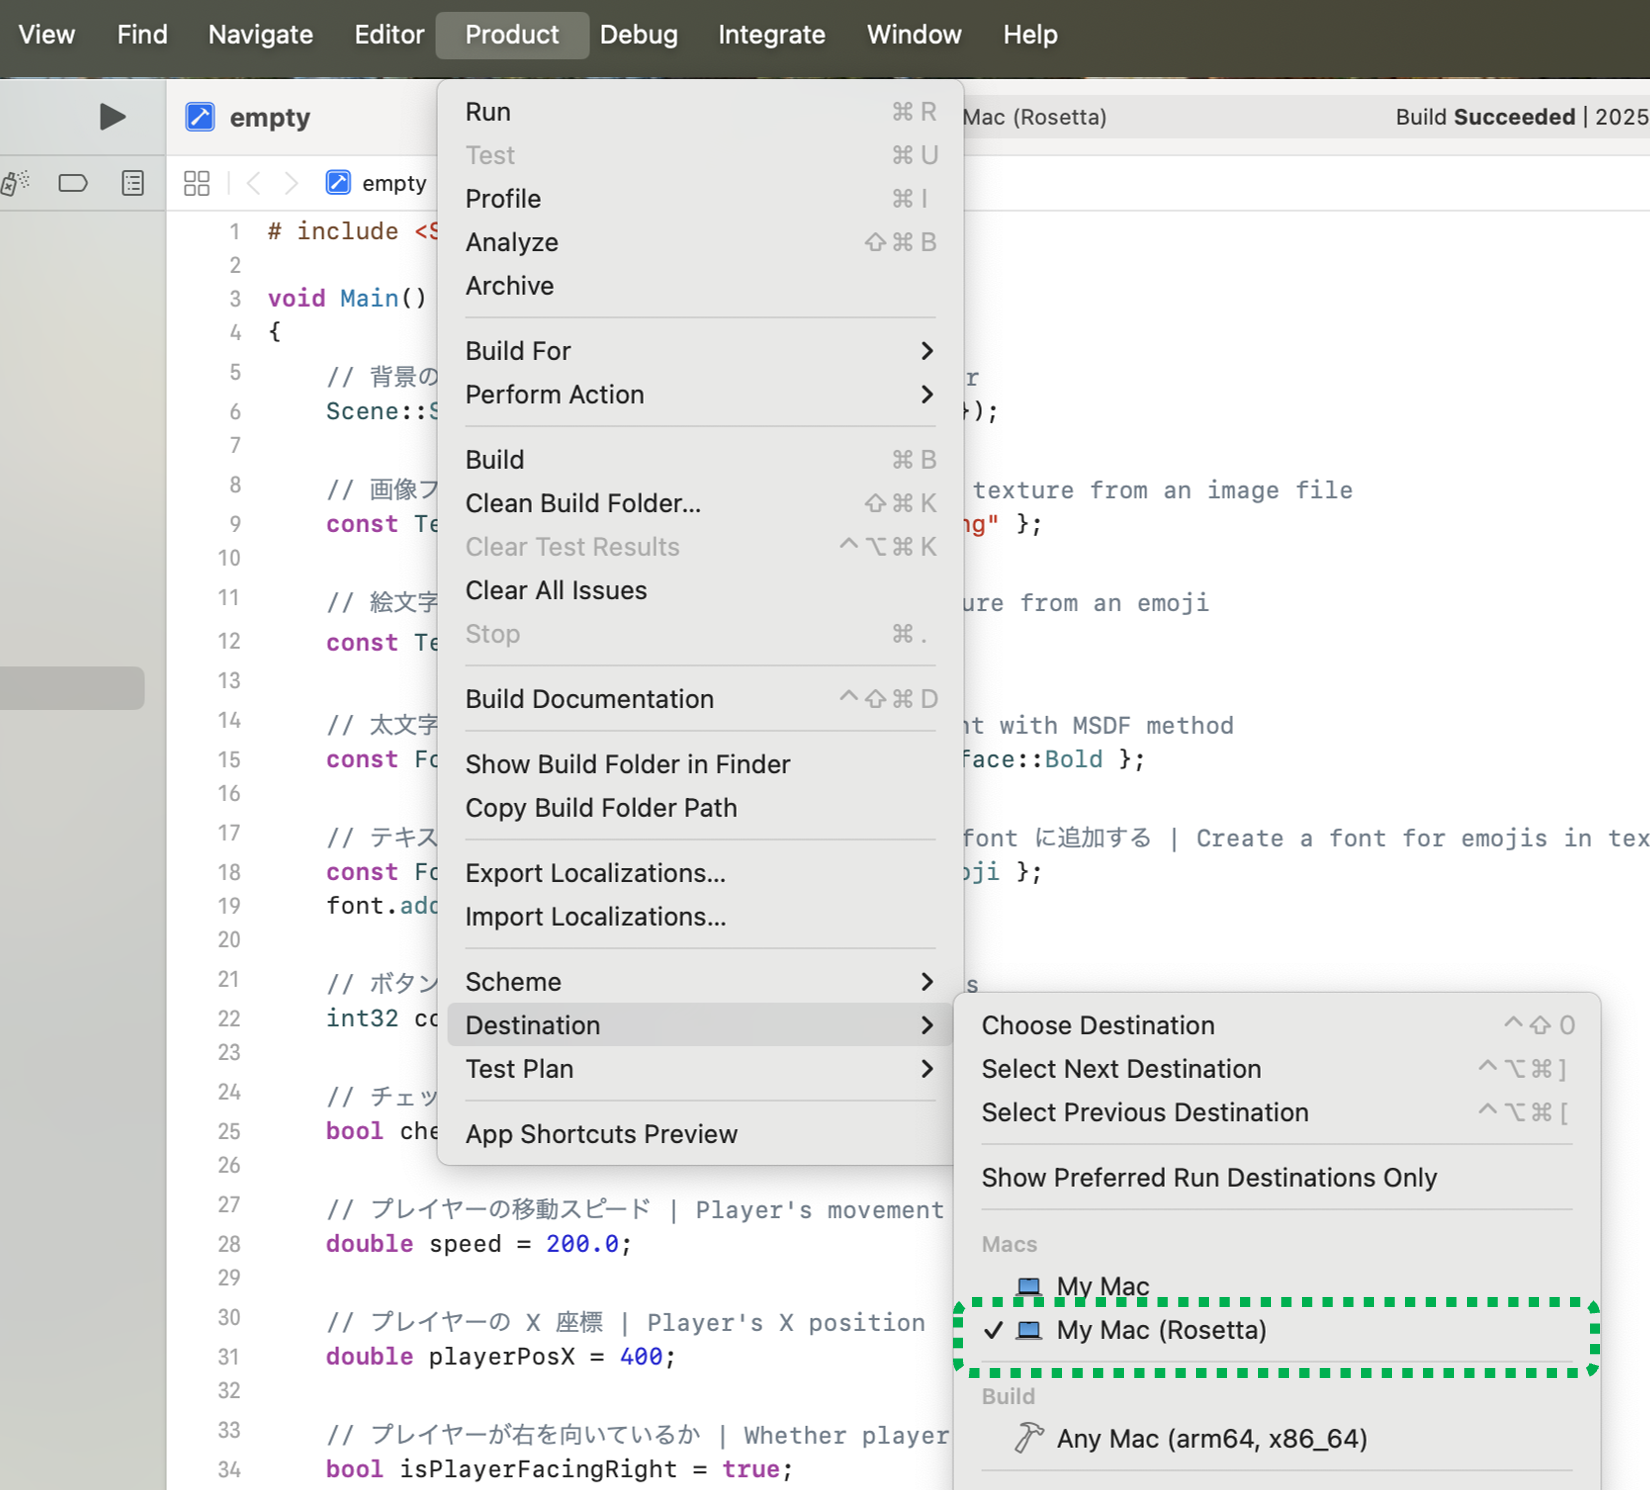
Enabling Rosetta Mode on M1 - M4 Macs
- The method to display Rosetta options in Xcode varies depending on the Xcode version:
- Xcode 15.3 and later: From the menu bar, select Product > Destination > Show All Run Destinations.
- Xcode 15.2 and earlier: From the menu bar, select Product > Destination > Destination Architectures and then Show Rosetta Destinations.
- Once the Rosetta option is displayed, select it.
Avoiding File Access Permission Dialogs
- On macOS Catalina and later, file access permission dialogs may appear every time you run the program.
- This can be avoided by moving the entire project folder to the
(username)/Applicationsfolder (the user's Applications folder, not the root Applications folder) instead of the(username)/Desktopor(username)/Downloadsfolders.
How to add a new project
- Copy the
emptyfolder from the project template folder into the same directory. - A project generator for Xcode is planned for a future release.
If the program runs but the editor shows red, error-like displays
- This is a known issue with recent versions of Xcode. It does not affect execution.
- This will be resolved in Siv3D v0.8, which is currently in development. Your patience is appreciated.