Getting Started with Siv3D Programming on Windows
1. System Requirements
1.1 Developer System Requirements
- The development environment required for Siv3D programming on a Windows PC is as follows:
| OS | Windows 10 (64-bit) / Windows 11 |
| CPU | Intel or AMD CPU |
| Video Output | Any video output device such as a monitor |
| Audio Output | Any audio output device |
| Development Environment | Microsoft Visual C++ 2022 17.14 or Microsoft Visual C++ 2026 (Please install the "Desktop development with C++" workload) |
Which Visual Studio Edition to Install
- For Siv3D programming on Windows, we recommend using "Visual Studio Community 2022 / 2026".
- This is the free version of "Visual Studio," an integrated development environment used by professional software developers worldwide.
- For students and individual developers, it offers the same features as the paid editions of Visual Studio for free.
Visual Studio Installation Steps
- Download the installer for "Visual Studio 2026 Community" from the Visual Studio download page and run it.
- When you run the installer, a screen for selecting workloads (sets of tools) will appear. Select "Desktop development with C++". (The individual components shown on the right under "Installation details" may vary depending on your Visual Studio version; you don't need to worry about them.)
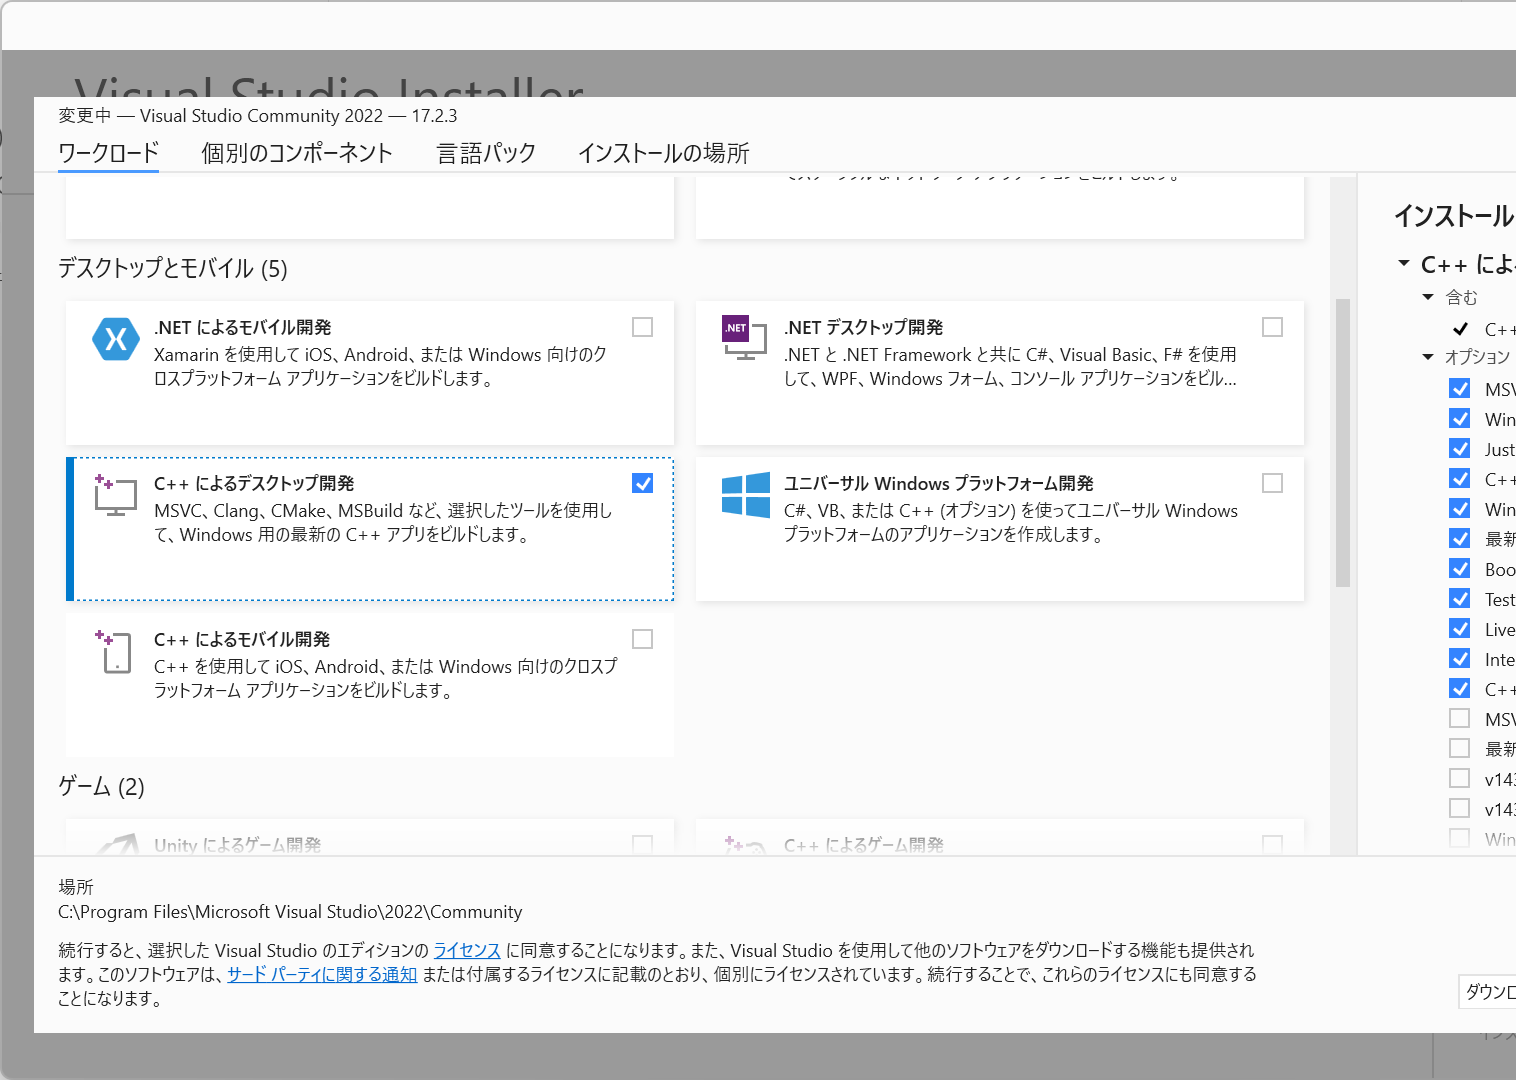
- Click the "Install" button in the bottom right to begin installing the necessary tools for C++ programming.
1.2 App Runtime System Requirements
- The environment required to run applications developed with Siv3D v0.6.16 on a Windows PC is as follows:
| OS | Windows 8.1 (64-bit) / Windows 10 (64-bit) / Windows 11 |
| CPU | Intel or AMD CPU |
| Video Output | Any video output device such as a monitor |
| Audio Output | Any audio output device |
2. Install the SDK
- Download and run the OpenSiv3D v0.6.16 Installer for Windows Desktop.
- If the "Windows protected your PC" dialog appears, click More info and then click Run anyway.
If you don't have administrator privileges
- If you don't have administrator privileges and cannot run the installer, you can install the SDK using the "Manually Installing the SDK" method at the bottom of this page.
What the installer does automatically
- The Siv3D installer automatically performs the following actions:
- Places the SDK files (in the Documents folder by default).
- Sets a user environment variable to the path where the SDK is located.
- Copies the Siv3D Visual Studio project templat
Documents\Visual Studio 2022\Templates\ProjectTemplates\OpenSiv3D_0.x.xx.zip(for Visual Studio 2022)Documents\Visual Studio 18\Templates\ProjectTemplates\OpenSiv3D_0.x.xx.zip(for Visual Studio 2026)
- Registers an uninstaller.
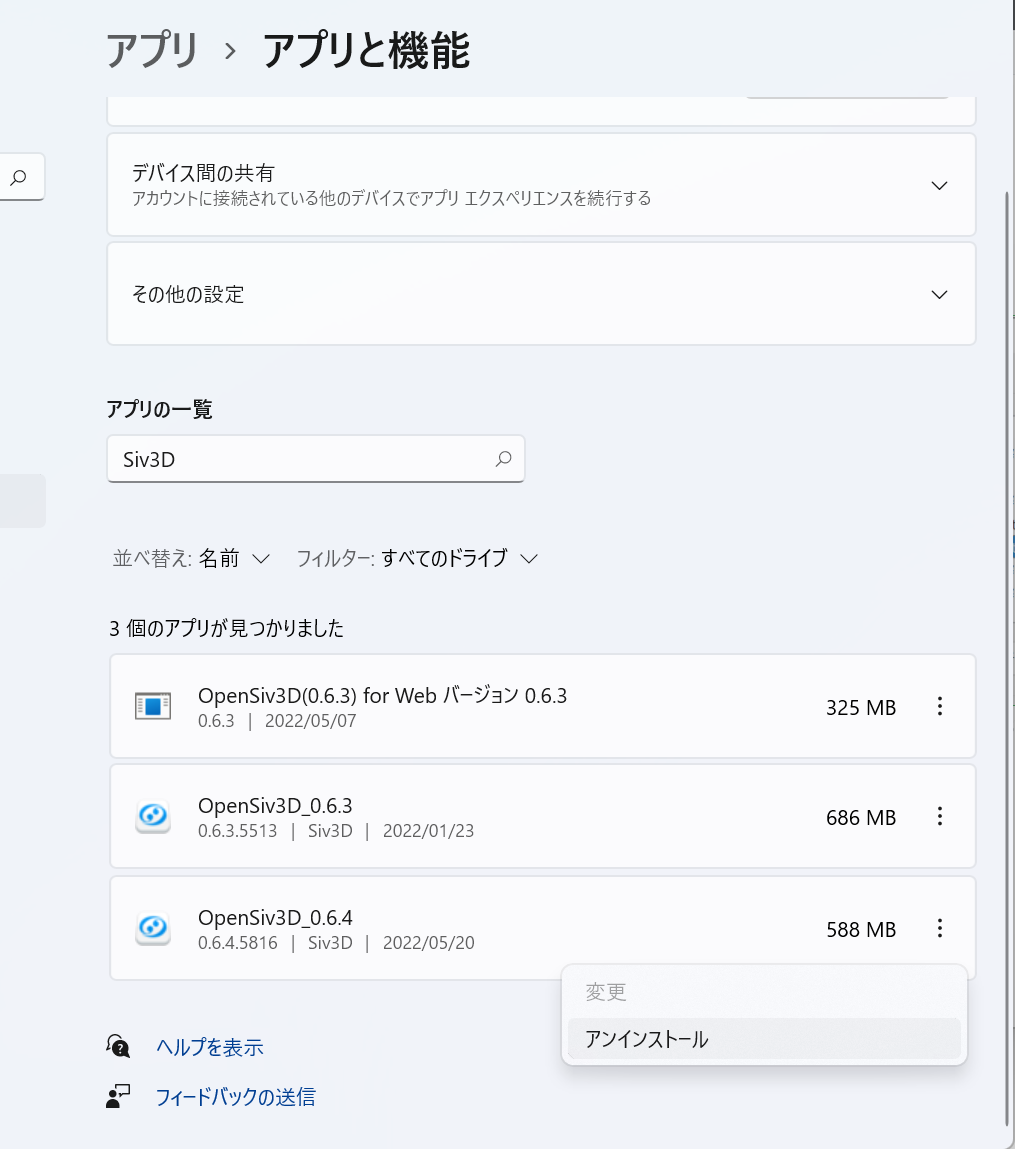
To uninstall the SDK
- Uninstall it from Windows "Settings" just like any other Windows application.
Previous Versions
- Using previous versions is not recommended, but if necessary, they can be downloaded from the links below:
- Due to compiler updates and other changes, building with previous versions may fail in the latest development environment.
- If you want to run an old Siv3D project, it's better to port its source code to the latest project template.
- OpenSiv3D v0.6.15 Installer for Windows Desktop
- OpenSiv3D v0.6.14 Installer for Windows Desktop
- OpenSiv3D v0.6.13 Installer for Windows Desktop
- OpenSiv3D v0.6.12 Installer for Windows Desktop
- OpenSiv3D v0.6.11 Installer for Windows Desktop
- OpenSiv3D v0.6.10 Installer for Windows Desktop
- OpenSiv3D v0.6.9 Installer for Windows Desktop
- OpenSiv3D v0.6.8 Installer for Windows Desktop
- OpenSiv3D v0.6.7 Installer for Windows Desktop
- OpenSiv3D v0.6.6 Installer for Windows Desktop
- OpenSiv3D v0.6.5 Installer for Windows Desktop
- OpenSiv3D v0.6.4 Installer for Windows Desktop
- OpenSiv3D v0.6.3 Installer for Windows Desktop
- OpenSiv3D v0.6.2 Installer for Windows Desktop
3. Create a Siv3D Project
- On the Visual Studio start screen, click Create a new project.
- Select OpenSiv3D from the list of project templates and click Next.
- Enter a project name and choose a location (optional), then click Create.
If you can't find 'OpenSiv3D' in the project templates
- If you are using Visual Studio 2026, please replace "2022" with "18".
- On Windows PCs with OneDrive enabled, there can sometimes be two "Documents" folders.
- If this happens, the Documents folder that Visual Studio uses might not be the same one where the Siv3D project template was installed, causing Visual Studio to not find the template.
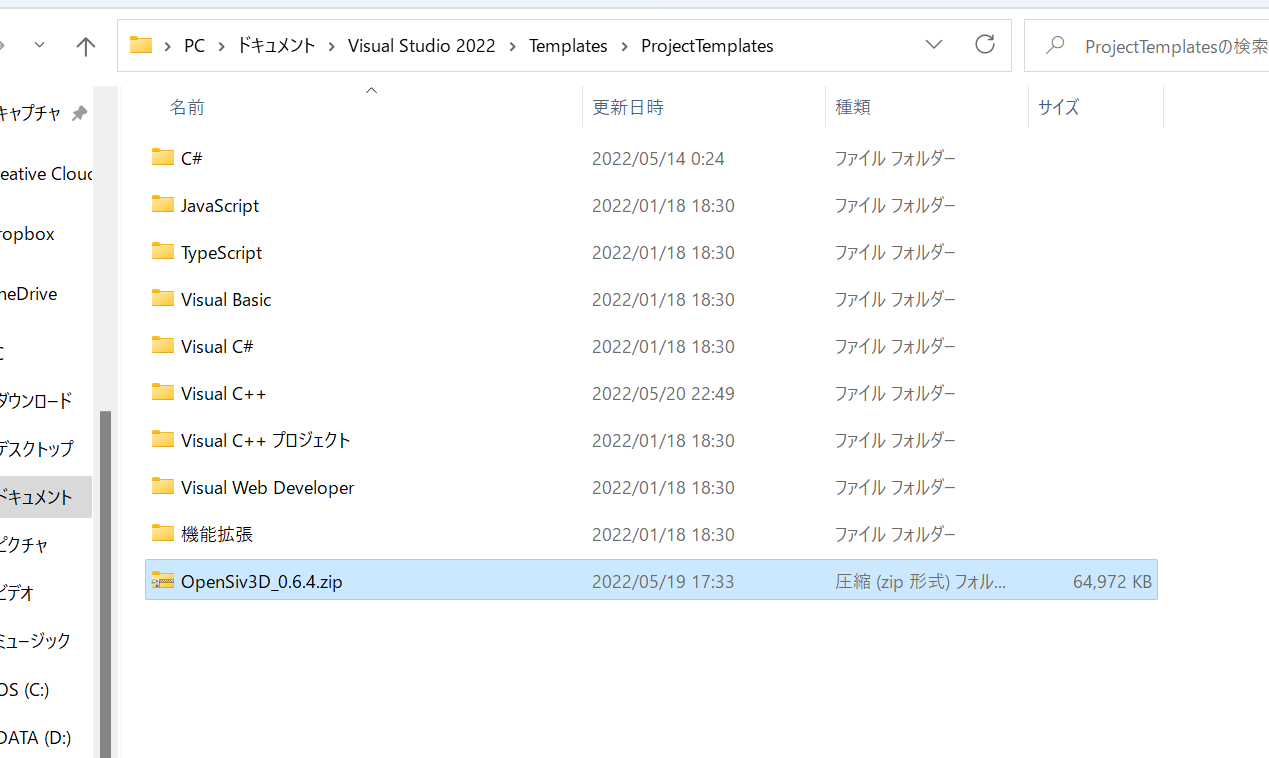
- First, verify that the project template file,
OpenSiv3D_vX.X.X.zip, exists inC:\Users\YourUsername\Documents\Visual Studio 2022\Templates\ProjectTemplates. - Then, choose one of the following two solutions:
Solution A: Change the folder that Visual Studio references
- Launch Visual Studio and select Options from the Tools menu.
- Go to Projects and Solutions > Locations.
- Change the User project templates location from your OneDrive Documents folder to your local Documents folder.
- Before:
C:\Users\YourUsername\OneDrive\Documents\Visual Studio 2022\Templates\ProjectTemplates - After:
C:\Users\YourUsername\Documents\Visual Studio 2022\Templates\ProjectTemplates
Solution B: Move the project template to the folder that Visual Studio references
- Move the project template file to the OneDrive folder described in "Solution A".
- From:
C:\Users\YourUsername\Documents\Visual Studio 2022\Templates\ProjectTemplates\OpenSiv3D_vX.X.X.zip - To:
C:\Users\YourUsername\OneDrive\Documents\Visual Studio 2022\Templates\ProjectTemplates\OpenSiv3D_vX.X.X.zip
4. Build a Siv3D App
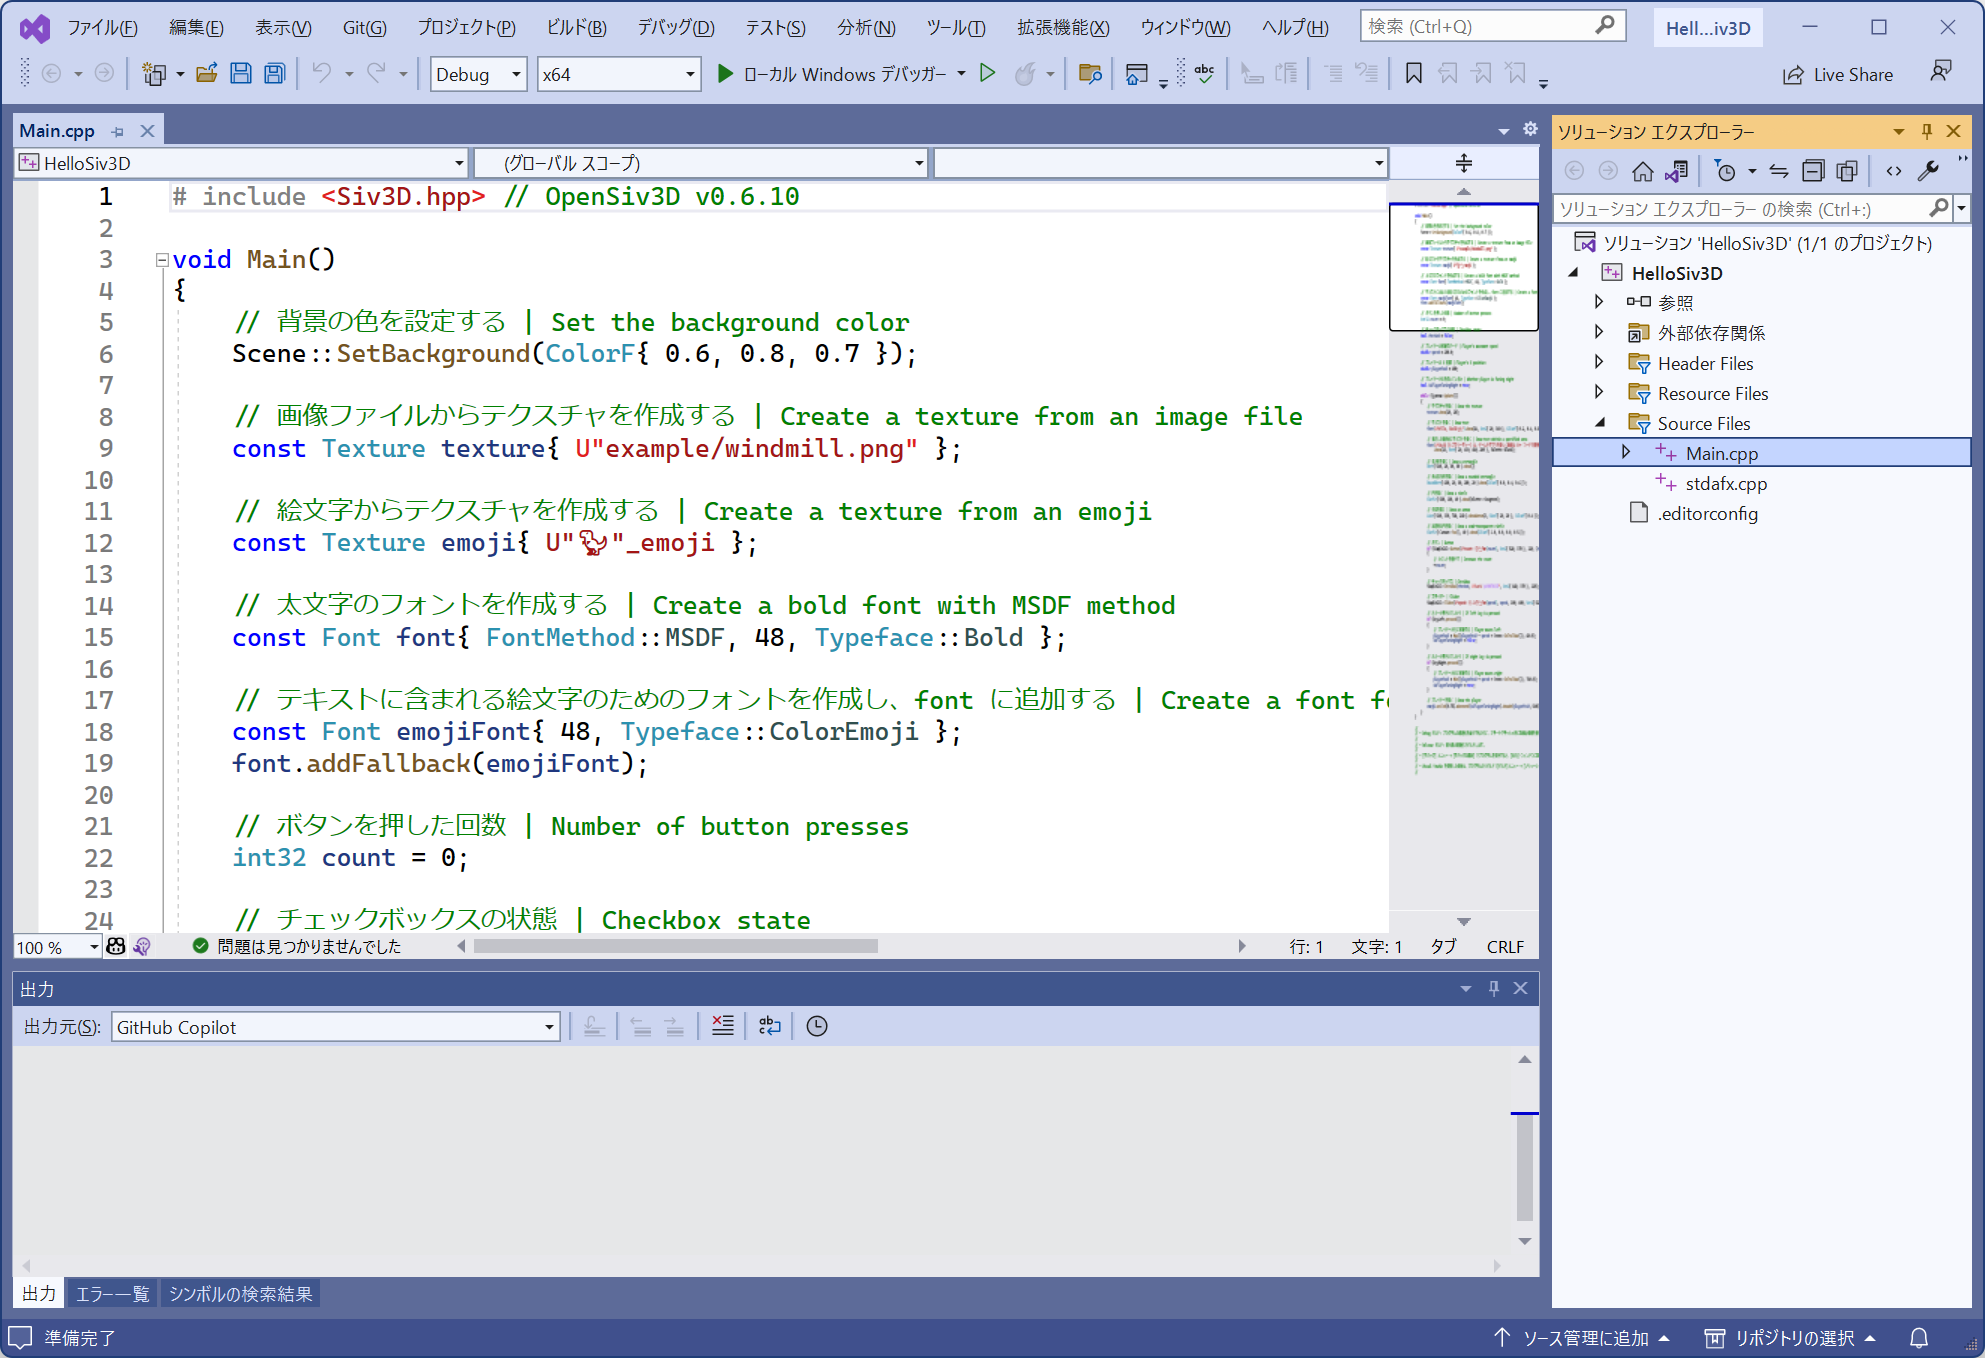
- When you create a project, a sample program (Main.cpp) is provided by default.
- From the Build menu, select Build Solution to build the project.
- From the Debug menu, select Start Debugging to run the built program.
- To exit the running program, press Esc or close the window.
If you get a 'Cannot open source file Siv3D.hpp' error
- This is typically caused by the environment variable for the Siv3D SDK path (set by the installer) not being recognized by Visual Studio yet.
- To fix this, discard the current project, restart Windows, and then create a new Siv3D project.
If you get an error related to __std_min_element_d and the program fails to run
- This error occurs when the C++ standard library of the C++ build tools installed in Visual Studio is outdated.
- Use the Visual Studio Installer to uninstall old build tools and install the latest version.
- If you're unsure how to do this, reinstalling Visual Studio should also resolve the issue.
If the program runs but the 'Error List' shows build-like errors
- The messages in the "Error List" window can be misleading. It may show information that is not an actual build error or warnings unrelated to your code.
- You should always refer to the actual error messages and warnings in the "Output" window, not the "Error List" window.
(Supplement) Manually Installing the SDK
- If the SDK installer does not run correctly, you can install Siv3D manually by following these steps:
Steps for manually installing the SDK
1. Place SDK Files and Set Environment Variable
- Download and extract OpenSiv3D_SDK_0.6.16.zip, then place its contents in your Documents folder (
.../Documents) like this:.../Documents/OpenSiv3D_SDK_0.6.16/addon.../Documents/OpenSiv3D_SDK_0.6.16/include.../Documents/OpenSiv3D_SDK_0.6.16/lib
- Create a new user environment variable named
SIV3D_0_6_16and set its value to the path of the OpenSiv3D SDK folder you just placed.- For example, if your SDK is at
C:\Users\Siv3D\Documents\OpenSiv3D_SDK_0.6.16, set the value of theSIV3D_0_6_16environment variable toC:\Users\Siv3D\Documents\OpenSiv3D_SDK_0.6.16.
- For example, if your SDK is at

2. Place Visual Studio Project Template
- Download the Visual Studio project template OpenSiv3D_0.6.16.zip (Size: approx. 63 MB).
- Without extracting it, place the ZIP file into the
Visual Studio 2022\Templates\ProjectTemplates\folder located in your Documents folder.
- The manual installation is now complete.
- Restart your PC to ensure the new environment variable is applied, then proceed to step 3 on this page.