電卓アプリを作る
| 難易度 | 入門 | 時間 | 30 分~ |
1. 背景色を設定する

Scene::SetBackground(色);を使って背景色を設定します。
コード
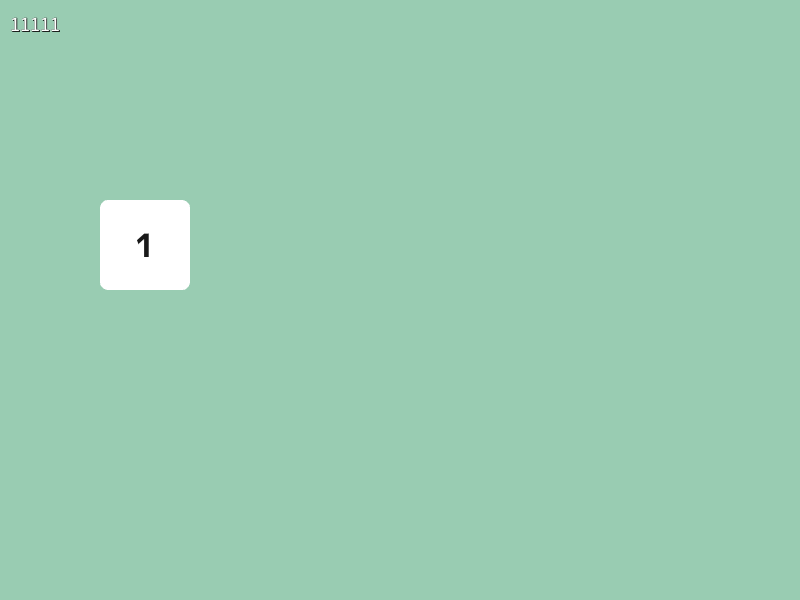
2. ボタンの情報を用意する

- ボタンの領域を表す
Rectと、ボタンに書かれるテキストを表すStringを持つクラスButtonを作成します。 - 「1」ボタンの情報を
Buttonクラスの変数buttonの初期値として設定します。
コード
3. ボタンの背景を描く

Buttonクラスのメンバ変数.rectにアクセスし、ボタンの背景を描画します。
コード
# include <Siv3D.hpp>

/// @brief ボタンクラス
struct Button
{
	/// @brief ボタンの長方形
	Rect rect;

	/// @brief ボタンのテキスト
	String text;
};

void Main()
{
	// 背景の色を設定する
	Scene::SetBackground(ColorF{ 0.6, 0.8, 0.7 });

	// ボタンの情報
	Button button{ Rect{ 100, 200, 90, 90 }, U"1" };

	while (System::Update())
	{
		// ボタンの背景を描画する
		button.rect.draw();
	}
}
4. ボタンの角を丸くする

Rectのメンバ関数.rounded(角の半径)を使って、ボタンの角を丸くします。
コード
# include <Siv3D.hpp>

/// @brief ボタンクラス
struct Button
{
	/// @brief ボタンの長方形
	Rect rect;

	/// @brief ボタンのテキスト
	String text;
};

void Main()
{
	// 背景の色を設定する
	Scene::SetBackground(ColorF{ 0.6, 0.8, 0.7 });

	// ボタンの情報
	Button button{ Rect{ 100, 200, 90, 90 }, U"1" };

	while (System::Update())
	{
		// ボタンの背景を描画する
		button.rect.rounded(8).draw();
	}
}
5. ボタンに文字を表示する

- テキストを表示するための
Fontを用意します。 Buttonのメンバ変数.textにアクセスし、ボタンのテキストを描画します。
新しい機能
- font(テキスト).drawAt(フォントサイズ, 位置, 色);` は、指定した位置が中心となるようにテキストを描画します。
Rectの.center()メンバ関数は、長方形の中心の座標を返します。
コード
# include <Siv3D.hpp>

/// @brief ボタンクラス
struct Button
{
	/// @brief ボタンの長方形
	Rect rect;

	/// @brief ボタンのテキスト
	String text;
};

void Main()
{
	// 背景の色を設定する
	Scene::SetBackground(ColorF{ 0.6, 0.8, 0.7 });

	// ボタン用のフォント
	const Font font{ FontMethod::MSDF, 40, Typeface::Bold };

	// ボタンの情報
	Button button{ Rect{ 100, 200, 90, 90 }, U"1" };

	while (System::Update())
	{
		// ボタンの背景を描画する
		button.rect.rounded(8).draw();

		// ボタンのテキストを描画する
		font(button.text).drawAt(32, button.rect.center(), ColorF{ 0.1 });
	}
}
6. ボタンの上でマウスカーソルを手の形にする

Rectのメンバ関数.mouseOver()で、マウスカーソルがボタンの上にあるかを判定します。Cursor::RequestStyle(CursorStyle::Hand);で、現在のマウスカーソルのスタイルを手の形に変更します。
コード
# include <Siv3D.hpp>

/// @brief ボタンクラス
struct Button
{
	/// @brief ボタンの長方形
	Rect rect;

	/// @brief ボタンのテキスト
	String text;
};

void Main()
{
	// 背景の色を設定する
	Scene::SetBackground(ColorF{ 0.6, 0.8, 0.7 });

	// ボタン用のフォント
	const Font font{ FontMethod::MSDF, 40, Typeface::Bold };

	// ボタンの情報
	Button button{ Rect{ 100, 200, 90, 90 }, U"1" };

	while (System::Update())
	{
		// ボタンの背景を描画する
		button.rect.rounded(8).draw();

		// ボタンのテキストを描画する
		font(button.text).drawAt(32, button.rect.center(), ColorF{ 0.1 });

		// マウスがボタンの上にあるとき
		if (button.rect.mouseOver())
		{
			// マウスカーソルを手の形にする
			Cursor::RequestStyle(CursorStyle::Hand);
		}
	}
}
7. ボタンで数式を入力する
- 電卓への入力式を文字列で管理する
String型の変数expressionを用意します。 - ボタンがクリックされたときに、ボタンのテキスト「U"1"」を
expressionに追加します。 Printを使って、入力式の内容を簡易表示します。
コード
# include <Siv3D.hpp>

/// @brief ボタンクラス
struct Button
{
	/// @brief ボタンの長方形
	Rect rect;

	/// @brief ボタンのテキスト
	String text;
};

void Main()
{
	// 背景の色を設定する
	Scene::SetBackground(ColorF{ 0.6, 0.8, 0.7 });

	// ボタン用のフォント
	const Font font{ FontMethod::MSDF, 40, Typeface::Bold };

	// ボタンの情報
	Button button{ Rect{ 100, 200, 90, 90 }, U"1" };

	// 入力式
	String expression;

	while (System::Update())
	{
		// ボタンの背景を描画する
		button.rect.rounded(8).draw();

		// ボタンのテキストを描画する
		font(button.text).drawAt(32, button.rect.center(), ColorF{ 0.1 });

		// マウスがボタンの上にあるとき
		if (button.rect.mouseOver())
		{
			// マウスカーソルを手の形にする
			Cursor::RequestStyle(CursorStyle::Hand);
		}

		// ボタンがクリックされたとき
		if (button.rect.leftClicked())
		{
			// 数式にボタンのテキストを追加する
			expression += button.text;
		}

		ClearPrint();
		Print << expression; // 数式を簡易表示する
	}
}
8. ボタンを増やす
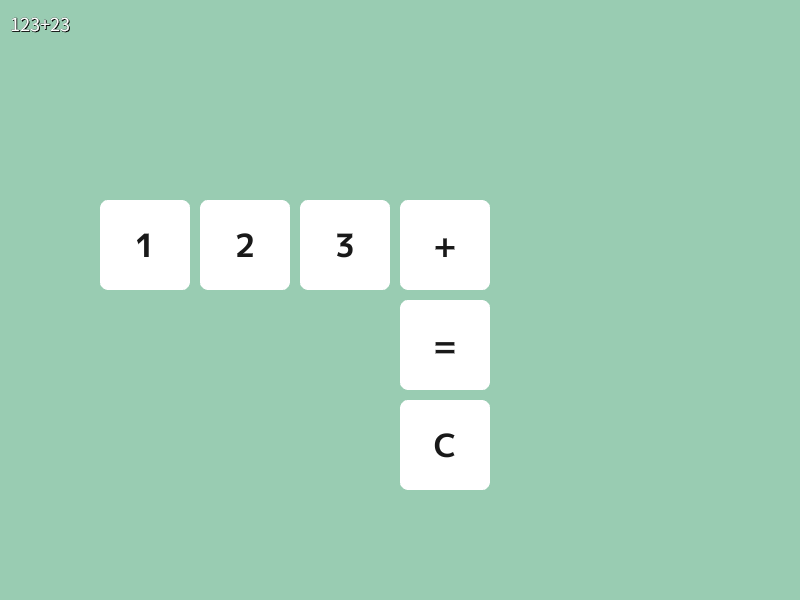
- 配列
Array<Button>を使って、より多くのボタンを管理します。 for (const auto& button : buttons) { }内に、各ボタンに対する処理を記述します。- ボタンがクリックされた場合は、そのボタンのテキストに応じて、入力式
expressionを更新します。
コード
# include <Siv3D.hpp>

/// @brief ボタンクラス
struct Button
{
	/// @brief ボタンの長方形
	Rect rect;

	/// @brief ボタンのテキスト
	String text;
};

void Main()
{
	// 背景の色を設定する
	Scene::SetBackground(ColorF{ 0.6, 0.8, 0.7 });

	// ボタン用のフォント
	const Font font{ FontMethod::MSDF, 40, Typeface::Bold };

	// ボタンの情報の配列
	Array<Button> buttons;
	buttons << Button{ Rect{ 100, 200, 90, 90 }, U"1" };
	buttons << Button{ Rect{ 200, 200, 90, 90 }, U"2" };
	buttons << Button{ Rect{ 300, 200, 90, 90 }, U"3" };
	buttons << Button{ Rect{ 400, 200, 90, 90 }, U"+" };
	buttons << Button{ Rect{ 400, 300, 90, 90 }, U"=" };
	buttons << Button{ Rect{ 400, 400, 90, 90 }, U"C" };

	// 入力式
	String expression;

	while (System::Update())
	{
		// 各ボタンについて
		for (const auto& button : buttons)
		{
			// ボタンの背景を描画する
			button.rect.rounded(8).draw();

			// ボタンのテキストを描画する
			font(button.text).drawAt(32, button.rect.center(), ColorF{ 0.1 });

			// マウスがボタンの上にあるとき
			if (button.rect.mouseOver())
			{
				// マウスカーソルを手の形にする
				Cursor::RequestStyle(CursorStyle::Hand);
			}

			// ボタンがクリックされたとき
			if (button.rect.leftClicked())
			{
				if (button.text == U"=")
				{
					// ToDo
				}
				else if (button.text == U"+")
				{
					expression += button.text;
				}
				else if (button.text == U"C")
				{
					// 数式を消去する
					expression.clear();
				}
				else
				{
					// 数式にボタンのテキストを追加する
					expression += button.text;
				}
			}
		}

		ClearPrint();
		Print << expression; // 数式を簡易表示する
	}
}
9. 数式の表示エリアを追加する
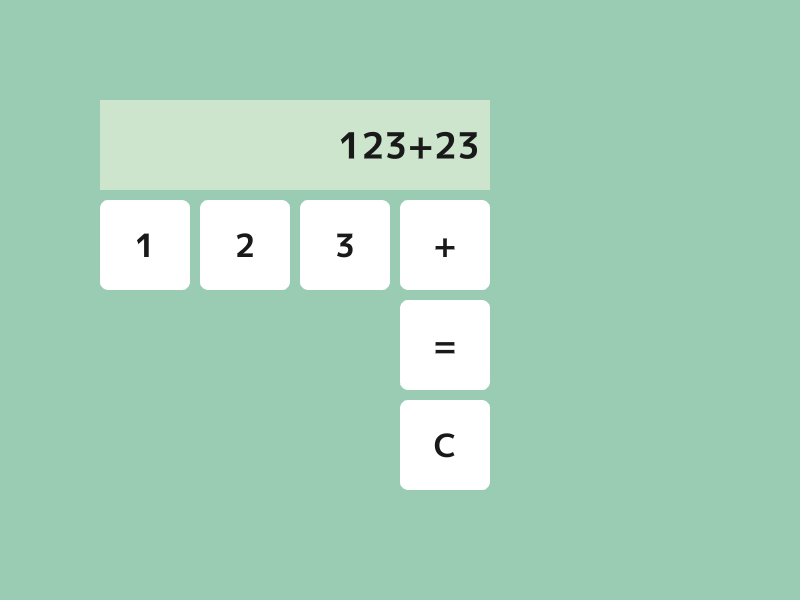
- 電卓に数式を表示するエリアを追加します。
- 表示エリアから 10 ピクセル左にずらして、数式を右寄せで表示します。
新しい機能
font(テキスト).draw(フォントサイズ, Arg::rightCenter = 位置, 色);は、指定した位置がテキストの右辺の中心となるよう、右寄せしてテキストを描画します。Rectの.rightCenter()メンバ関数は、長方形の右辺の中心の座標を返します。
コード
# include <Siv3D.hpp>

/// @brief ボタンクラス
struct Button
{
	/// @brief ボタンの長方形
	Rect rect;

	/// @brief ボタンのテキスト
	String text;
};

void Main()
{
	// 背景の色を設定する
	Scene::SetBackground(ColorF{ 0.6, 0.8, 0.7 });

	// ボタン用のフォント
	const Font font{ FontMethod::MSDF, 40, Typeface::Bold };

	// 結果表示エリアの色
	const ColorF displayColor{ 0.8, 0.9, 0.8 };

	// 結果表示エリアのテキストの色
	const ColorF displayTextColor{ 0.1 };

	// 結果表示エリアの長方形
	const Rect displayRect{ 100, 100, 390, 90 };

	// ボタンの情報の配列
	Array<Button> buttons;
	buttons << Button{ Rect{ 100, 200, 90, 90 }, U"1" };
	buttons << Button{ Rect{ 200, 200, 90, 90 }, U"2" };
	buttons << Button{ Rect{ 300, 200, 90, 90 }, U"3" };
	buttons << Button{ Rect{ 400, 200, 90, 90 }, U"+" };
	buttons << Button{ Rect{ 400, 300, 90, 90 }, U"=" };
	buttons << Button{ Rect{ 400, 400, 90, 90 }, U"C" };

	// 入力式
	String expression;

	while (System::Update())
	{
		// 各ボタンについて
		for (const auto& button : buttons)
		{
			// ボタンの背景を描画する
			button.rect.rounded(8).draw();

			// ボタンのテキストを描画する
			font(button.text).drawAt(32, button.rect.center(), ColorF{ 0.1 });

			// マウスがボタンの上にあるとき
			if (button.rect.mouseOver())
			{
				// マウスカーソルを手の形にする
				Cursor::RequestStyle(CursorStyle::Hand);
			}

			// ボタンがクリックされたとき
			if (button.rect.leftClicked())
			{
				if (button.text == U"=")
				{
					// ToDo
				}
				else if (button.text == U"+")
				{
					expression += button.text;
				}
				else if (button.text == U"C")
				{
					// 数式を消去する
					expression.clear();
				}
				else
				{
					// 数式にボタンのテキストを追加する
					expression += button.text;
				}
			}
		}

		// 結果表示エリアを描画する
		displayRect.draw(displayColor);

		// 結果表示エリアに数式を描画する
		font(expression).draw(36, Arg::rightCenter = (displayRect.rightCenter() + Vec2{ -10, 0 }), displayTextColor);
	}
}
10. 計算処理を追加する

- 「=」ボタンを押したときに入力式を計算して、その結果を新しい入力式とするための関数
PushEqualを実装します。 - 「+」ボタンを押したときに入力式に「+」を追加するための関数
PushPlusを実装します。
新しい機能
!(ノット)はbool型の値を反転します。String型の変数の.isEmpty()メンバ関数は、文字列が空かどうかを判定します。String型の変数の.back()メンバ関数は、文字列の末尾の文字を返します。空の場合はエラーになります。IsDigit(char32 ch)関数は、引数の文字chが数字であるかを判定します。Eval(String expression)関数は、数式expressionを評価した結果をdouble型で返します。数式が不正な場合はNaNを返します。NaNであるかはIsNaN(double x)関数で判定できます。
Format(double x)関数は、double型の値xをStringに変換して返します。
コード
# include <Siv3D.hpp>

/// @brief ボタンクラス
struct Button
{
	/// @brief ボタンの長方形
	Rect rect;

	/// @brief ボタンのテキスト
	String text;
};

/// @brief 数式が数字で終わるかを返します。
/// @param expression 数式
/// @return 数字で終わる場合 true, それ以外の場合 false
bool EndsWithDigit(String expression)
{
	if (expression.isEmpty())
	{
		return false;
	}

	return IsDigit(expression.back());
}

/// @brief = ボタンが押されたときの処理を行います。
/// @param expression 現在の数式
/// @return 新しい数式
String PushEqual(String expression)
{
	// 数字で終わっていない場合は何もしない
	if (!EndsWithDigit(expression))
	{
		return expression;
	}

	// 数式パーサで数式を評価する
	double result = Eval(expression);

	// 評価結果を文字列に変換して返す
	return Format(result);
}

/// @brief + ボタンが押されたときの処理を行います。
/// @param expression 現在の数式
/// @return 新しい数式
String PushPlus(String expression)
{
	// 数字で終わっていない場合は何もしない
	if (!EndsWithDigit(expression))
	{
		return expression;
	}

	// 数式の末尾に + を追加して返す
	return (expression + U"+");
}

void Main()
{
	// 背景の色を設定する
	Scene::SetBackground(ColorF{ 0.6, 0.8, 0.7 });

	// ボタン用のフォント
	const Font font{ FontMethod::MSDF, 40, Typeface::Bold };

	// 結果表示エリアの色
	const ColorF displayColor{ 0.8, 0.9, 0.8 };

	// 結果表示エリアのテキストの色
	const ColorF displayTextColor{ 0.1 };

	// 結果表示エリアの長方形
	const Rect displayRect{ 100, 100, 390, 90 };

	// ボタンの情報の配列
	Array<Button> buttons;
	buttons << Button{ Rect{ 100, 200, 90, 90 }, U"1" };
	buttons << Button{ Rect{ 200, 200, 90, 90 }, U"2" };
	buttons << Button{ Rect{ 300, 200, 90, 90 }, U"3" };
	buttons << Button{ Rect{ 400, 200, 90, 90 }, U"+" };
	buttons << Button{ Rect{ 400, 300, 90, 90 }, U"=" };
	buttons << Button{ Rect{ 400, 400, 90, 90 }, U"C" };

	// 入力式
	String expression;

	while (System::Update())
	{
		// 各ボタンについて
		for (const auto& button : buttons)
		{
			// ボタンの背景を描画する
			button.rect.rounded(8).draw();

			// ボタンのテキストを描画する
			font(button.text).drawAt(32, button.rect.center(), ColorF{ 0.1 });

			// マウスがボタンの上にあるとき
			if (button.rect.mouseOver())
			{
				// マウスカーソルを手の形にする
				Cursor::RequestStyle(CursorStyle::Hand);
			}

			// ボタンがクリックされたとき
			if (button.rect.leftClicked())
			{
				if (button.text == U"=")
				{
					expression = PushEqual(expression);
				}
				else if (button.text == U"+")
				{
					expression = PushPlus(expression);
				}
				else if (button.text == U"C")
				{
					// 数式を消去する
					expression.clear();
				}
				else
				{
					// 数式にボタンのテキストを追加する
					expression += button.text;
				}
			}
		}

		// 結果表示エリアを描画する
		displayRect.draw(displayColor);

		// 結果表示エリアに数式を描画する
		font(expression).draw(36, Arg::rightCenter = (displayRect.rightCenter() + Vec2{ -10, 0 }), displayTextColor);
	}
}
11. ボタンのスタイルをカスタマイズする
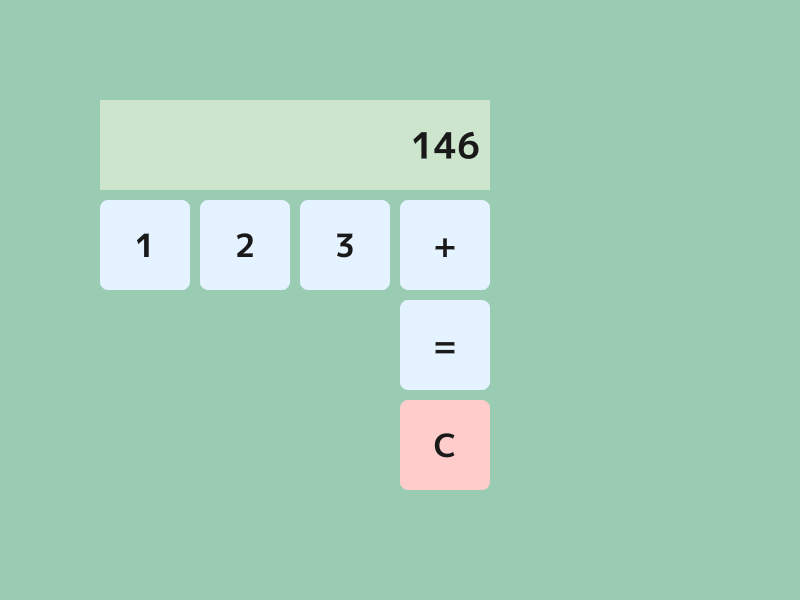
Buttonクラスに、ボタンの背景色とテキストの色を表すColorF型のメンバ変数を追加します。
コード
# include <Siv3D.hpp>

/// @brief ボタンクラス
struct Button
{
	/// @brief ボタンの長方形
	Rect rect;

	/// @brief ボタンのテキスト
	String text;

	/// @brief ボタンの色
	ColorF backgroundColor;

	/// @brief テキストの色
	ColorF textColor;
};

/// @brief 数式が数字で終わるかを返します。
/// @param expression 数式
/// @return 数字で終わる場合 true, それ以外の場合 false
bool EndsWithDigit(String expression)
{
	if (expression.isEmpty())
	{
		return false;
	}

	return IsDigit(expression.back());
}

/// @brief = ボタンが押されたときの処理を行います。
/// @param expression 現在の数式
/// @return 新しい数式
String PushEqual(String expression)
{
	// 数字で終わっていない場合は何もしない
	if (!EndsWithDigit(expression))
	{
		return expression;
	}

	// 数式パーサで数式を評価する
	double result = Eval(expression);

	// 評価結果を文字列に変換して返す
	return Format(result);
}

/// @brief + ボタンが押されたときの処理を行います。
/// @param expression 現在の数式
/// @return 新しい数式
String PushPlus(String expression)
{
	// 数字で終わっていない場合は何もしない
	if (!EndsWithDigit(expression))
	{
		return expression;
	}

	// 数式の末尾に + を追加して返す
	return (expression + U"+");
}

void Main()
{
	// 背景の色を設定する
	Scene::SetBackground(ColorF{ 0.6, 0.8, 0.7 });

	// ボタン用のフォント
	const Font font{ FontMethod::MSDF, 40, Typeface::Bold };

	// 数字ボタンの色
	const ColorF numberButtonColor{ 0.9, 0.95, 1.0 };

	// クリアボタンの色
	const ColorF clearButtonColor{ 1.0, 0.8, 0.8 };

	// ボタンのテキストの色
	const ColorF buttonTextColor{ 0.1 };

	// 結果表示エリアの色
	const ColorF displayColor{ 0.8, 0.9, 0.8 };

	// 結果表示エリアのテキストの色
	const ColorF displayTextColor{ 0.1 };

	// 結果表示エリアの長方形
	const Rect displayRect{ 100, 100, 390, 90 };

	// ボタンの情報の配列
	Array<Button> buttons;
	buttons << Button{ Rect{ 100, 200, 90, 90 }, U"1", numberButtonColor, buttonTextColor };
	buttons << Button{ Rect{ 200, 200, 90, 90 }, U"2", numberButtonColor, buttonTextColor };
	buttons << Button{ Rect{ 300, 200, 90, 90 }, U"3", numberButtonColor, buttonTextColor };
	buttons << Button{ Rect{ 400, 200, 90, 90 }, U"+", numberButtonColor, buttonTextColor };
	buttons << Button{ Rect{ 400, 300, 90, 90 }, U"=", numberButtonColor, buttonTextColor };
	buttons << Button{ Rect{ 400, 400, 90, 90 }, U"C", clearButtonColor, buttonTextColor };

	// 入力式
	String expression;

	while (System::Update())
	{
		// 各ボタンについて
		for (const auto& button : buttons)
		{
			// ボタンの背景を描画する
			button.rect.rounded(8).draw(button.backgroundColor);

			// ボタンのテキストを描画する
			font(button.text).drawAt(32, button.rect.center(), button.textColor);

			// マウスがボタンの上にあるとき
			if (button.rect.mouseOver())
			{
				// マウスカーソルを手の形にする
				Cursor::RequestStyle(CursorStyle::Hand);
			}

			// ボタンがクリックされたとき
			if (button.rect.leftClicked())
			{
				if (button.text == U"=")
				{
					expression = PushEqual(expression);
				}
				else if (button.text == U"+")
				{
					expression = PushPlus(expression);
				}
				else if (button.text == U"C")
				{
					// 数式を消去する
					expression.clear();
				}
				else
				{
					// 数式にボタンのテキストを追加する
					expression += button.text;
				}
			}
		}

		// 結果表示エリアを描画する
		displayRect.draw(displayColor);

		// 結果表示エリアに数式を描画する
		font(expression).draw(36, Arg::rightCenter = (displayRect.rightCenter() + Vec2{ -10, 0 }), displayTextColor);
	}
}
発展
ここから先は、自分で考えてプログラムを改良してみましょう。
機能のアイデア
- 残りの数字を追加する
- 引き算、掛け算、割り算を追加する
Eval()は-や*,/にも対応しています。
- 括弧を入力できるようにする
- バックスペース(1 文字削除)ボタンを追加する
Stringのメンバ関数.pop_back()は、文字列の末尾の文字を削除します。文字列が空の場合はエラーになります。
- 小数を含む数を入力できるようにする
- キーボードで数字を入力できるようにする
- 平方根を計算できるようにする
Eval()はsqrt(25)のような数式にも対応しています。
- 以前の計算結果を記録して再利用できるようにする
- 表示エリアをクリックすると、その数式をクリップボードにコピーする
Clipboard::SetText(s);は、文字列sをクリップボードにコピーします。
デザインのアイデア
- ボタンのサイズや配置をアレンジする
- マウスオーバーでボタンの色を変える